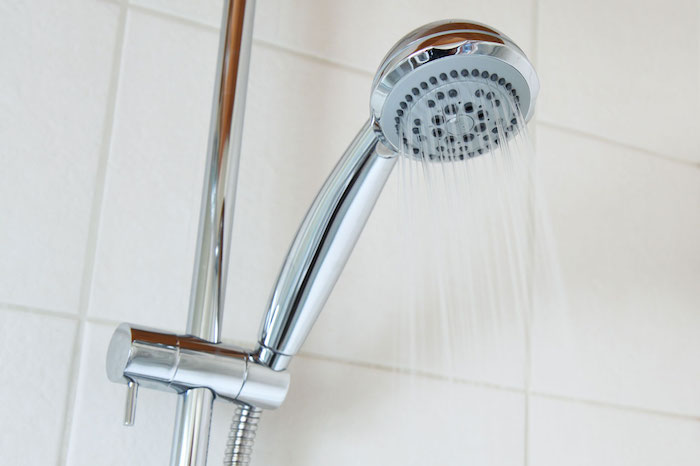
How to Replace a Two Handle Bathtub Faucet
Changing a bathtub faucet may sound like a daunting task at first, but it can be quite easily achieved if you follow simple instructions. Changing the bathtub faucet yourself can save you money and time (you won’t have to wait for the handyman to come around). Good news – you can do the replacement yourself as this does not need extensive knowledge on the matter. You will, however, need a few tools!
Tip: the process to replace a single-handle faucet or a multi-control faucet is the same.
Tools You Need to Replace a Two Handle Bathtub Faucet
- A starpoint screwdriver
- A flathead screwdriver
- A wrench
- An Allen wrench (if your spout has this particular screw that needs to be loosened)
- A tape measure
- Plumbers tape/ threaded tape
- Chalk (if you feel that your taps are not watertight)
- A cloth or towel
- Silicone
Follow the steps below to fix your faulty faucet or replace it with something new!
Step 1: Turn Off the Water Supply to Your Bathroom or Your Home
Most bathrooms do not have a separate shut-off valve, but if yours does, simply locate the bathroom’s water supply, which should be located somewhere inside your home, and turn the valves off.
On the other hand, if you do not have a separate shut-off valve, you will need to locate the main-line water source to your home. You will usually find this behind your home, in or around the garage. Then, turn it off by turning the supply valve perpendicular to the pipes. Remember, if you are turning off the water supply to your whole home, you will not be able to use any items that require water until the water is back on.
Step 2: Open the Faucet in Your Bathroom to Drain Any Excess Water
When you shut off the water supply, some water will remain in the pipes. You will need to turn on one of the handles in your bathtub and leave it open until the remainder of the water has drained. Whenno more water is draining from the spout, you can turn the faucet off again. This will ensure no water sprays on you while you’re installing the new faucet system.
Step 3: Remove the Cover from the Centre of the Handle with a Screwdriver
A coin-sized cover in the center of the handle can be removed using a flathead screwdriver. Slide the edge of the flathead screwdriver under the edge of the cover and pry it out! If you plan on keeping your old faucet, make sure you keep these covers as it makes your taps look more aesthetically pleasing.
Step 4: Loosen the Screw Inside the Handle with a Screwdriver
Below the cover you have just removed, you will see a screw inside the opening. You work the screw loose by turning it counterclockwise; in return, this will loosen the handle from the faucet’s stem. You can easily remove the handle from the stem by pulling it off. Keep your screws on one side, so you don’t lose them.
Step 5: Unscrew the Stem from the Faucet Using a Wrench
You will identify the stem since it extends out from the wall; this is what controls the faucet. Remove the stem by placing the wrench over it, secure a firm grip by pushing it over the hex nut, and then twisting the wrench counterclockwise. Once it is sufficiently loose, you can pull it out of the wall.
Make sure you have entirely loosened the stem before pulling on it since it can damage the threading of the pipe.
Step 6: Removing the Spout
Your spout may have a screw holding it in place. If this is the case, locate it underneath the spout and turn it counterclockwise using an Allen Wrench. When the screw is loose, the faucet will easily turn off the pipe. If your spout does not have a screw holding it in place, use a pair of pliers and turn it counterclockwise. Once the spout is loose, you will be able to loosen it further and can easily pull it out by hand.
Attaching Your New Faucet

Now that you have removed all the different parts of your old faucet, you can start the process of attaching your new faucet. Please remember your water supply should remain turned off.
Step 1: Screw the Stem onto The Faucet Pipe
Take your new stem and place it over the pipe. Make sure that the threaded end is in the hole of the old faucet. To ensure no water leakage, use threaded tape by wrapping it around the thread 2-3 times before you tighten it. Using a wrench, you can now tighten and secure the stem in place. Do this by turning in a clockwise direction with a wrench, make sure it is sealed well.
Step 2: Place Your Handle Over the Stem and Secure it
Take your new handle and push it over the stem; make sure it touches the wall. When you have placed the handle over the stem, you can use a screwdriver to tighten the center screw to ensure it is secured. If you have purchased an entirely new set, use the screws that your new handle has come with. If it is similar or the same and your new faucet set has not come with screws, you can use your old ones. You can then pop in the center cover over the screw, and your handle will be complete!
Step 3: Attaching your New Spout
Plumber’s tape helps prevent your spout from leaking, so make sure you wrap 2-3 layers of plumber’s tape over the pipe threading that comes out of the wall.
Step 4: Screw your New Spout into Place
You can attach your new spout by sliding it in over the pipe. Screw-in your new faucet by hand until it is challenging to turn; you should then use a wrench to tighten your faucet further, but be careful not to damage it. Cover the new faucet with a cloth or a towel before using the wrench to secure it to the spout. Next, make sure that your faucet is facing downward – turn it until it does. This could mean either turning it clockwise or counterclockwise but ensure that it is adequately tightened.
Step 5: Turn your Water Supply back on
When you have secured everything in place, ensuring that you tightened your screws and added your thread tape where needed, you can turn your water supply back on. Remember that since your pipes are now empty, you will need to open your faucet and allow any accumulated wind to exit – this may make a strange noise but leave your tap open until the wind is out and your water begins to run smoothly.
Step 6: Enjoy Your New Bathtub Faucet
Providing you ensure all the stems, faucets, and handles (depending on how many you replaced) were tightened securely, and you did not use chalk, you will be able to use your new faucet right away. If you used chalk to make sure that your taps are watertight, you must follow the drying instructions of the chalk or silicone used and wait until your new installation is ready to use.
3 Best Two Handle Faucets: Our Picks
If you’re looking for a new two handle faucet to use, we have selected three of the best that come with simple installation instructions.
1. Kingston Brass Twin Handle Tub and Shower Faucet

The Kingston Brass tub and shower faucet are the best in their class. The two-handle system offers a non-pressure balance and a ¼ turn easy maintenance washerless cartridge. The universal connections included mean you can use ½’’ Copper sweat or ½’’ IPS pipe during installation. Best of all, the product meets ASME A112.18.1. ANSI and NSF 61 Sec.9 code means you can expect many years, possibly even a lifetime, of unhindered service from it. This faucet ensures a 1.8 GPM/6.8 LP showerhead flowrate at 80 PSI.
2. Moen Eva Two-Handle Deck Mount Roman Tub Faucet Trim Kit

The Moen T943BN Eva two handle tub faucet in brushed nickel finish is a great pick for the modern home. Keep in mind that this kit only works with specific Moen valves, including 4798, 4794, 4796, 4794, 4793, 4792. The two-handle design makes water temperature control convenient, and the Moen M-Pact valve system ensures you can keep modernizing your faucets without having to change any plumbing. The Moen proves to be a worthy long-term investment with the LifeShine finish that is resistant to flaking and corroding for life!
3. POP Matte Black Roman Tub Faucet Trim Kit

The POP Matte Black Roman two handle tub faucet kit is an excellent choice for the home with an ultra-modern aesthetic. The faucet is exterior is designed for the ultimate durability, easily resisting tarnishing, corrosion, and scratches. The waterfall spout allows for quick filling of the bathtub while providing a classic and appealing statement. The product has been tested with over 600,000 uses and still is drip-free. Installation is easy, with a design that fits 3-hole. The installation guide is included in the package and all mounting hardware and hot/cold waterlines.
Tips to Make Faucet Replacement Easier
- Ensure you have all your tools on hand before you begin; this way, you can ensure you won’t be walking up and down to retrieve them.
- Use a tape measure to measure the exact length of the pipe that comes out from your wall – make sure to write down this measurement and take it with you when you are purchasing your new stem and faucet to make sure the length of your new equipment is long enough to cover the pipe and can be used with your system at home.
- Use a cloth or towel to cover the stem and faucet before using a wrench to tighten it. This will ensure that you don’t damage your new appliance.
- When you go and purchase your new stems, take your old ones with you, this way, you can purchase stems that are exactly the same and will fit into your pipe easily.
- Take your handles with you for your new purchase. This way, you will be able to see if they will work for your new system.
- There will be stores that sell kits that include stems and handles, which will help you with easy installation.
- Place all of your screws in one place. This way you won’t lose them.
- If you notice that your handles aren’t watertight, you should use chalk around them to prevent water from entering your walls.
- If by chance, your pipe is too short and your sprout won’t screw on, you will be able to purchase a spout adapter – this will act as a pipe extension and screw onto the pipe and your new spout will screw onto the adapter.
- You can go to any home appliance store to find things such as chalk, silicone, a wrench—screwdrivers, tape measures, Allen wrenches, plumbers, tape, etc.
- Anywhere where there is a thread, you can apply the plumber’s tape; this will not cause any damage but only further ensure no leakage.
See Also:
Toto VS Kohler Toilets: Which Is Better
How Much Is A Bidet Toilet Seat?
Do You Wipe Before Using A Bidet