19 Inexpensive Garden Edging And DIY Borders For Around Trees In Your Yard: Creative Ideas To Beautify Your Outdoor Space
Every time I stroll through my yard, I dream about making each corner feel special. It’s amazing how a simple edging or cute border can change the way my trees and flower beds look. Finding inexpensive garden edging ideas lets me refresh my space and gives me that cozy, creative boost I’ve always wanted—even when I’m working with a tight budget.
I know how important it is to have a yard that feels welcoming, lively, and uniquely mine. Turning everyday materials into charming borders inspires me to see beauty and potential in what I already have. With just a little time and love, I can make my yard shine and share a piece of my personality every time someone stops by to admire it.
Stacked River Stones Circle
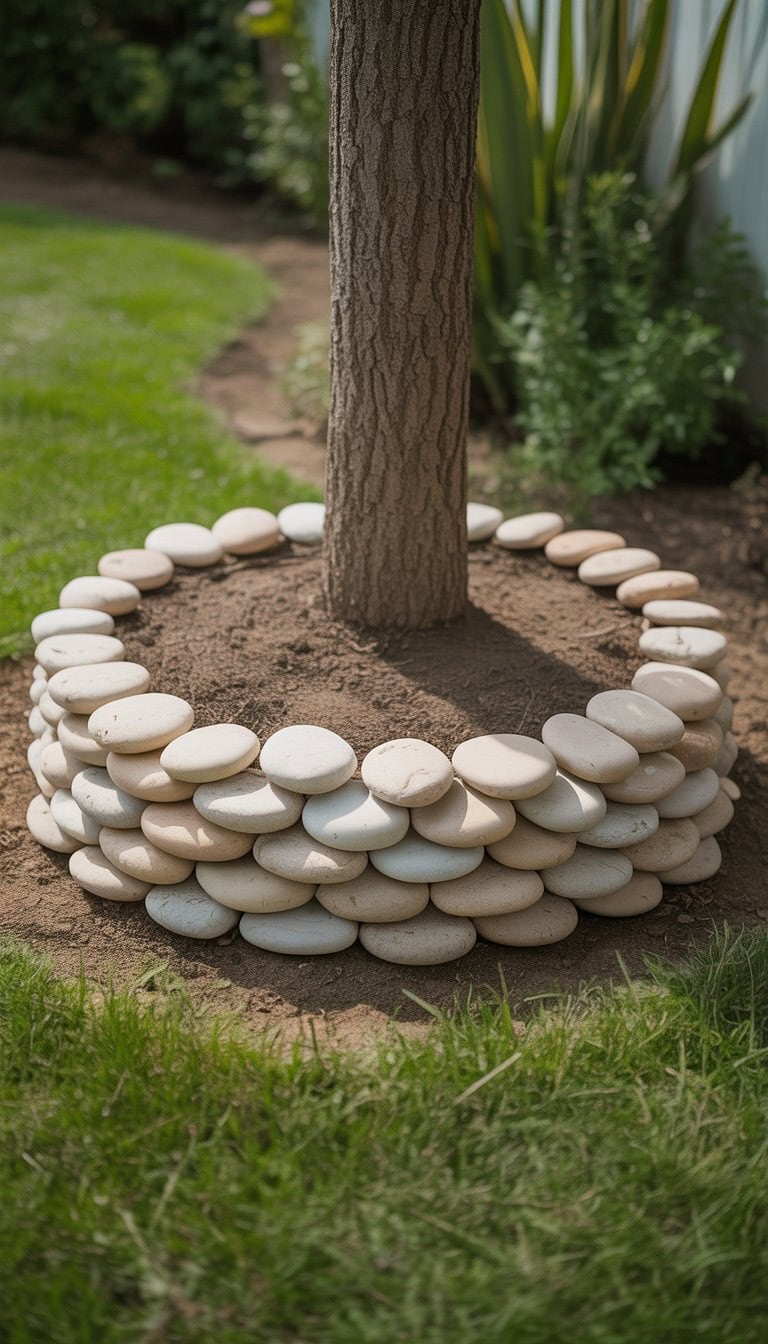
I love using river stones to edge around my trees. These smooth rocks stack up easily and look natural in any yard. I just place one layer at a time, making sure each stone feels steady.
I find it helps to dig a small trench so the stones sit lower and don’t roll away. It takes a little patience, but the result always feels worth it. The finished circle brings a gentle, finished look that blends well with plants and grass.
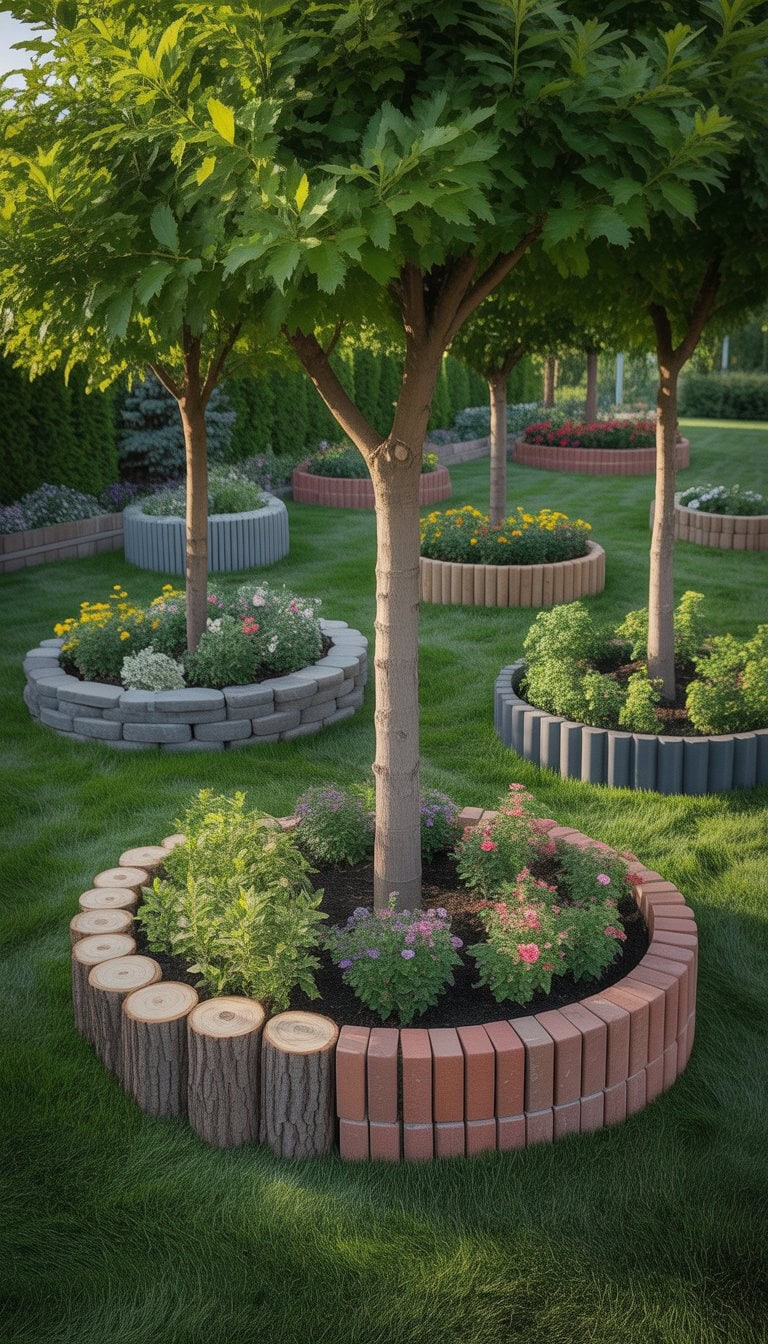
I love using reclaimed bricks for edging around my trees. They give a backyard a classic look without costing much at all.
Laying the bricks is simple. I just dig a shallow trench and set the bricks in place, either flat or on their sides.
Sometimes, I mix and match colors or patterns to make the border stand out. For more tips and ideas, I check out creative brick edging ideas.
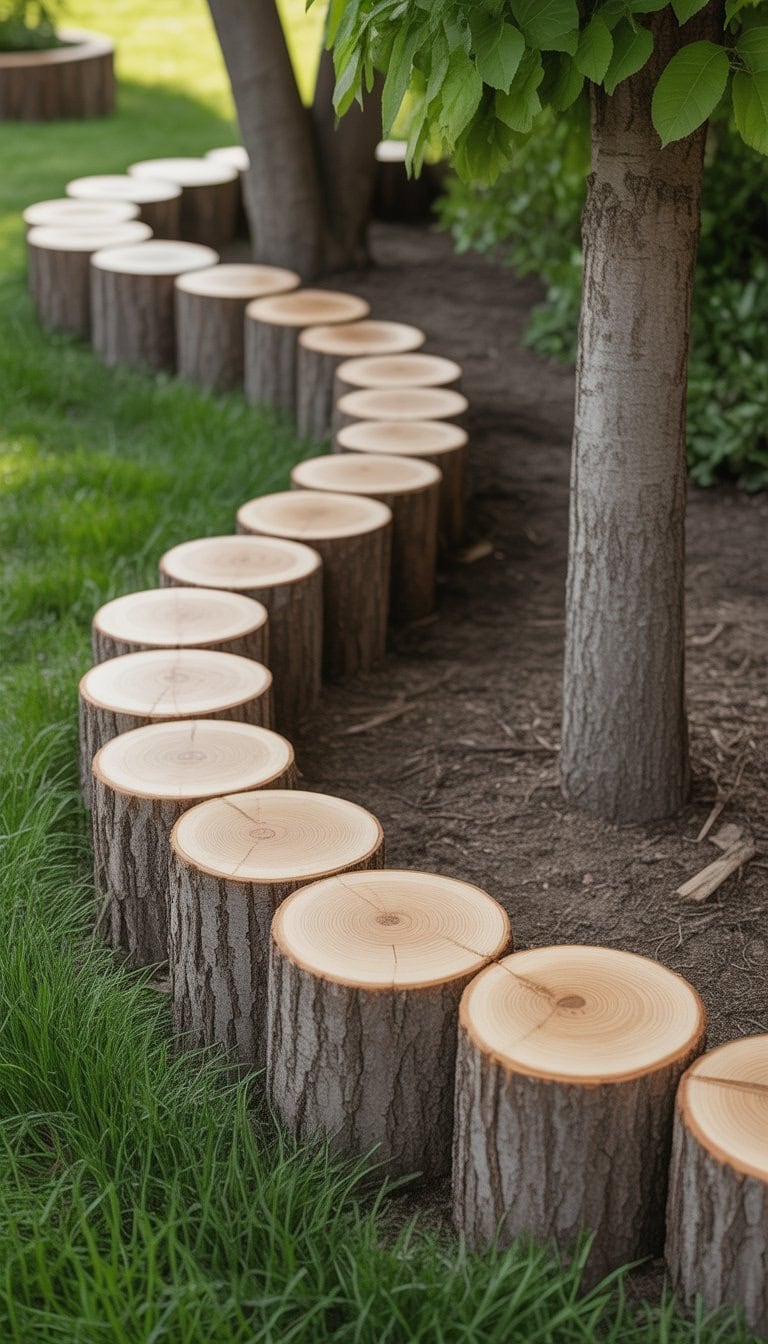
Wooden Log Slices
I love using wooden log slices to edge around my trees. They bring a warm, rustic touch to the yard.
To make these, I cut logs into slices about two inches thick. I lay them flat, side by side, forming a circle at the base of my trees.
The natural wood blends well with the garden. It’s easy to find logs from tree trimming or storm cleanup. It gives my outdoor space a homemade look that feels both neat and inviting.
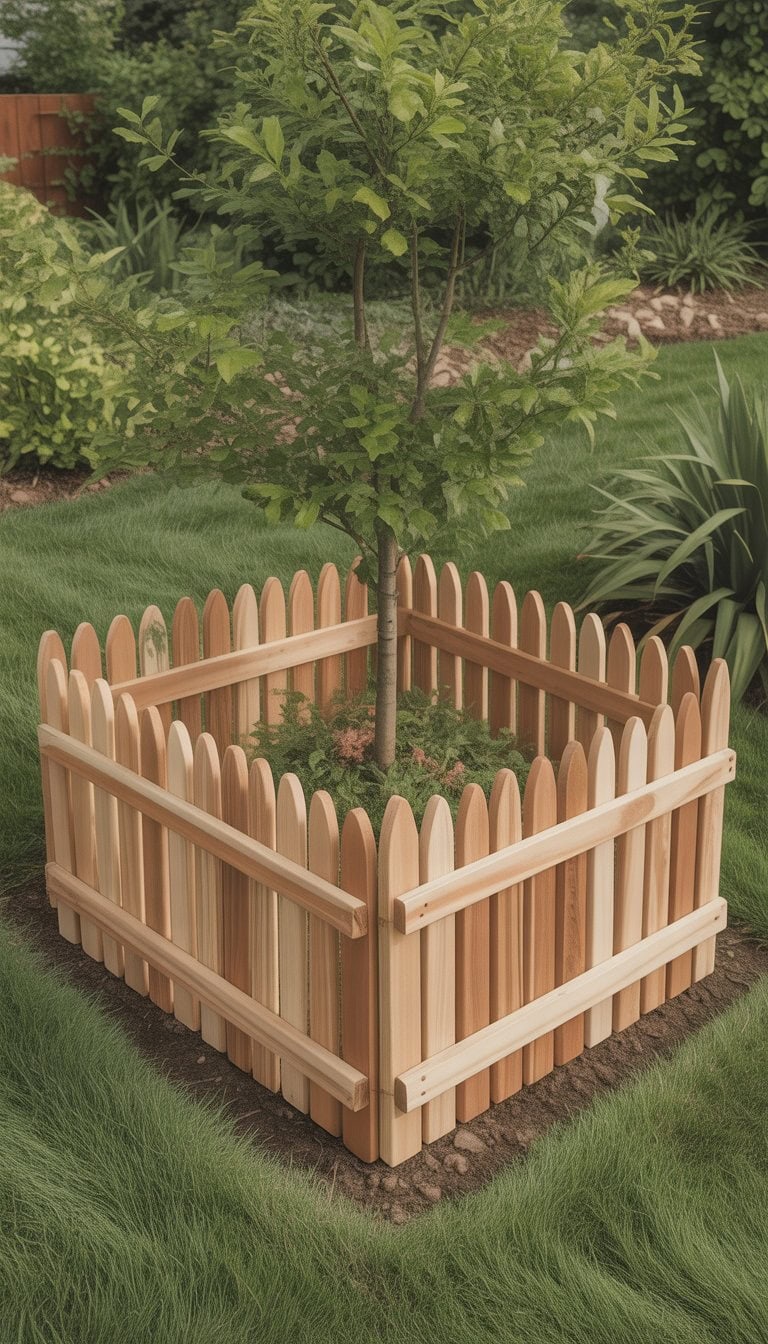
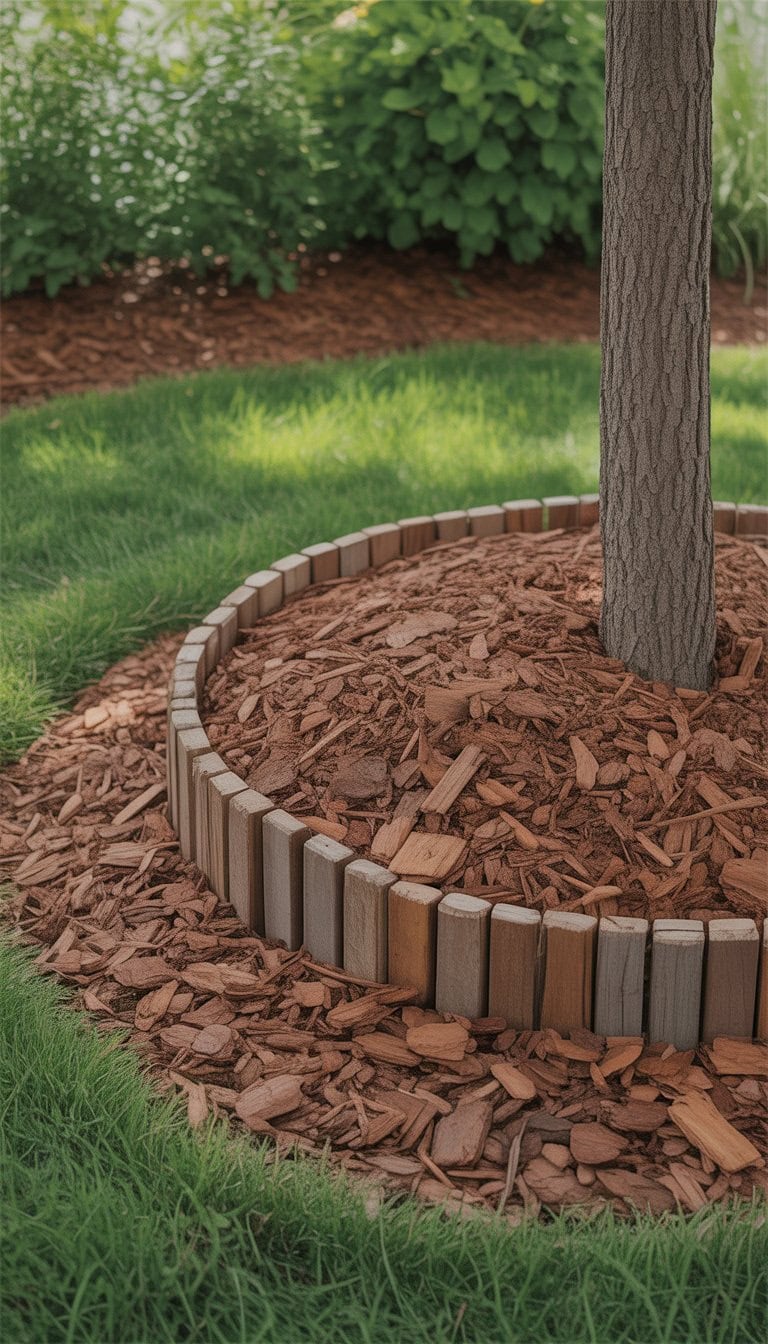
Small Cedar Shake Fencing
I like using small cedar shake fencing when I need a border that’s both simple and eye-catching. Cedar shakes are easy to set up around trees and garden beds. They give the yard a neat, tidy look without much effort.
I can hammer them in quickly, and they last a long time. Cedar also handles weather well, so I know my border will stay nice season after season. This edging idea has a warm, natural feel that I always appreciate in my garden.
For inspiration, you can see more ways to use cedar for garden edging.
Concrete Paver Ring
I love using concrete pavers to create a neat, classic ring around my trees. Pavers are easy to find at most garden centers and usually don’t cost much. Laying them in a circle looks tidy and keeps the mulch from spreading into the lawn.
I like that I can shape the ring to fit any tree size. This method gives the yard a finished look and makes mowing simpler. If you want more tips, I found some good ideas about this in a DIY paver border video.
Mulch Chip Bed Edge
I love using mulch chips as a simple edge around my trees. It’s easy to lay down and gives the area a clean, finished look. The mulch helps keep weeds away and holds moisture in the soil.
I just make a neat line between the lawn and bed. Mulch chips are affordable and blend in well with most yards. If you want a low-cost, natural border, this works great and you can find more tips about it on The Spruce’s inexpensive garden edging ideas.
Metal Garden Edging Strip
I like to use metal garden edging strips when I want a tidy, straight edge around my trees. These strips are tough and hold their shape well over time. Some even come in flexible options so I can curve them around different tree sizes.
When I install metal edging, I just hammer the strips into the ground. It keeps grass and mulch in place, and the area looks neat. Metal edging is available in different heights and finishes at spots like Home Depot.
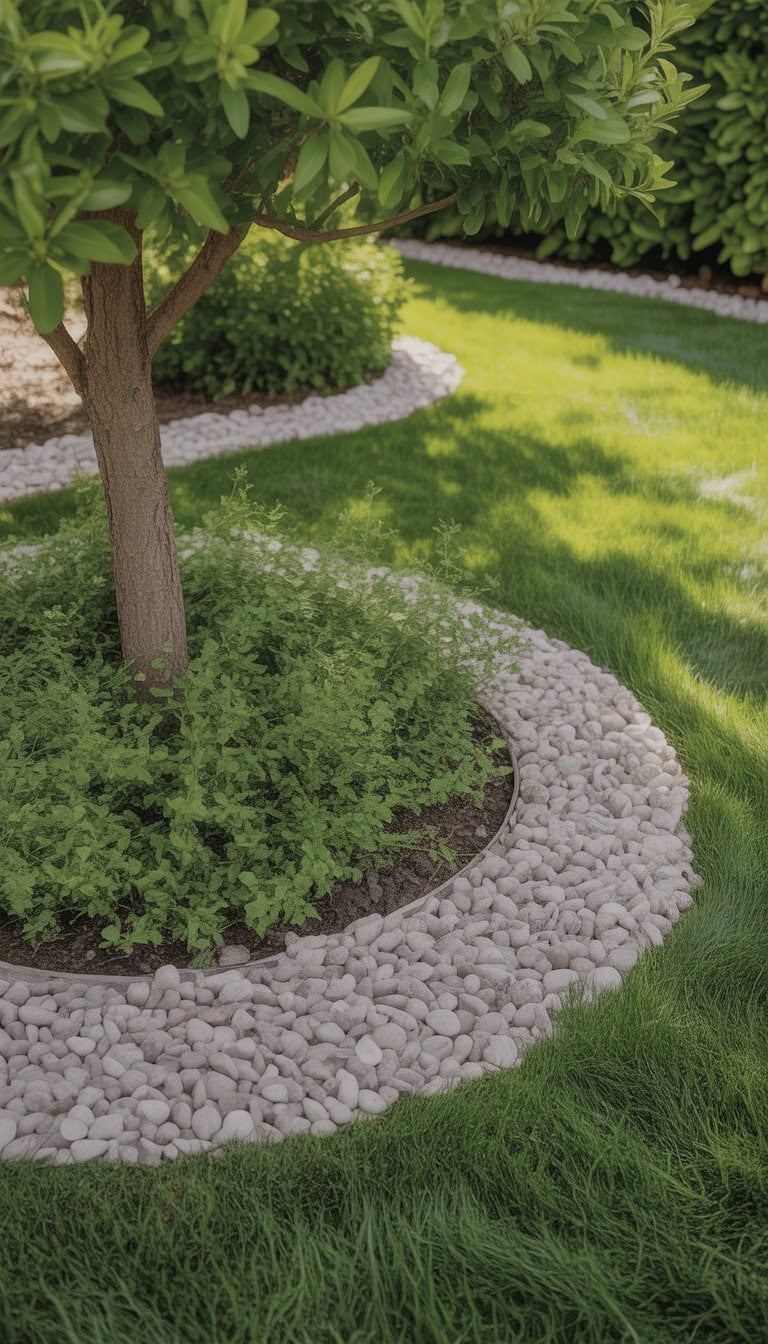
Pebble Rock Outline
I like using pebble rocks to create a simple, natural border around my trees. Pebbles are easy to find and come in different colors and sizes, so I can pick the right look for my yard.
I spread the rocks in a smooth, even line to outline the tree’s base. This makes the space feel neat and keeps mulch and soil in place.
If you want more ideas, there are lots of garden edging ideas with rocks that work well for trees. It’s a low-cost way to upgrade your yard.
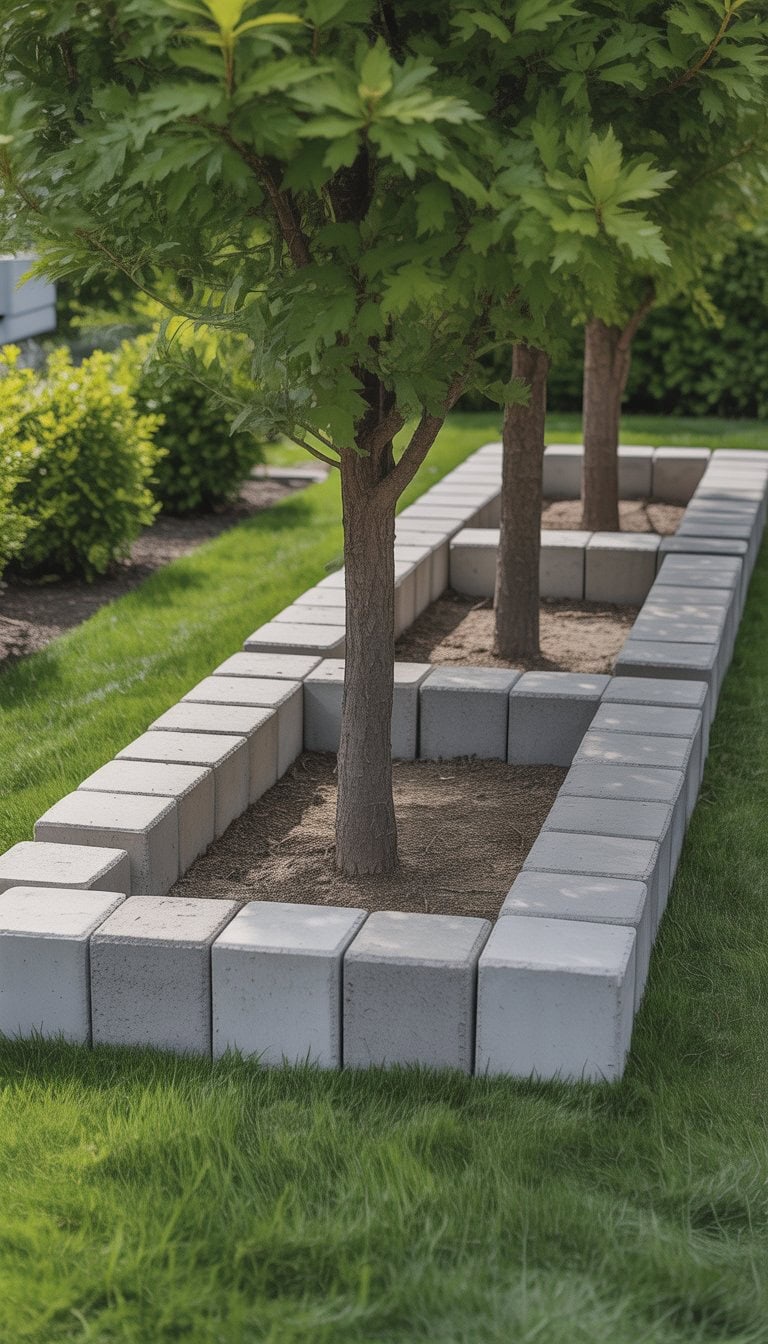
Concrete Blocks Laid Flat
I like using concrete blocks for tree borders because they’re sturdy and easy to find. I simply lay them flat on the ground in a ring around the tree. This gives the area a neat, tidy look.
If I want to get creative, I can paint the blocks or fill the holes with soil for flowers. Concrete blocks last a long time and hold up in any weather. If you want more ideas, you can check out concrete edging tips at The Home Depot’s landscape edging guide.
DIY Pallet Wood Border
I love using pallet wood for simple, rustic garden edging. It’s budget-friendly and easy to find—I can often spot free pallets behind stores or online. I cut the boards to the size I want, making sure to remove any nails and sand down rough spots.
Lining them up around my tree beds gives a clean border and keeps mulch in place. I sometimes stain the wood for extra protection or let it weather for a natural look. This project adds charm, and I enjoy building each border myself. For more tips, I watched this DIY Pallet Project: Tree Landscape Border Edging video.
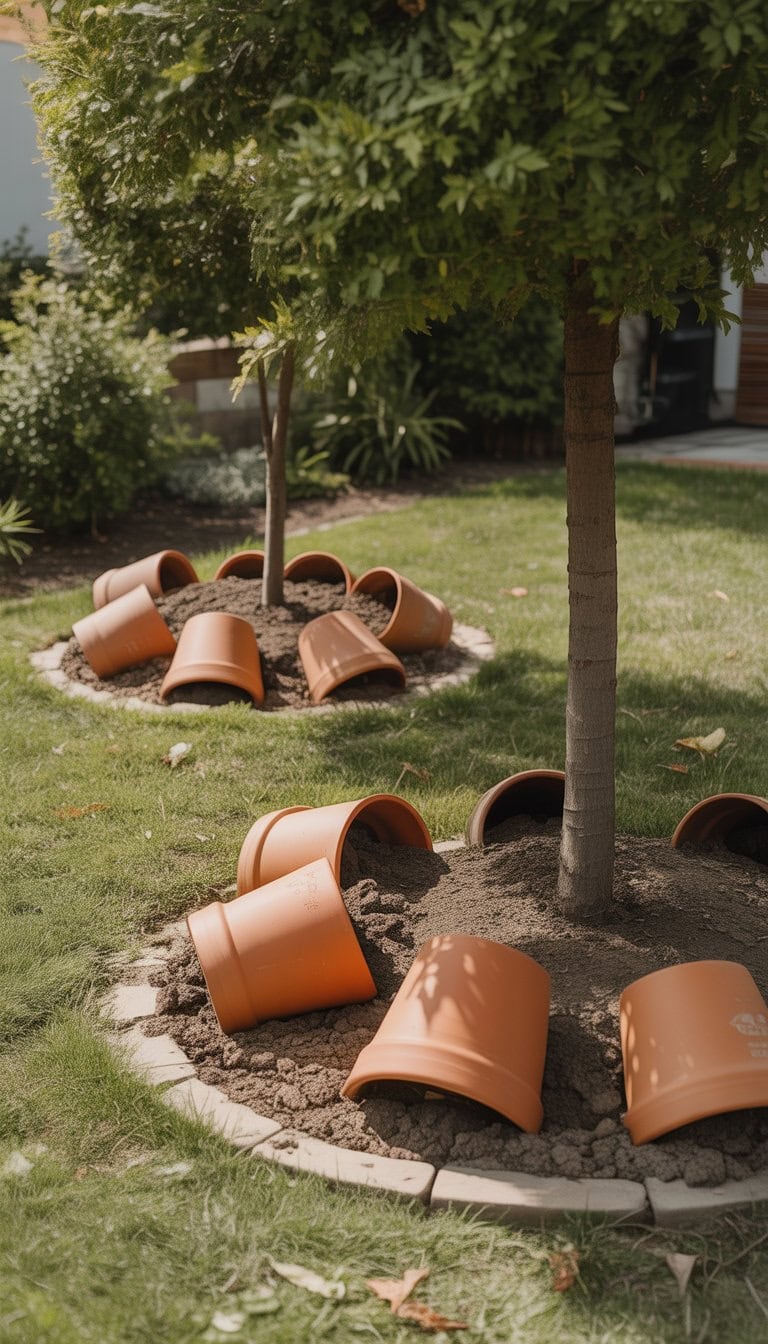
Half-Buried Terracotta Pots
I love using half-buried terracotta pots for garden edging around trees. The look is natural and charming, and it’s easy to do myself.
All I do is sink the pots halfway into the soil, setting them close together. Sometimes I use old or cracked pots to save money.
This trick works especially well in dry, shady spots, like under my spruce trees. For more inspiration, I found helpful ideas for this method here.
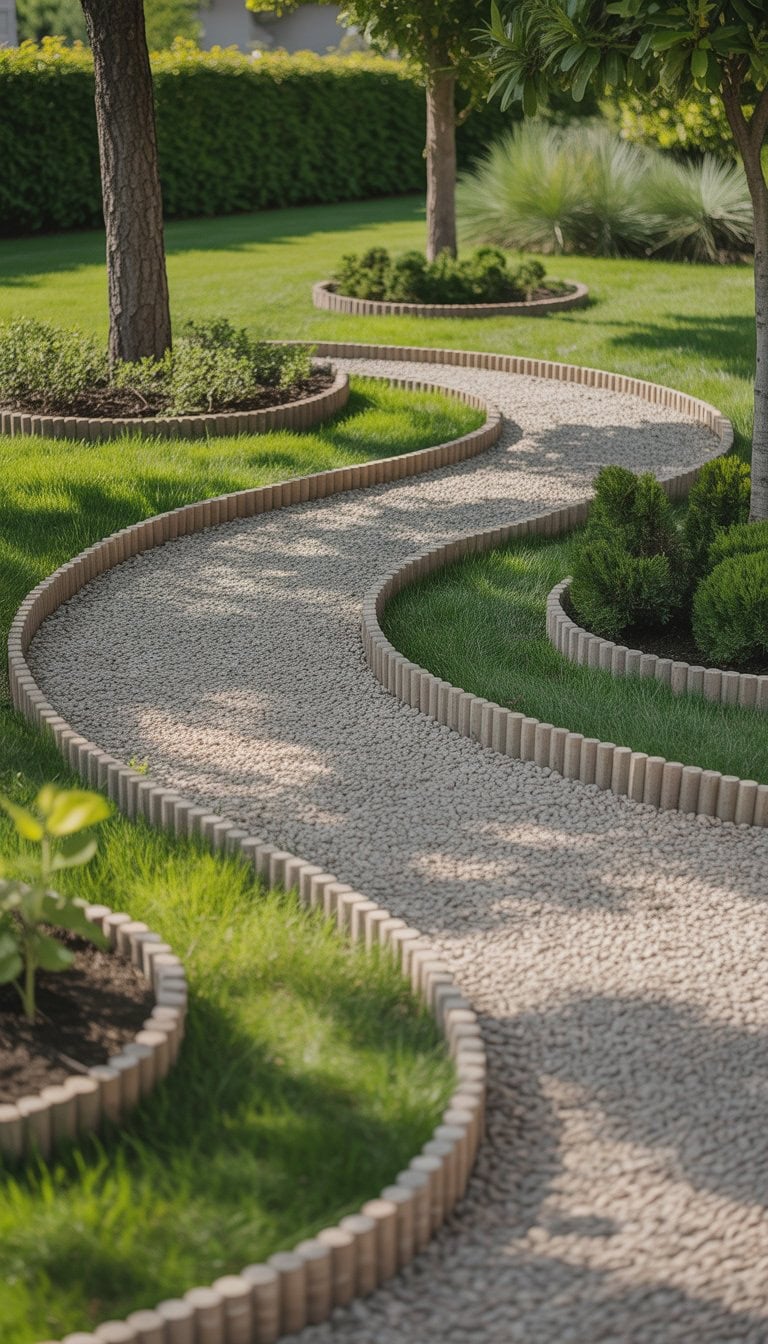
Rounded Gravel Pathway
When I want a tidy look around my trees, I like to use a rounded gravel pathway. Laying gravel is simple, and it does not cost much.
I enjoy choosing gray or natural-colored gravel since it blends in well with my yard. It’s easy to spread and shape into a neat curve.
Adding a slight edge with bricks or stones keeps the gravel contained. I find this type of border helps control weeds and makes the space feel welcoming. For more edging inspiration, I sometimes check out ideas like these garden edging examples.
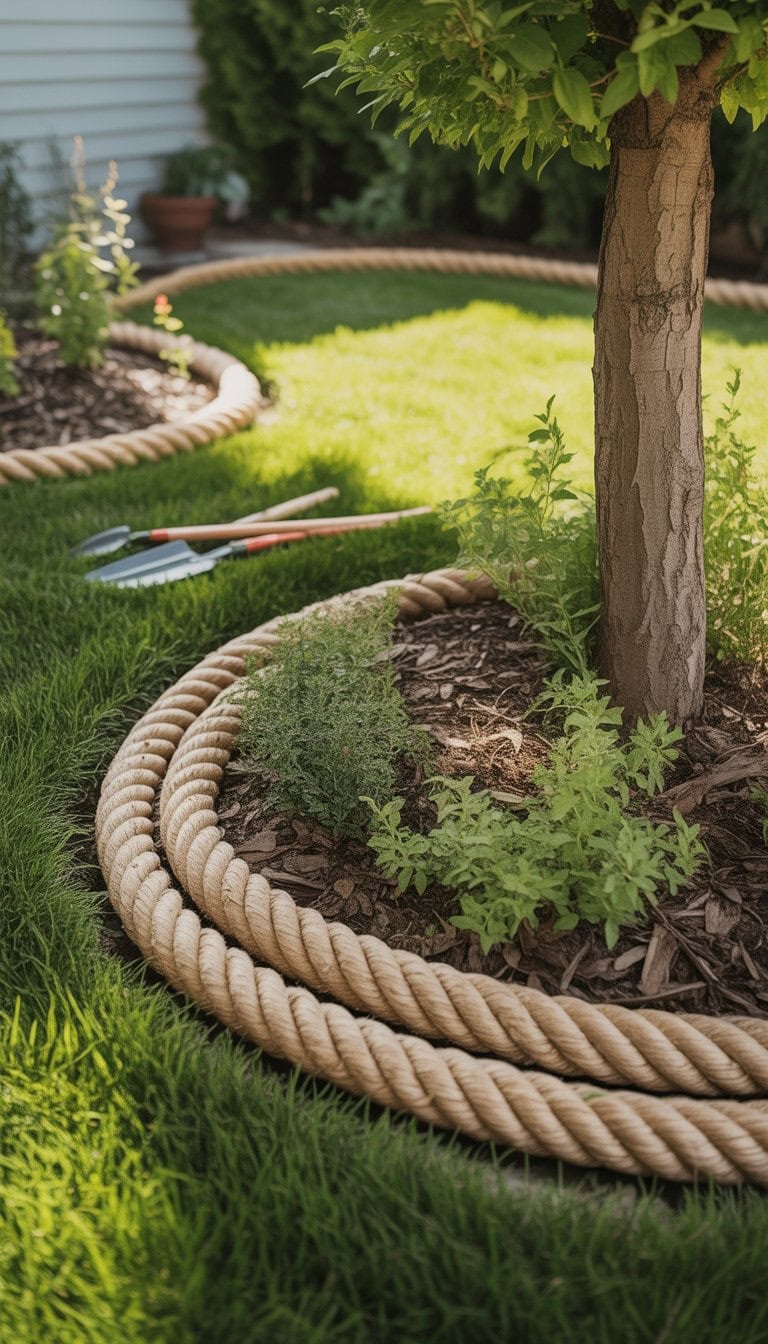
DIY Rope Lawn Edging
I love the natural look that rope can bring to a garden. It’s simple, works well around trees, and doesn’t cost much. All I need is some thick outdoor rope and landscape pins.
I lay the rope along the edge of my tree ring, shaping it the way I want. Then, I secure it every foot or so with pins to keep it steady.
It’s easy to move or change, and it gives my yard a clean, earthy border that stands out.
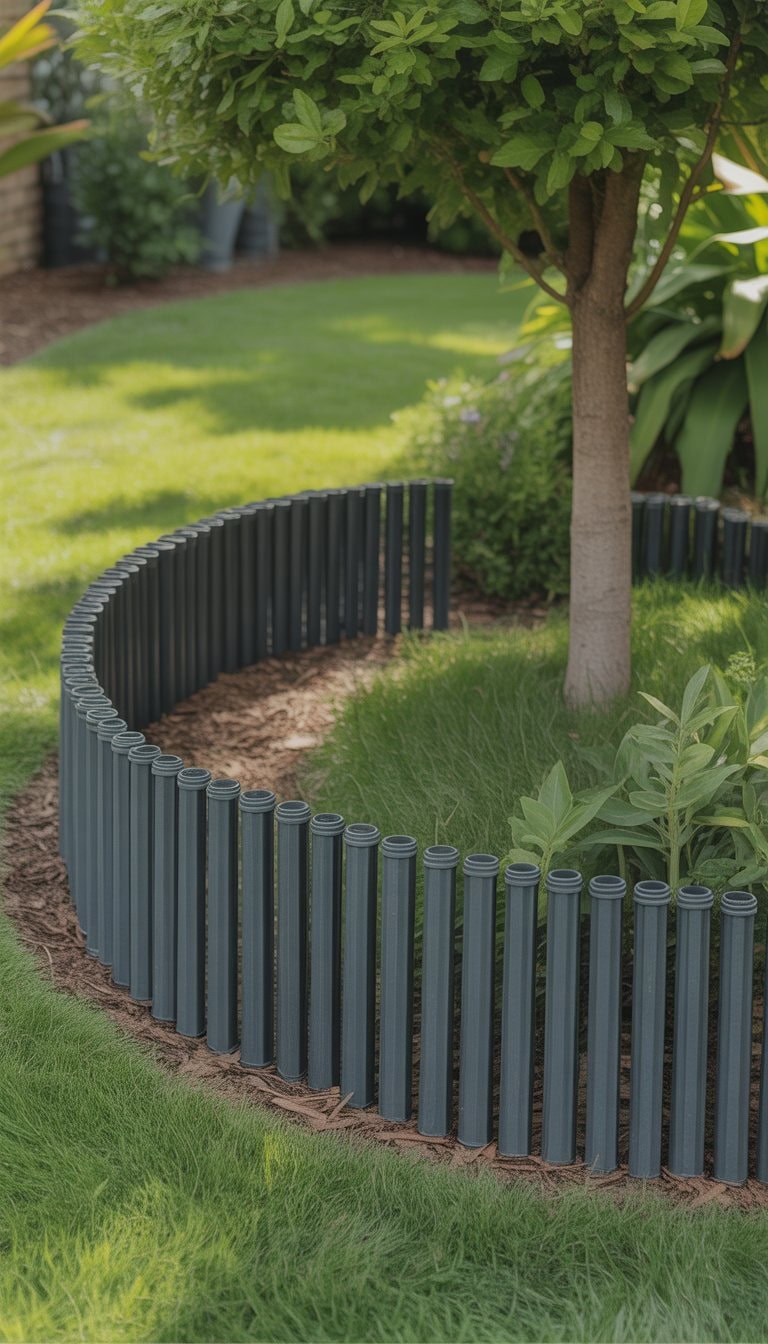
Plastic Lawn Edging Stakes
When I work on edging my garden, I like using plastic lawn edging stakes. They’re easy for me to handle and I don’t need special tools. I find they go into the ground with a simple push or tap.
I’ve noticed they hold the edging firmly even when the ground gets wet. I often use them for curved beds or around trees because they’re flexible.
If you want to shop for these, you can look for plastic landscape edging stakes online. They usually come in packs and cover a good amount of space.
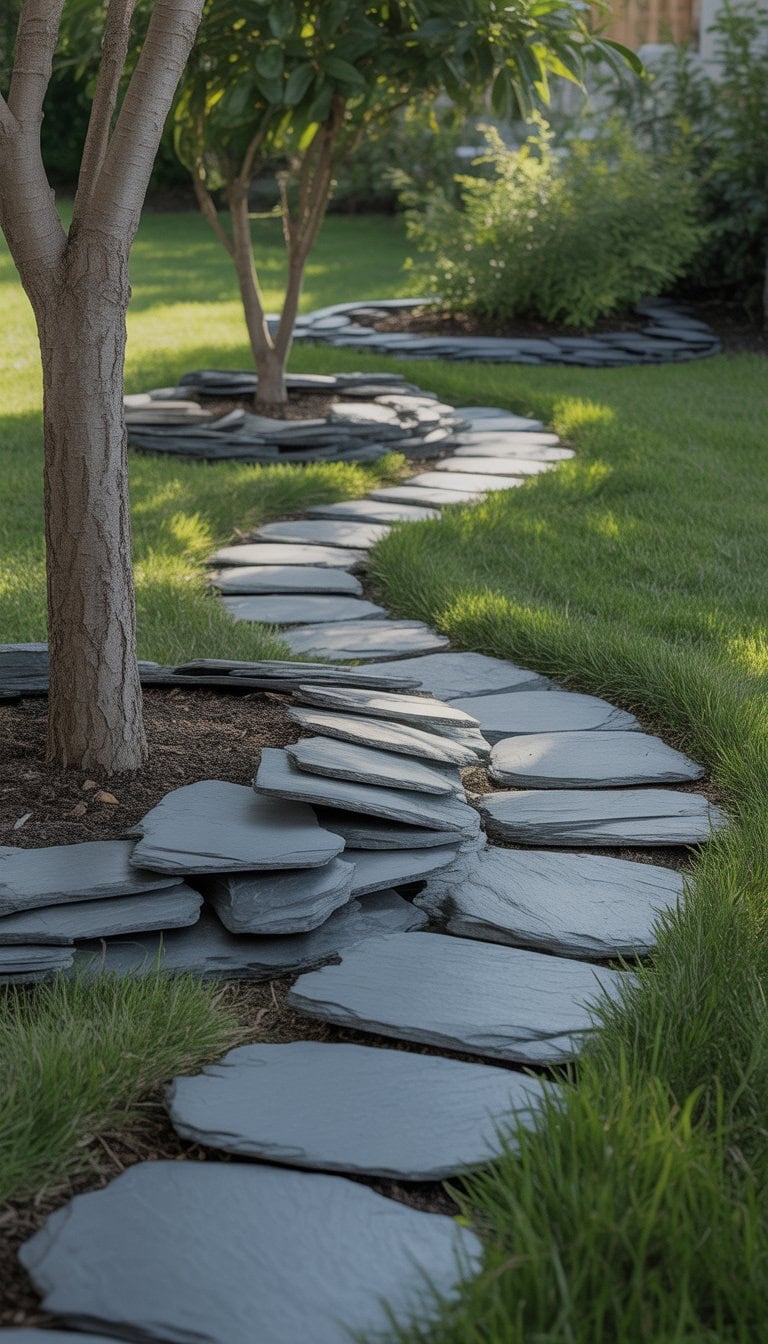
Thin Slate Rock Path
I like using thin slate rocks to create a natural path around my trees. The flat stones fit together easily, making the edging look neat without much effort. It’s easy to move the pieces and get the shape just right.
I found that these slate rocks blend in well with the trees. The gray and blue shades look nice next to green grass or mulch. Laying them out yourself saves money, and you don’t need special tools.
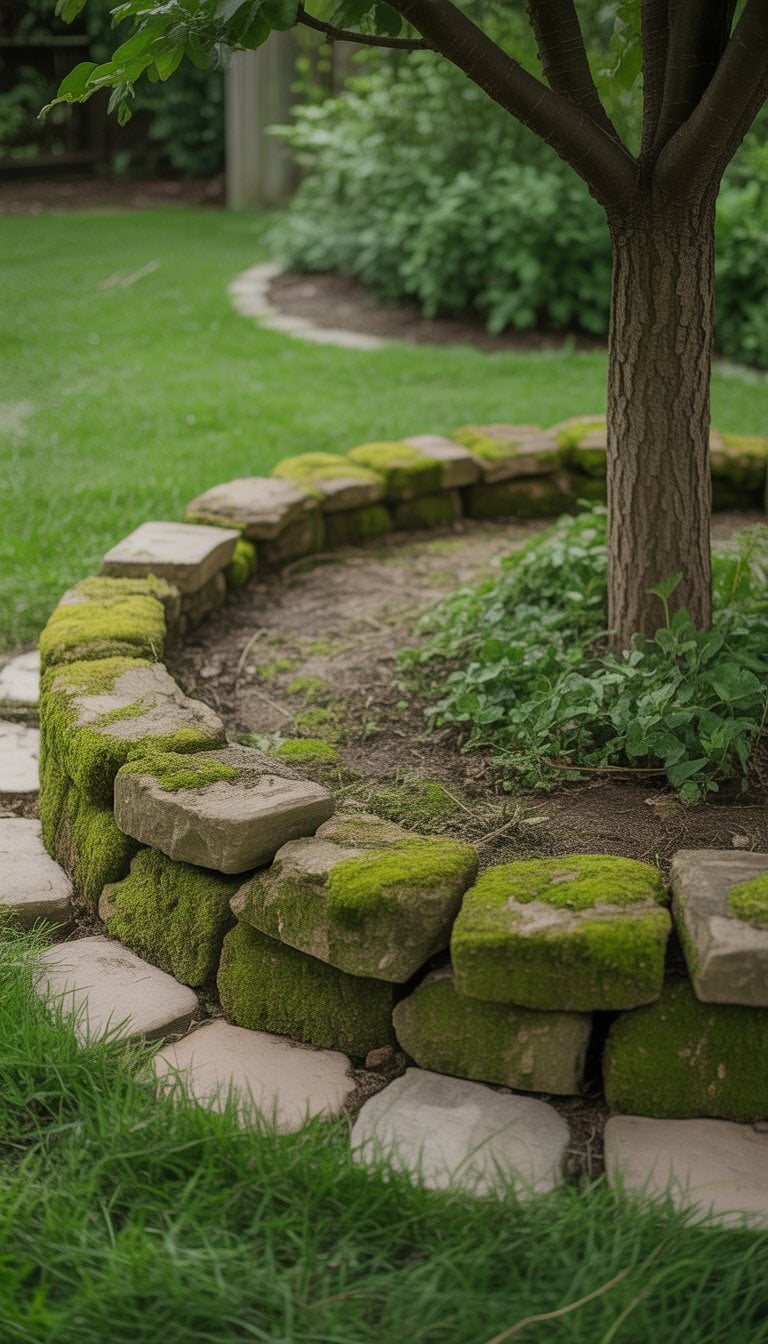
Moss-Covered Stone Border
I love using moss-covered stones to edge around my trees. It brings a peaceful, natural touch that feels right at home in any garden.
To get this effect, I gather old stones and place them in a ring. Over time, moss grows naturally, especially if the area is shady and moist.
This kind of border is easy to maintain and fits perfectly with trees. If you want more ideas like this, check out these garden edging ideas.
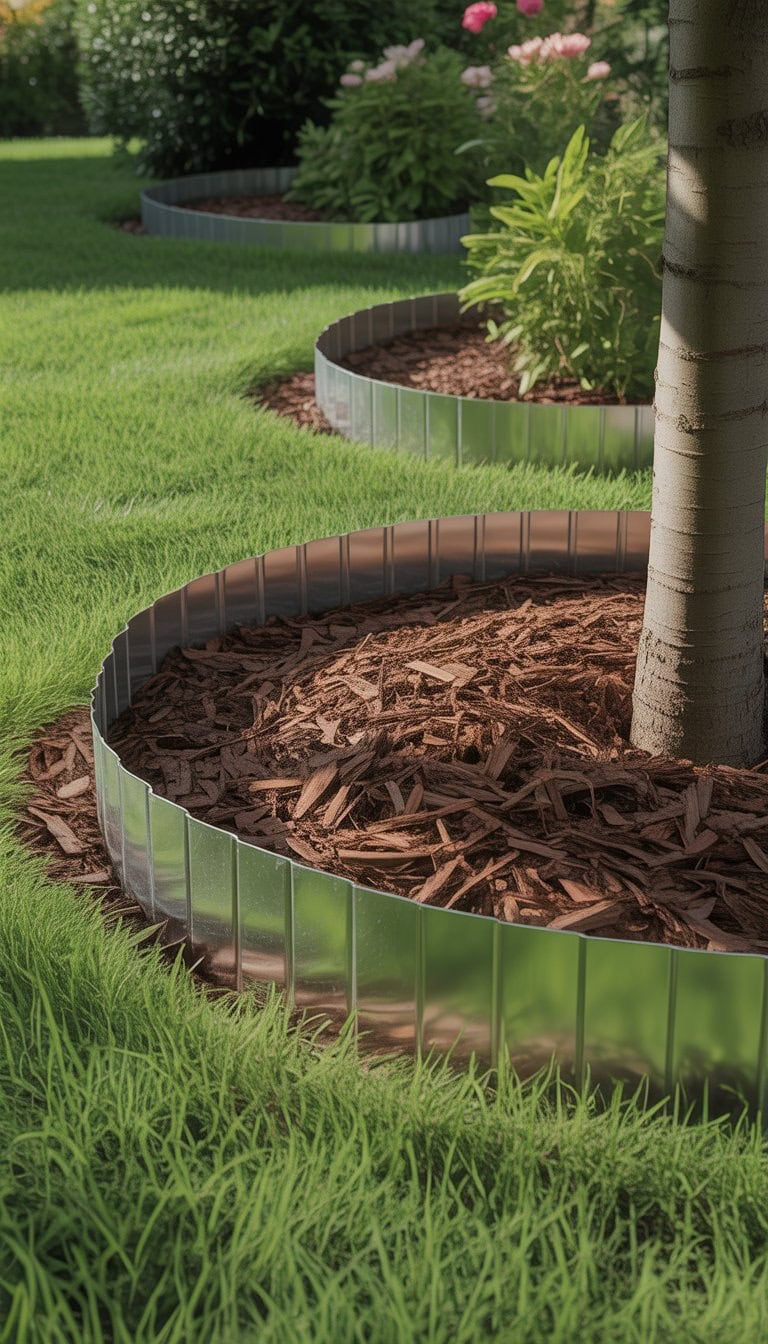
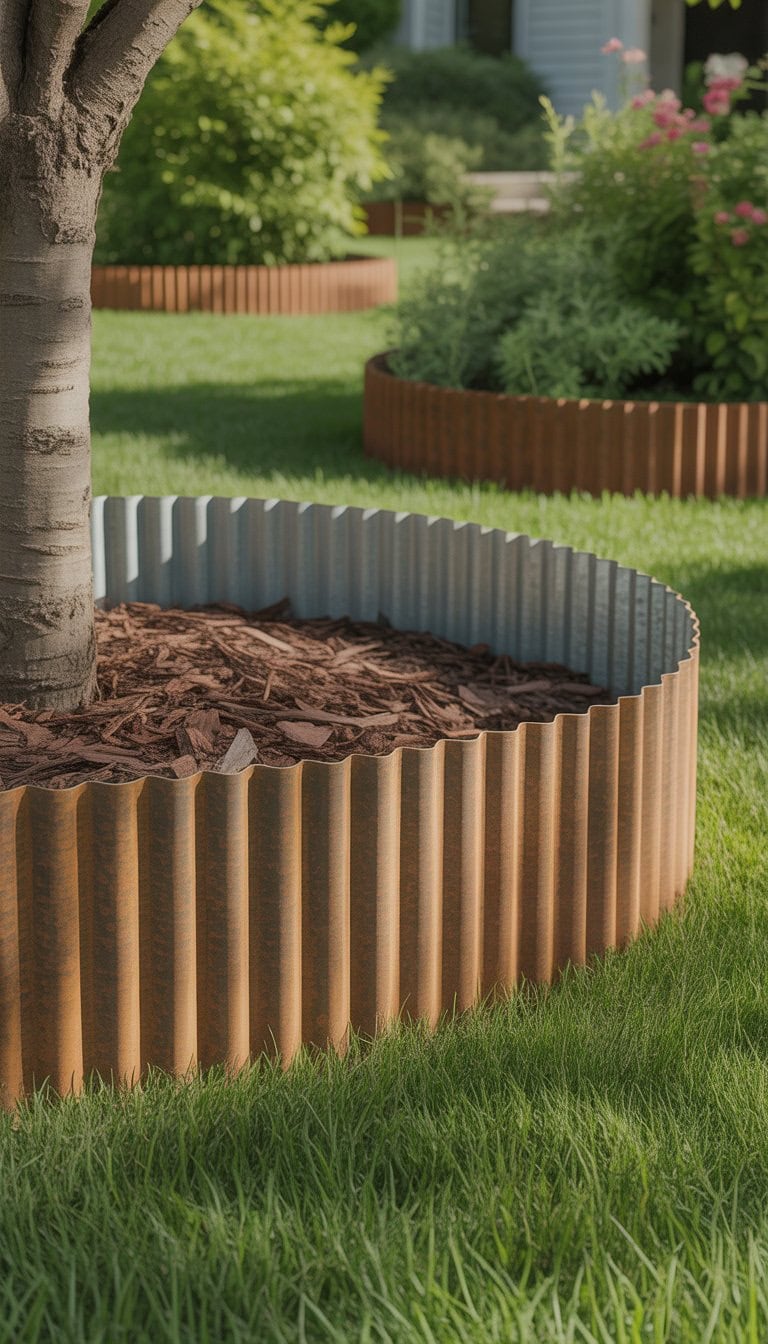
Corrugated Metal Strip
I really like using corrugated metal strips to edge around my garden trees. They’re budget-friendly and give a clean, modern look to the yard.
The metal is tough and stands up well to weather. I cut it to size and shape it in a ring around tree bases for a neat border.
It’s easier than you might think to install. I found some great options for corrugated metal garden edging that are perfect for DIY projects.
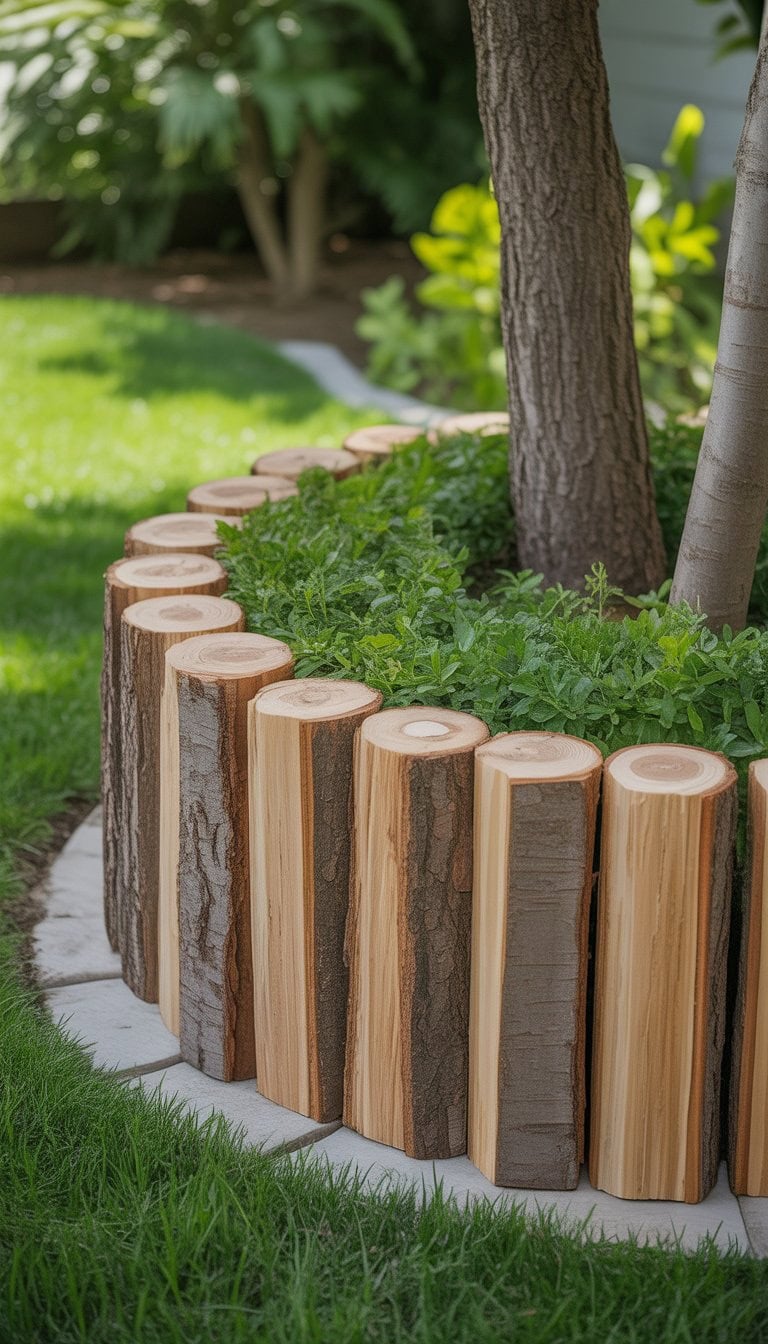
Split Log Edge
I like using split logs to edge around trees because they look natural and blend with the landscape. I usually pick small logs and cut them in half lengthwise with a saw. It doesn’t take much skill—just a steady hand and a bit of patience.
Once I have my split logs, I lay them flat side down in a curve around the tree. It helps define the space and keeps mulch in place. I’ve found this style lasts well and gives a cozy, rustic touch to my yard.
Natural Driftwood Curve
I love using driftwood to give my garden a relaxed, coastal vibe. The gentle curves of each branch let me shape soft borders around trees. This look feels natural and laid back.
I pick out pieces that fit the space and bury them just a little for stability. Driftwood blends in with soil and mulch, making the border look like it belongs. It’s a simple way to bring nature closer to my yard.
Planning Your Garden Edging Project
I always kick off a garden edging project by looking at the big picture. The materials I pick and how I sketch the borders can make my yard feel pulled together and easy to care for.
Choosing The Right Materials For Around Trees
I’ve learned that not every material works well around trees. The roots need to breathe, so I avoid anything that could trap moisture, like heavy plastic. Instead, I go for things like stone, brick, wood, or even simple metal strips. These offer enough structure to keep mulch or soil in place but don’t choke out the tree roots.
I like wood for its natural look, but it needs to be rot-resistant. Cedar and redwood are good choices. For a clean modern style, metal edging can do wonders and still bends easily around tree circles.
If I’m on a tight budget, I might lay bricks on end or even use old roof tiles for a creative, recycled look. It’s important that the edge sits slightly above the ground to stop grass from sneaking in.
Here’s a quick pros and cons list I rely on:
Material
Pros
Cons
Stone/Brick
Durable, classic
Heavier, more work
Wood
Warm, natural
Needs treatment, may rot
Metal
Sleek, flexible
Can rust, costlier
Recycled
Cheap, eco-friendly
Appearance may vary
Measuring And Designing Creative Borders
Before I start digging, I always walk around the tree with a tape measure and a garden hose. This helps me mark out a neat circle or an organic wavy shape—hoses are great for testing out curves before I commit.
I make sure there’s at least 12-24 inches from the trunk to the edge so the tree has room to grow. This wide border also makes mowing easier and keeps roots safe from being damaged.
For each tree, I jot down the sizes and plan how many edging sections I’ll need. I believe it’s better to buy a little extra and trim than to run short and end up with gaps.
If I’m planning a fun garden border, I might sketch ideas on paper. Sometimes I use two types of edging side by side for a modern look. Mixing and matching can turn ordinary beds into something eye-catching, such as placing wood and gravel together.
Getting a great tree border starts with careful prep and regular care. I focus on setting up the ground right and picking easy ways to keep it looking neat over time.
Preparing The Area For Lasting Results
First, I always choose the border shape, using a hose or rope as a guide. This makes it simple to see what works best before I dig. I clear grass, rocks, and weeds in a ring a few feet out from the trunk to give room for the border.
I dig a shallow trench, usually four to six inches deep, to hold my edging material in place. Keeping the trench even makes a big difference for straight lines and stops the border from shifting. I’m careful not to pile up soil or mulch against the trunk, since tree roots need to breathe and I want to avoid rot—just like experts mention in articles about edging around trees.
When I add bricks, stones, or plastic edging, I press them in firmly and check that everything sits level. For a neat finish, I pack soil tight around the edge and water the ground to help it settle in place. Here’s a quick list I follow for strong results:
To keep my borders tidy, I use mulch inside the ring to stop weeds and keep moisture in. I top up mulch a couple of times each year, especially after heavy rain or wind, making sure it never covers the tree’s root flare.
For stone or brick edging, I watch for pieces that come loose and push them back into place when needed. Hard plastic edging sometimes pops up, so I press it back down or add stakes for support, just like shown in landscape edging tutorials.
Regular checks every few weeks help me spot problems early. If I see weeds poking through, I pull them right away. Here’s what works for me:
Refresh mulch twice a year
Check for loose stones or edges
Re-set any pieces out of place
Pull weeds early
Avoid letting mulch stack against trunk
My borders stay sharp and look great without spending a lot of money or time.
Frequently Asked Questions
I’ve tried many ways to edge my gardens without spending a lot of money. From recycled bricks to log slices, these DIY solutions around the base of my trees not only add style but are easy to take care of.
How can I make my garden edges stand out on a budget?
I’ve found that using old bricks, river stones, or even broken concrete can give garden borders a special look without emptying my wallet. Stacking river stones in a circle around trees is eye-catching and doesn’t require mortar. Lining up reclaimed bricks at an angle gives my gardens a neat, finished edge for almost no cost.
Creative touches, like painting the edge of pavers or adding mulch in a new color, help my gardens pop even more.
What creative DIY solutions work well for tree borders in gardens?
I like to get creative with my tree borders. Small cedar shake fencing winds nicely around trunks and brings a soft, rustic feel. Wood log slices from trimmed trees or leftover firewood look natural and last for years if sealed.
Concrete paver rings also work really well. I set them slightly into the ground for a tidy border that stays in place. If I want something cute, I’ll even use mismatched plates or bottles.
Can you suggest eco-friendly materials for cost-effective garden edging?
I prefer materials that help the planet and save me money. Using reclaimed bricks, rocks from my yard, or wood logs from tree trimmings are all budget-friendly options that don’t create waste. Mulching with bark or wood chips also defines the space without adding plastics.
What are some simple techniques to create raised borders around my garden trees?
For a quick raised edge, I stack river stones or bricks in a low wall around the tree’s base. Sometimes I use wood planks positioned upright, or build a circle using wood log slices, tapping them gently into the soil until steady.
Mulch mounded inside the border gives a small lift for roots and adds a sculpted look with hardly any effort.
How do I choose garden edging that combines affordability with ease of maintenance?
I always look for materials that are cheap, easy to clean, and durable in my climate. Bricks and rocks need almost no care. Concrete pavers won’t shift much if installed right.
Plastic and rubber borders are usually the cheapest way to edge a garden, but I go for options that last, don’t need repainting, and can be cleared of weeds with a quick pass of the trimmer.
What are the best practices for installing garden edging without breaking the bank?
I save money by using what I already have, like leftover bricks or logs. I dig a small trench before setting any edge material to keep things straight and stable.
When I’m edging around trees, I’m careful not to pile soil or mulch up against the trunk, so the roots stay healthy and the tree lives a long time. For more tips, I share questions on forums and advice pages to see what has worked for other home gardeners.