Disclaimer: We only recommend products or services that we believe will add value to our readers. By using these affiliate links, we’ll receive a commission if you purchase through our link, at no extra cost to you. Please read full disclosurehere
Setting up a jewelry booth is one of my favorite ways to connect with people and show off what I love to make. Every time I create a new display, I get to express my style and make my booth feel welcoming. Whether it’s the shine of gold, the sparkle of gemstones, or the fun of handmade beads, my display helps visitors see the heart and care I put into every piece.
I’ve learned that the right display can turn curious shoppers into loyal customers by making my jewelry stand out and feel special. I want fellow jewelry lovers, crafters, and dreamers to feel inspired every time they set up their own booth. With a few creative ideas, anyone can design a display that draws people in and lets their work shine as bright as their passion.
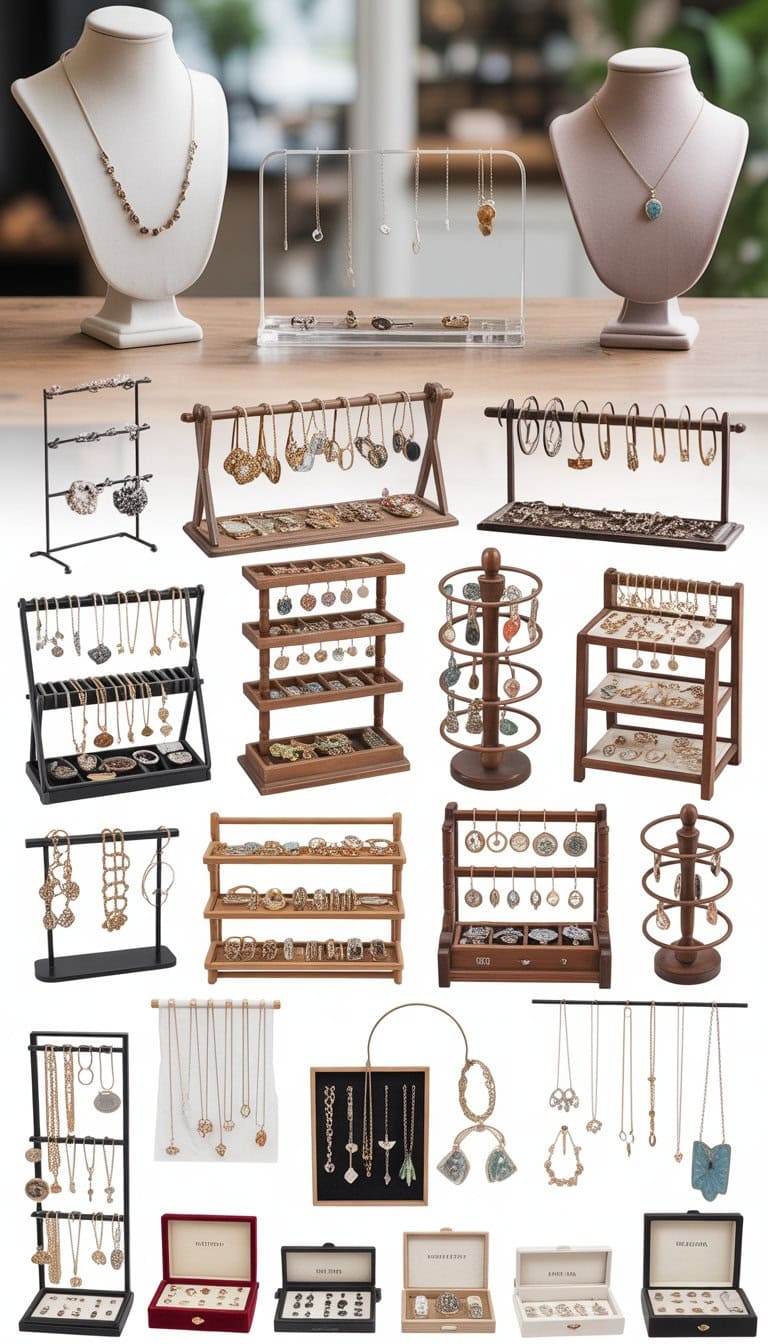
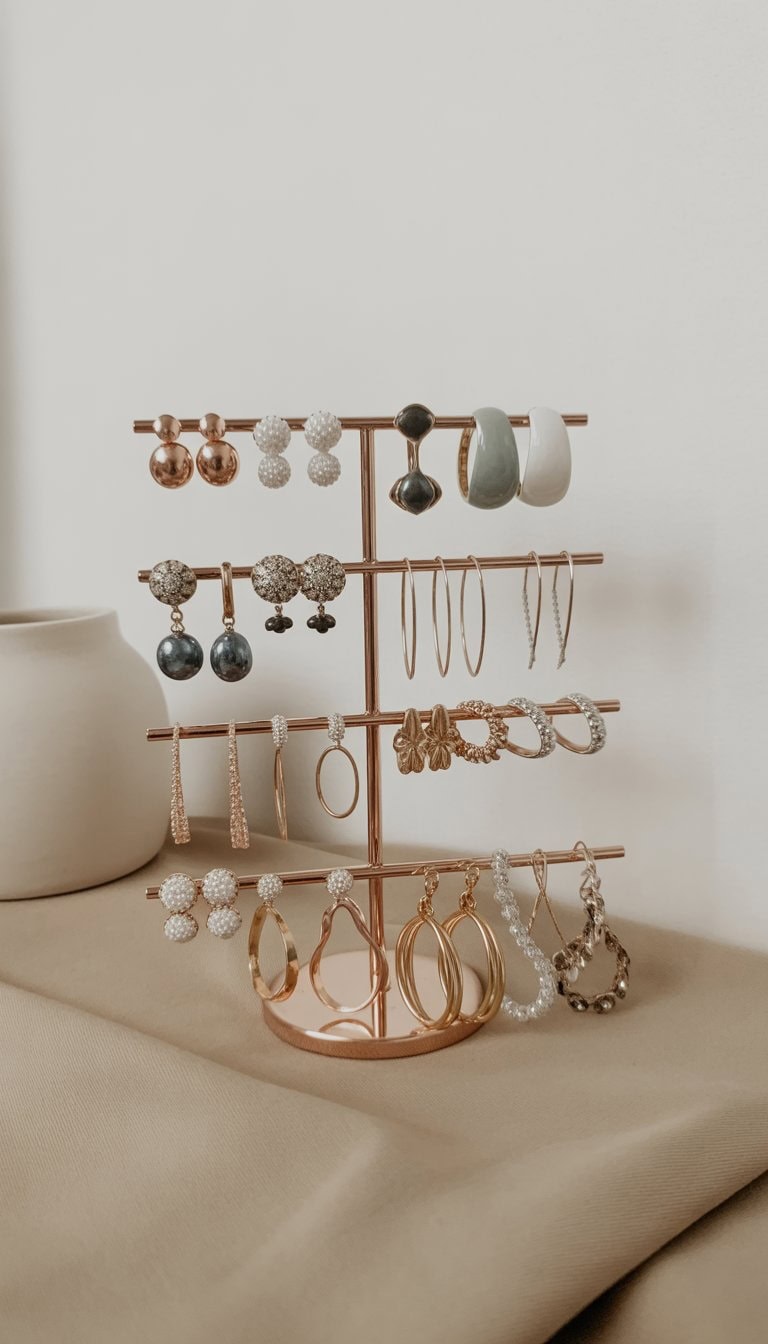
Use a tiered earring display stand for visual height
I love using tiered earring display stands when setting up my booth. They give my table more height, which catches people’s eyes from across the room. This makes my earrings stand out.
With a tiered stand, I can fit more pairs in a small space. It also helps me keep styles organized and easy for shoppers to browse.
There are lots of DIY and store-bought options out there. For more inspiration, I like to check out earring display ideas on Pinterest.
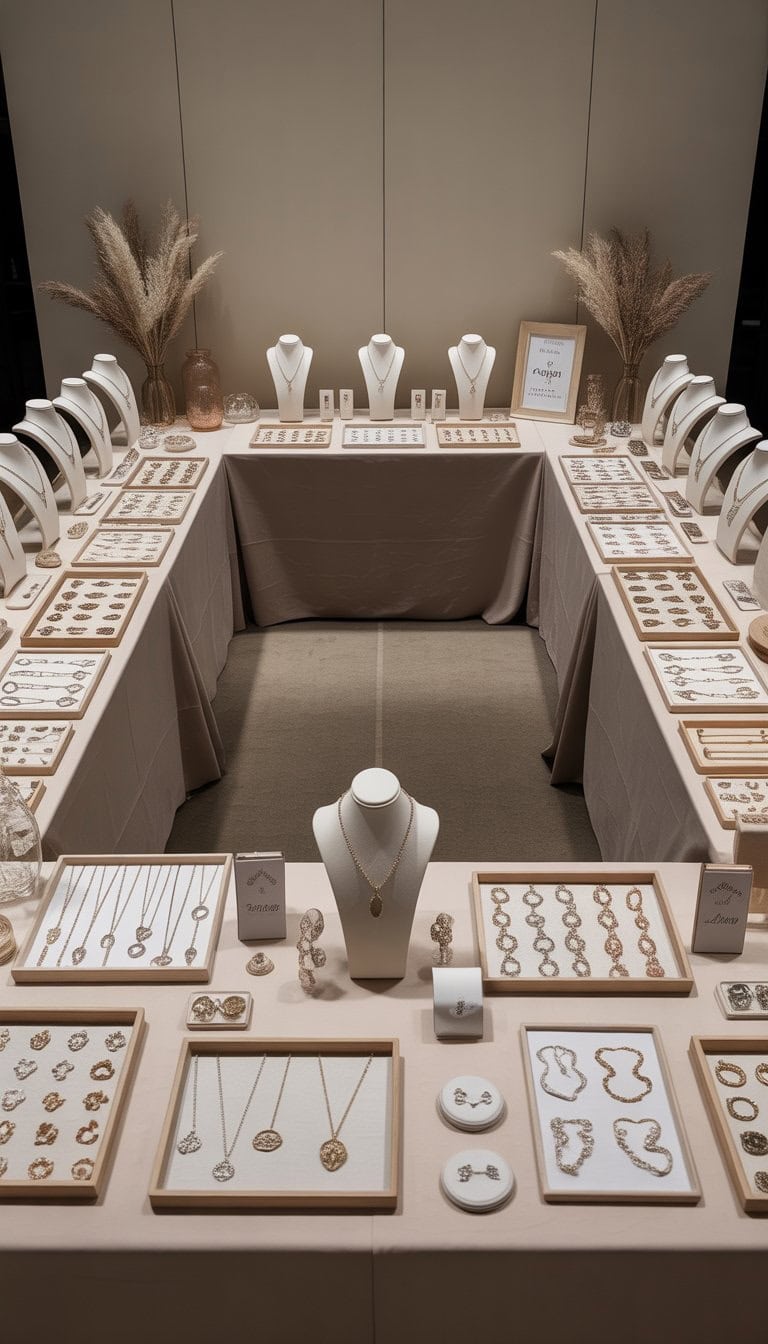
Create a U-shaped booth layout with three tables
I love using a U-shaped booth because it invites people in and makes my display feel open. I set up three tables to form the U, allowing shoppers to walk in and see my jewelry from every angle.
This setup gives me space to arrange different collections on each table. Customers can browse easily without feeling crowded. When I stand at the back, I can greet everyone and keep an eye on my products.
If you want a fresh look, check out this U-shape vendor booth setup for inspiration. It’s simple, but it makes a big impact on sales.
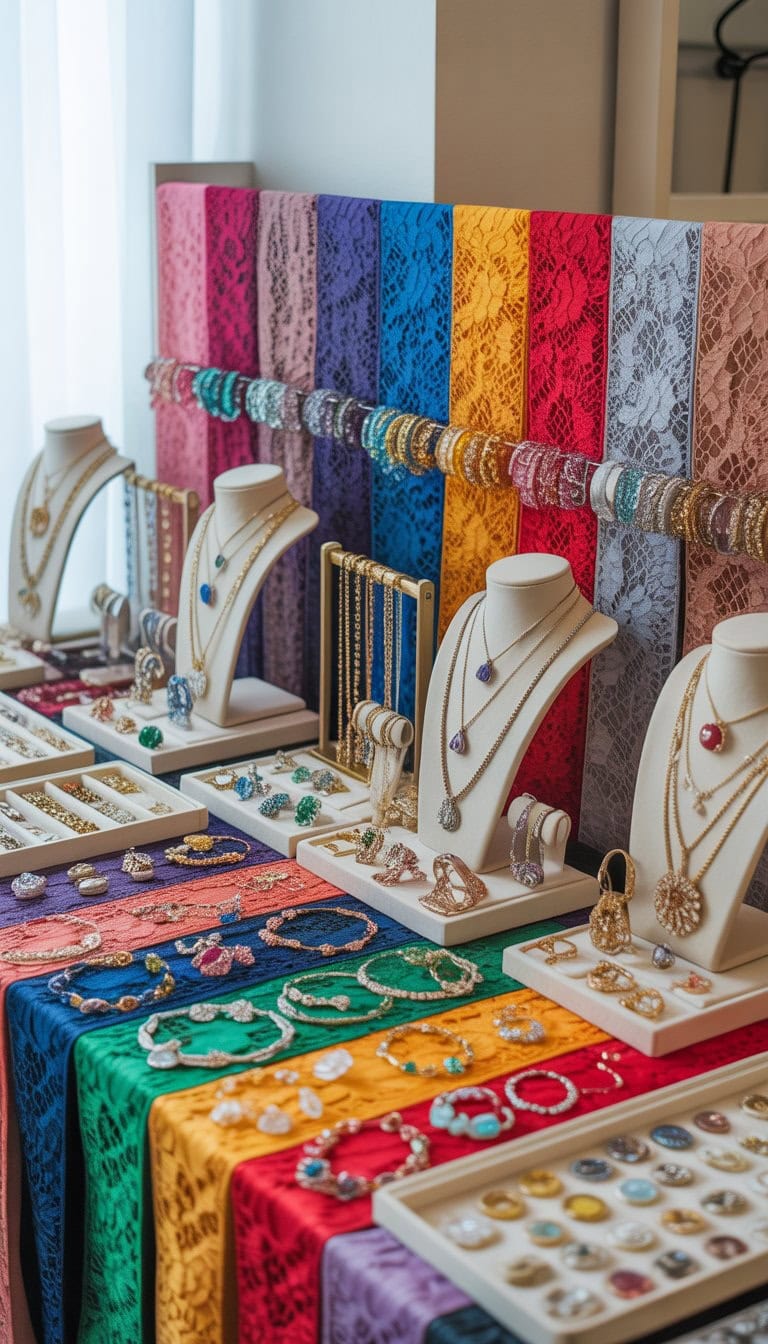
Incorporate colorful lace fabrics as display backdrops
I like to use colorful lace fabrics to make my booth feel warm and inviting. Lace adds texture without being heavy or blocking light. I drape the fabrics behind my jewelry table for a soft, eye-catching look.
Mixing different shades keeps things interesting. If I want a bold style, I choose bright colors that really stand out. For a softer touch, I stick with pastels or neutral tones.
Sometimes, I layer lace over a solid-colored cloth to help my jewelry pop. This simple trick draws attention and makes my display unique.
Use cork coasters glued into towers for necklace racks
I love using cork coasters to display necklaces because they are cheap and easy to find. By hot gluing them on top of each other, I make sturdy towers for hanging chains or pendants.
I can adjust the height to fit longer or shorter necklaces. I sometimes paint or decorate the cork for a fun custom look. This idea saves me money and gets lots of compliments at markets.
If you want more details, check out this suggestion about cork towers for jewelry display from Reddit.
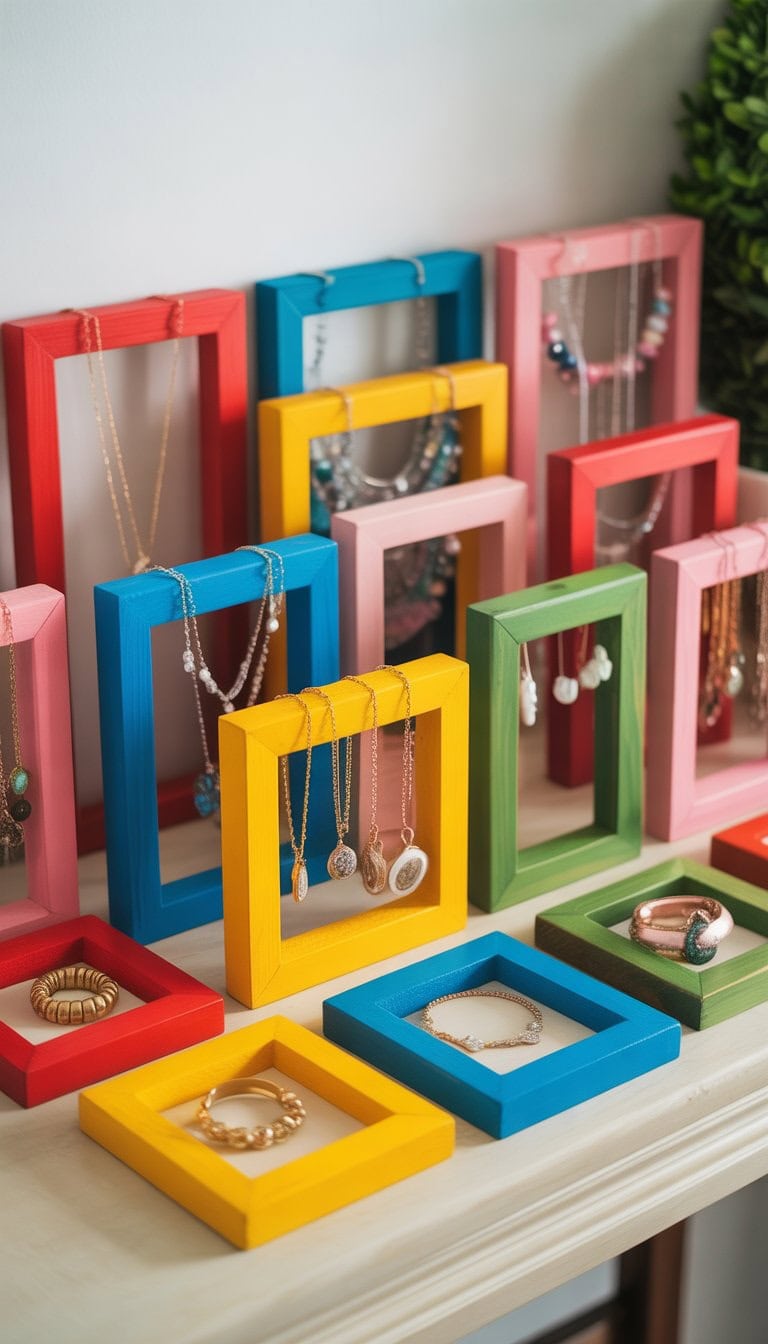
Paint wooden frames in bold colors for eye-catching contrast
I like using bold colors to make my jewelry displays pop. When I paint wooden frames in bright shades like red, teal, or yellow, my pieces stand out more. The contrast helps catch people’s attention from a distance.
I often look for frames at thrift stores or discount shops. Plain wood is easy to paint, and a fresh coat gives a clean, modern look. I’ve noticed that even simple frames become special with a splash of color.
Choosing colors that match my brand or gemstone hues can make the whole display look put-together. It doesn’t have to cost much, but the impact is huge for my table’s style. For more tips, I found useful ideas from ShopPOP Displays on using color in jewelry displays.
Add cardboard dividers to organize different jewelry types
I love using cardboard dividers when I set up my vendor display. They make it simple to keep earrings, necklaces, and rings in their own spaces. This way, it’s easy for shoppers to find what they want.
Cutting and arranging pieces of recycled cardboard for each section is budget-friendly and effective. I like to decorate the cardboard with paper or paint to match my style. It keeps everything neat and gives my booth a cleaner look.
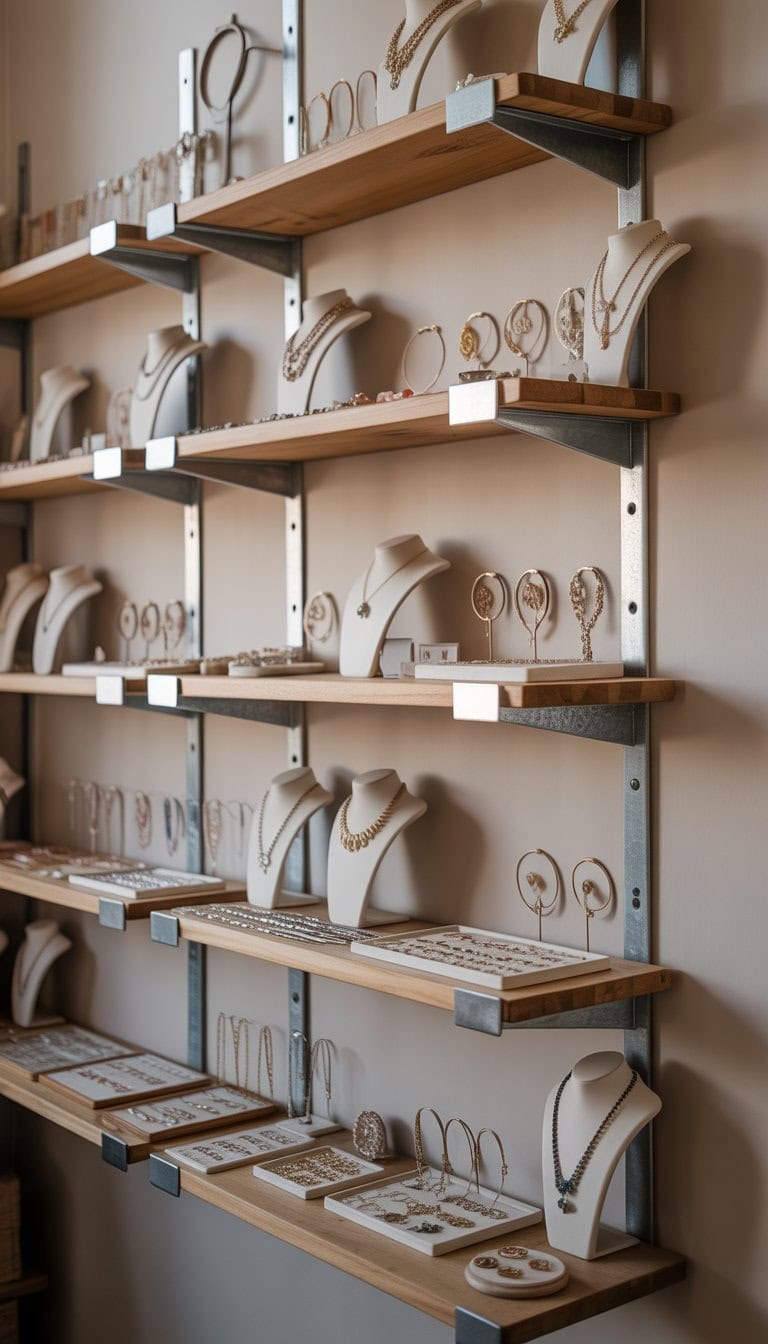
Use metal shelf brackets to create sturdy wall displays
I like to use metal shelf brackets because they hold up my jewelry displays really well. They don’t wobble, and I can trust them with heavier pieces.
Sometimes I buy simple black brackets for a clean look. Installing a few in my booth gives me extra space on the walls.
I hang necklaces, earrings, and even trays on shelves supported by these brackets. For a bold touch, I’ve used heavy duty brackets that look industrial but neat.
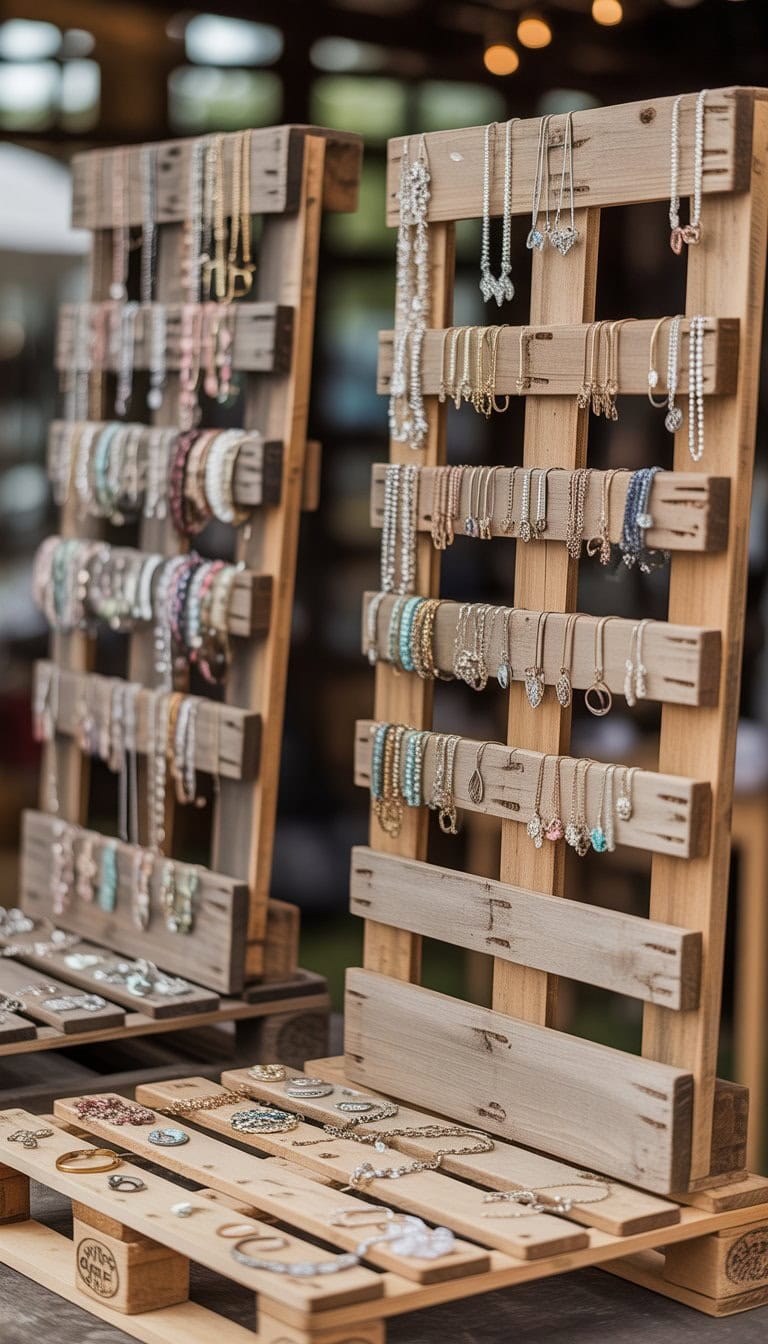
Repurpose vintage pallets as rustic jewelry display boards
I love using old pallets for jewelry displays because they give my booth a unique, rustic look. The wood is sturdy and has great character, which helps my jewelry stand out.
With a few hooks or small nails, I can easily organize necklaces, bracelets, and earrings. Pallet boards are also easy to paint or decorate with stencils for a personal touch.
I enjoy knowing that I’m reusing materials and saving money. For inspiration, I like to look at pallet-based jewelry holders like the ones on Pinterest and other DIY ideas.
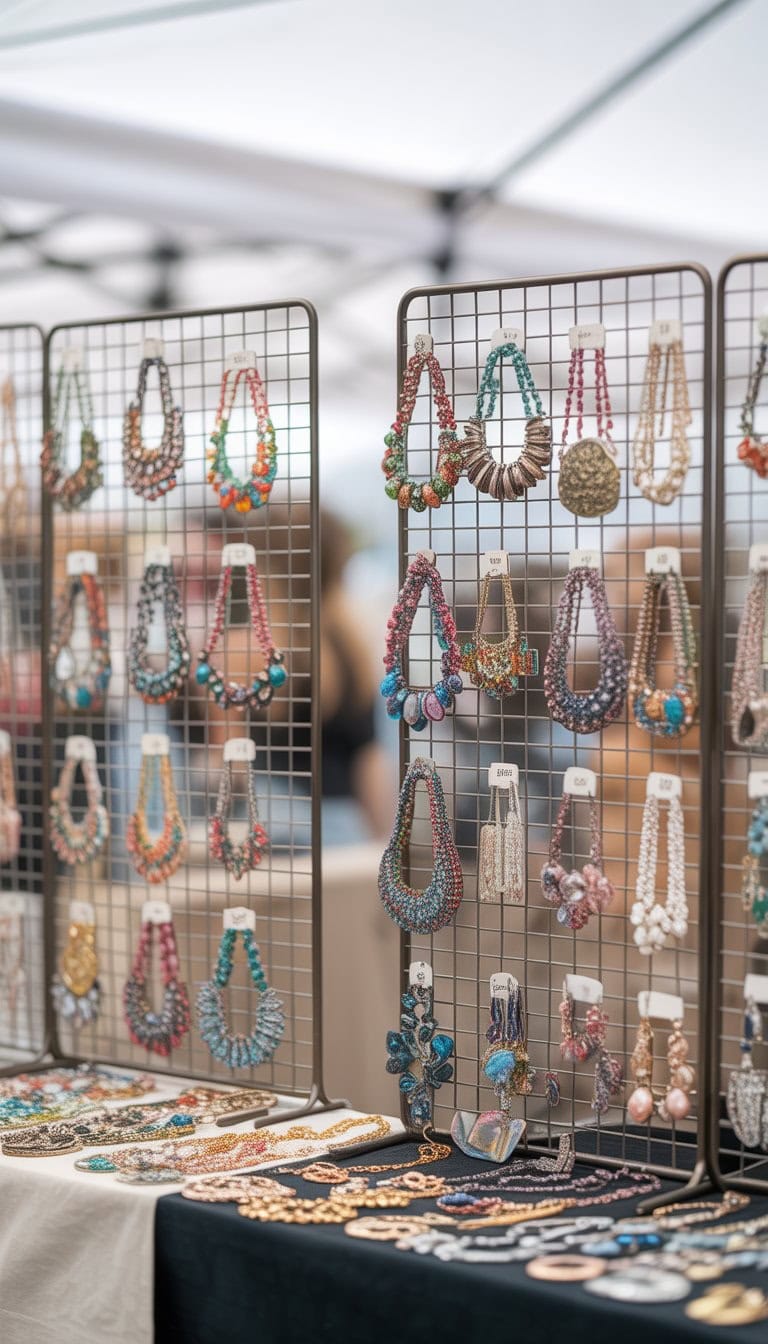
Hang statement necklaces on metal grid panels
I love using metal grid panels to hang my boldest statement necklaces. These grids help me keep my display neat, so customers can see each necklace clearly. The open design also lets me swap out pieces quickly if I want to change up the look.
When I set up my booth, I can move the panels around to fit any space. Sometimes I add hooks for extra storage or to hang matching earrings. I find ideas for layouts and new ways to arrange my jewelry by looking at grid wall jewelry display tips.
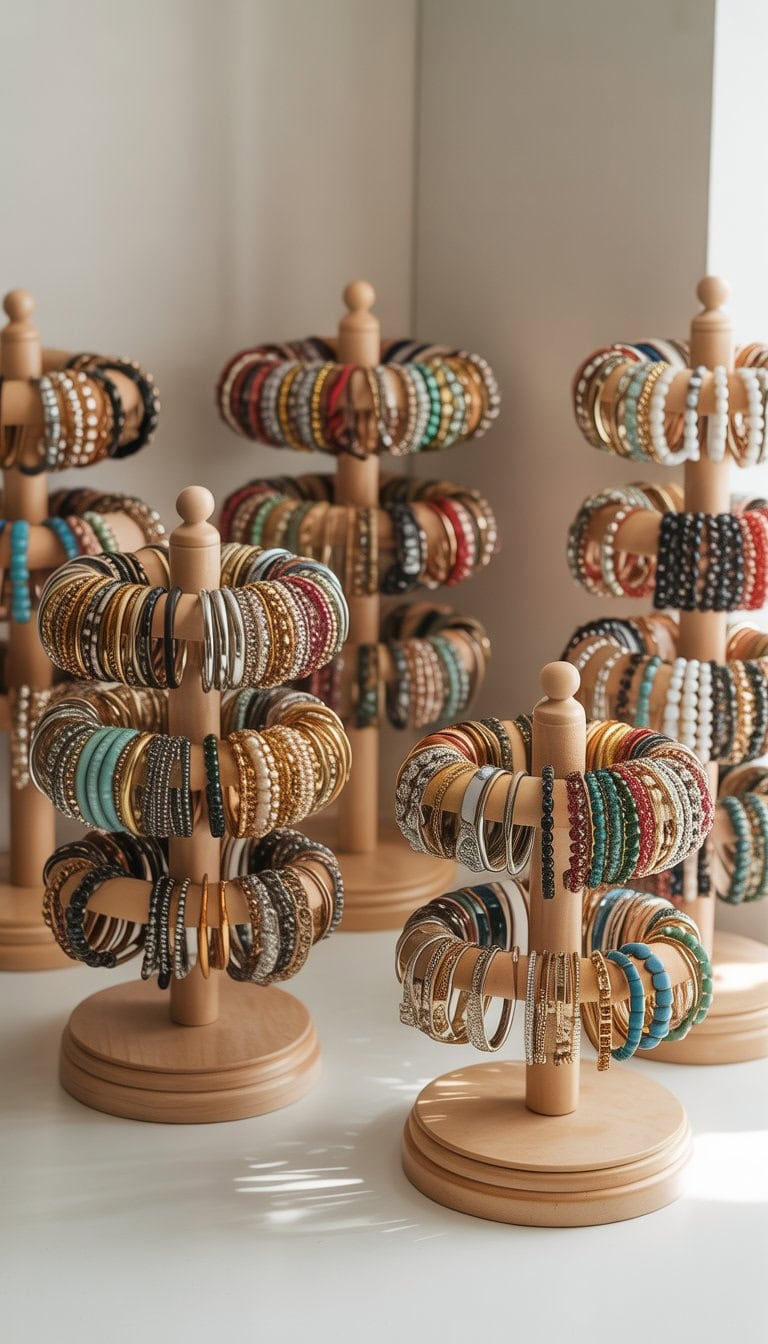
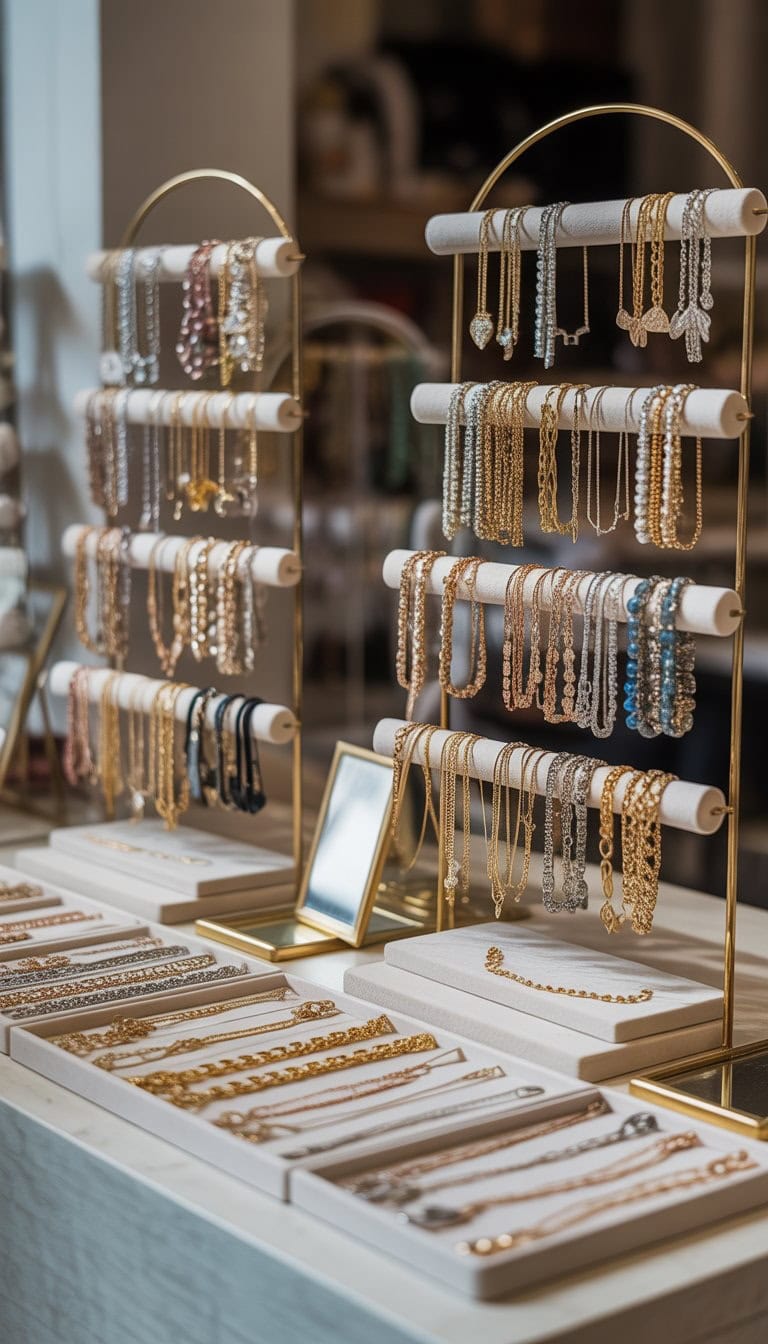
Use rotating carousel stands for bracelets
I like using rotating carousel stands to show off bracelets at my booth. They make it simple for shoppers to spin and see every style without picking up each item. This helps keep my display neat and inviting.
A rotating stand saves space by holding lots of bracelets on hooks or bars. Customers can browse more easily, and I can fit more designs in a smaller area.
I’ve found that stands with 360-degree rotation are especially helpful. These stands work well for both small markets and bigger craft fairs, making my setup look more professional and organized.
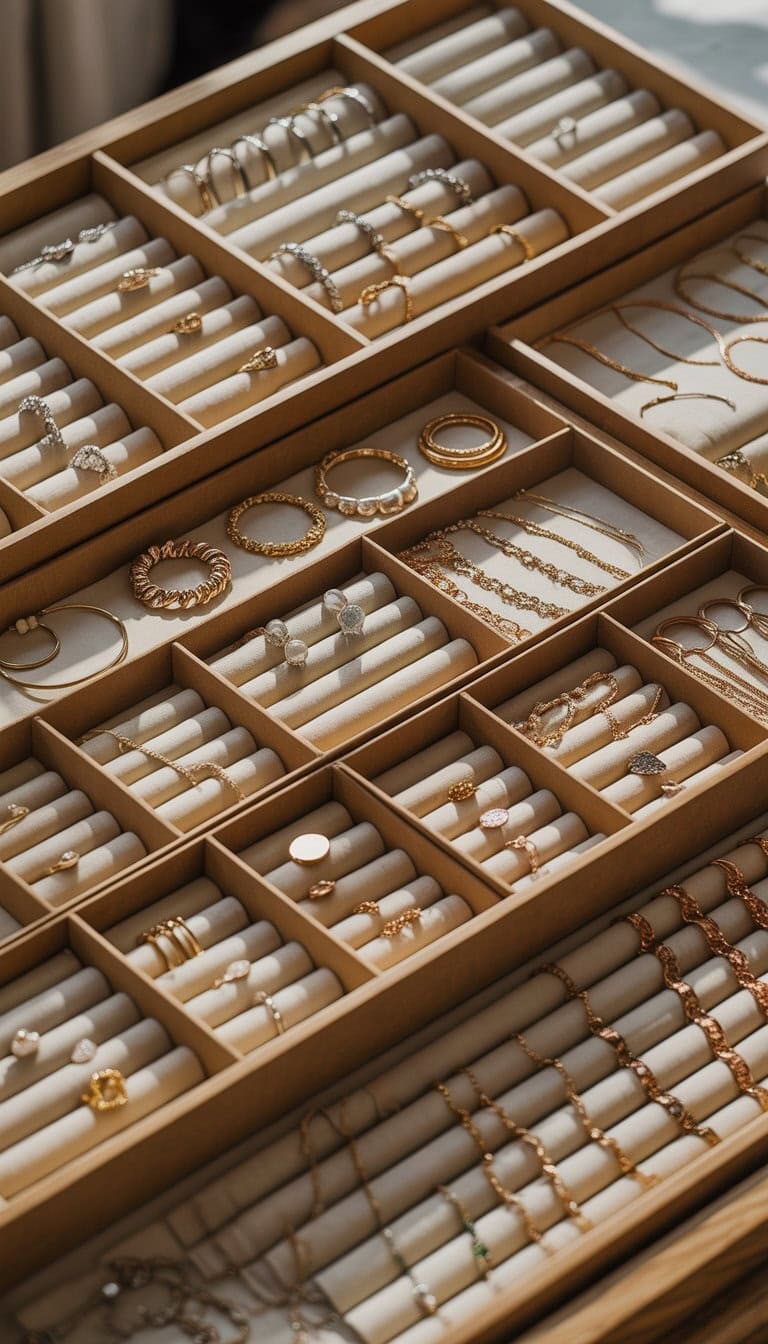
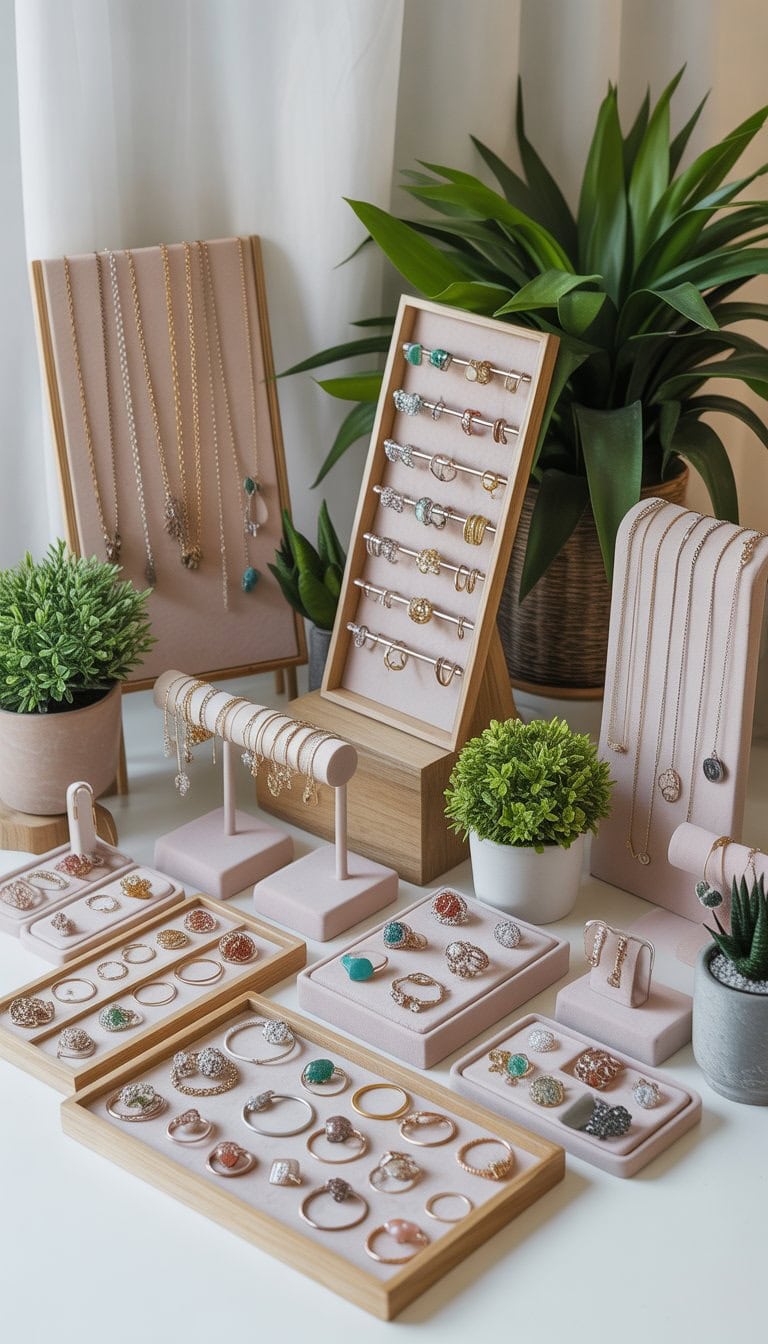
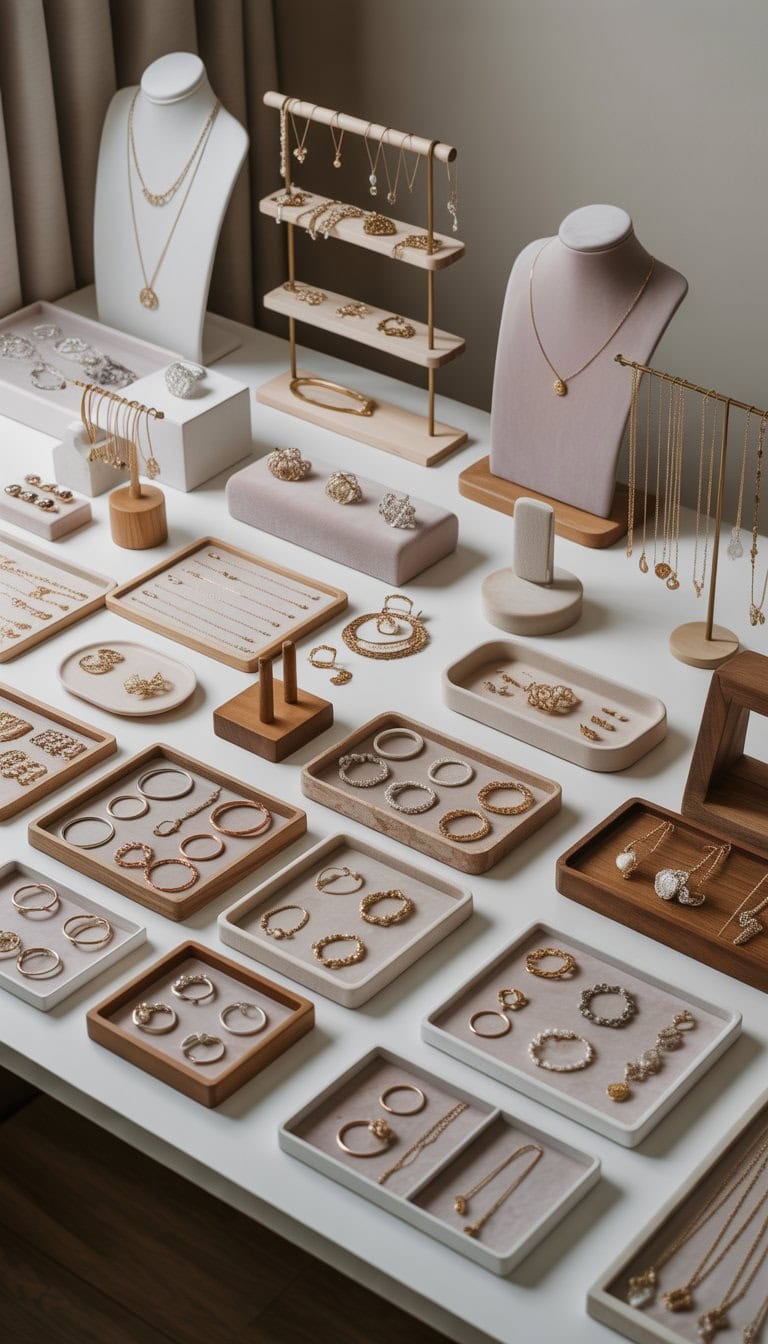
Incorporate velvet-lined trays for rings
I like to use velvet-lined trays when I display rings. The soft velvet helps keep each ring in place, so nothing slides around or gets lost. It also looks really nice on the table and gives the rings a touch of class.
Velvet trays come in different colors and sizes, which lets me match my display to my brand or style. When I group rings by style or metal, everything looks cleaner and more organized.
If you want to see some creative options for velvet ring trays, check out these custom velvet ring trays.
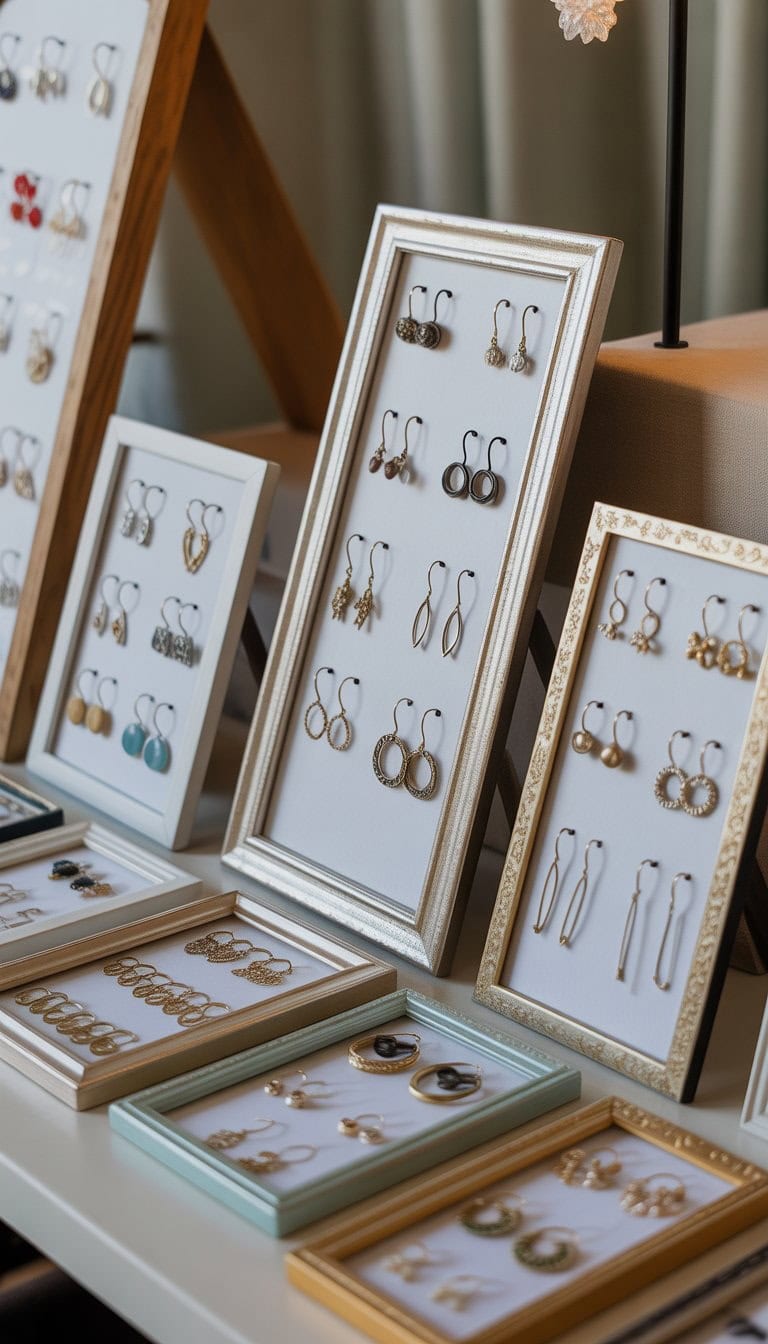
Attach small hooks to picture frames for earring hanging
I love using old picture frames to display earrings. It’s easy to transform one by attaching rows of small hooks along the top or bottom edges. This setup makes it simple for me to see all my pairs at a glance.
I can mix and match frames in different colors for a fun look. Sometimes I find unique frames at thrift stores and give them new life. For extra style, I choose decorative hooks that match my display’s vibe.
This method keeps my earrings neat and ready to grab. It also adds charm to my vendor table and helps my jewelry stand out. For more ideas, check out these picture frame earring displays.
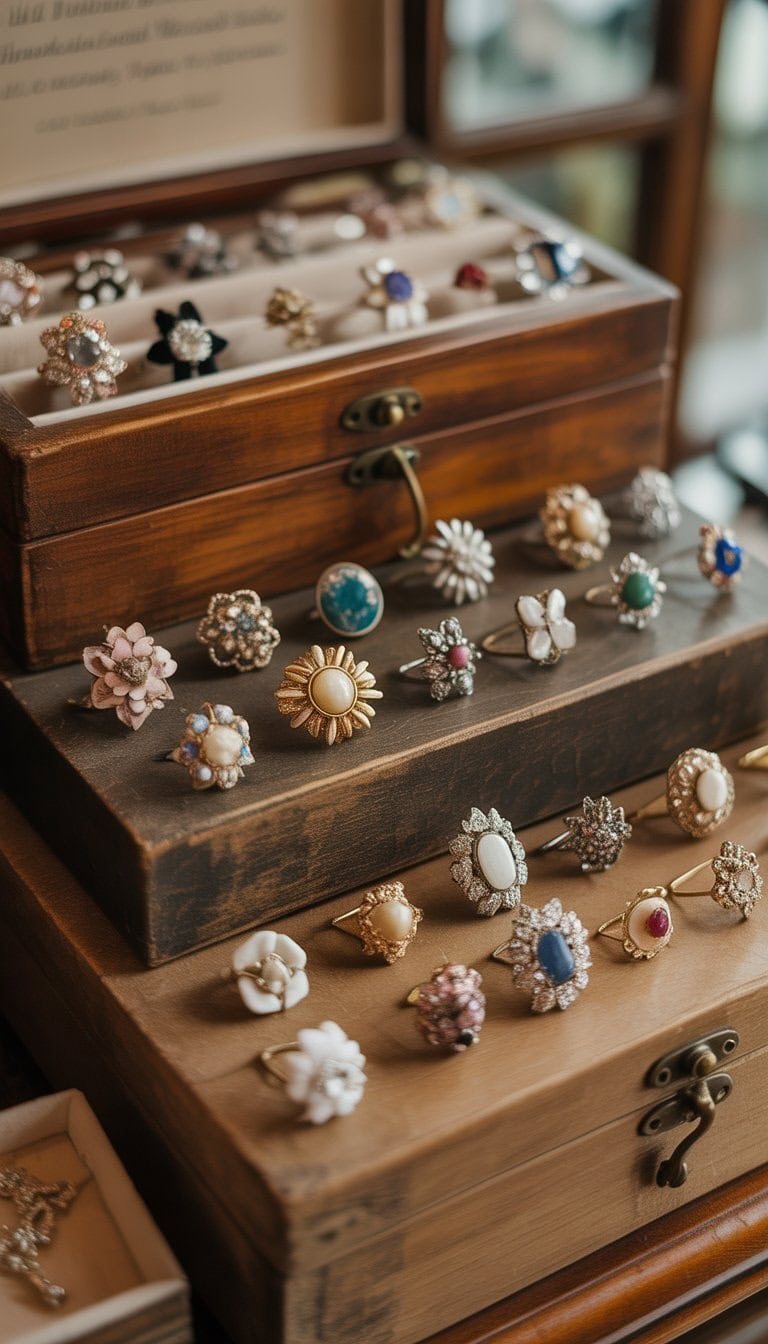
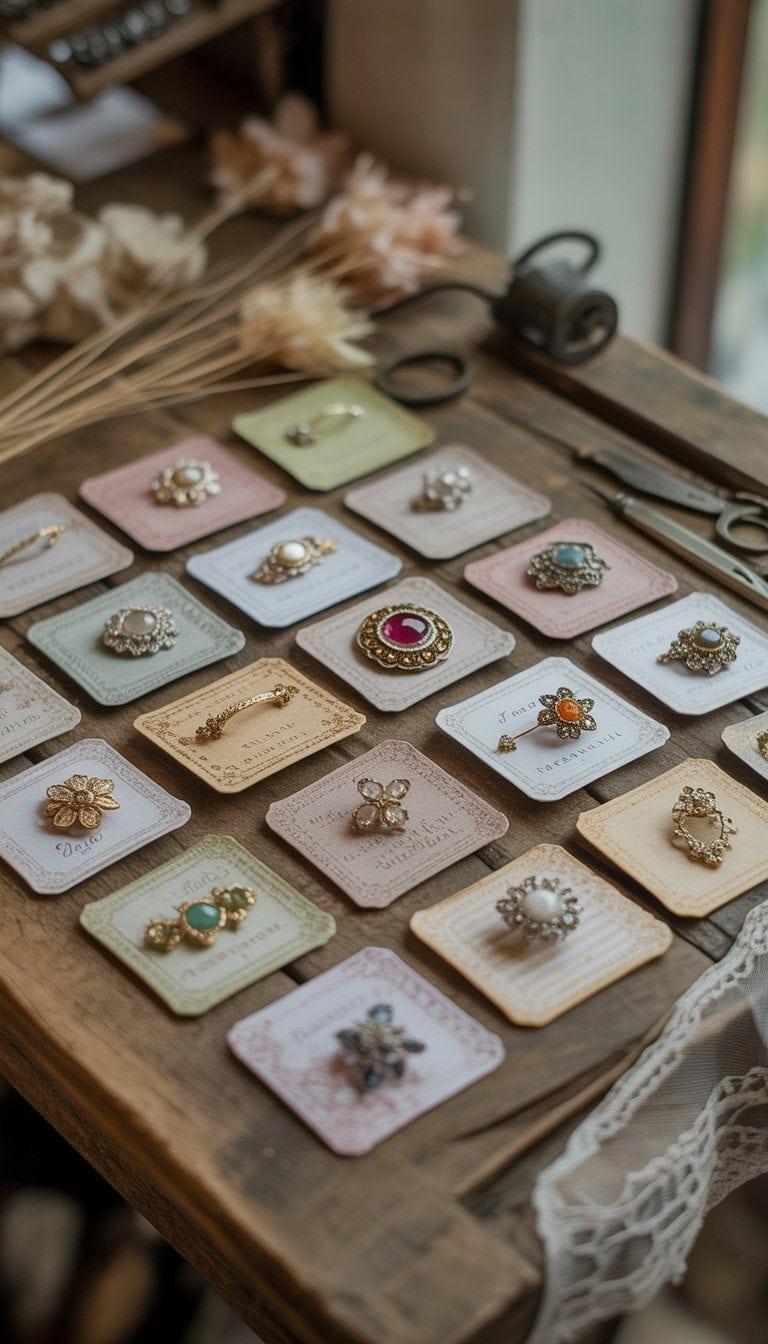
Display brooches on antique wooden boxes
I love using antique wooden boxes to show off my favorite brooches at vendor events. The aged wood creates a warm vintage look that always gets noticed. I carefully arrange the brooches on top, leaving space so each one stands out.
To keep them secure, I use a bit of fabric or velvet as a base inside the lid. This makes it easy for shoppers to see every detail. I’ve found that using these boxes adds a touch of nostalgia and charm that draws people in.
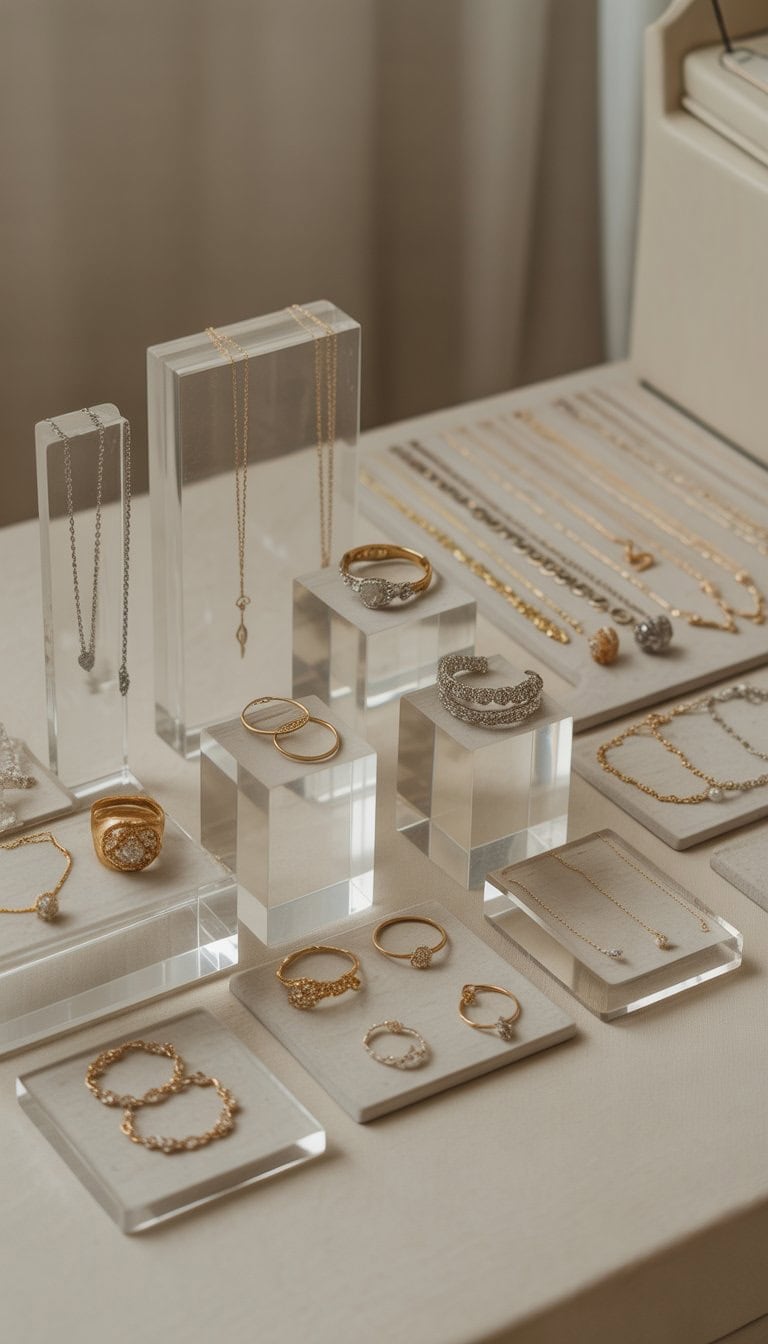
Use clear acrylic risers to make pieces pop
I love using clear acrylic risers at my booth. They add height, which helps my jewelry stand out and keeps everything looking neat.
The see-through design means customers focus on the pieces, not the display. These risers work well for arranging bracelets, earrings, and necklaces at different levels.
I’ve found that acrylic risers are light and easy to pack. They look modern and match any color scheme. If you want to get some, you can find acrylic display risers online or from craft supply stores.
I find old book pages or floral scrapbook paper work well. Sometimes I trim the edges with decorative scissors for a softer look.
Adding little details, like faux pearls or gold ink, takes just minutes but makes a difference. For more inspiration, I check out brooch display ideas on Pinterest. Every display card feels like a tiny work of art.
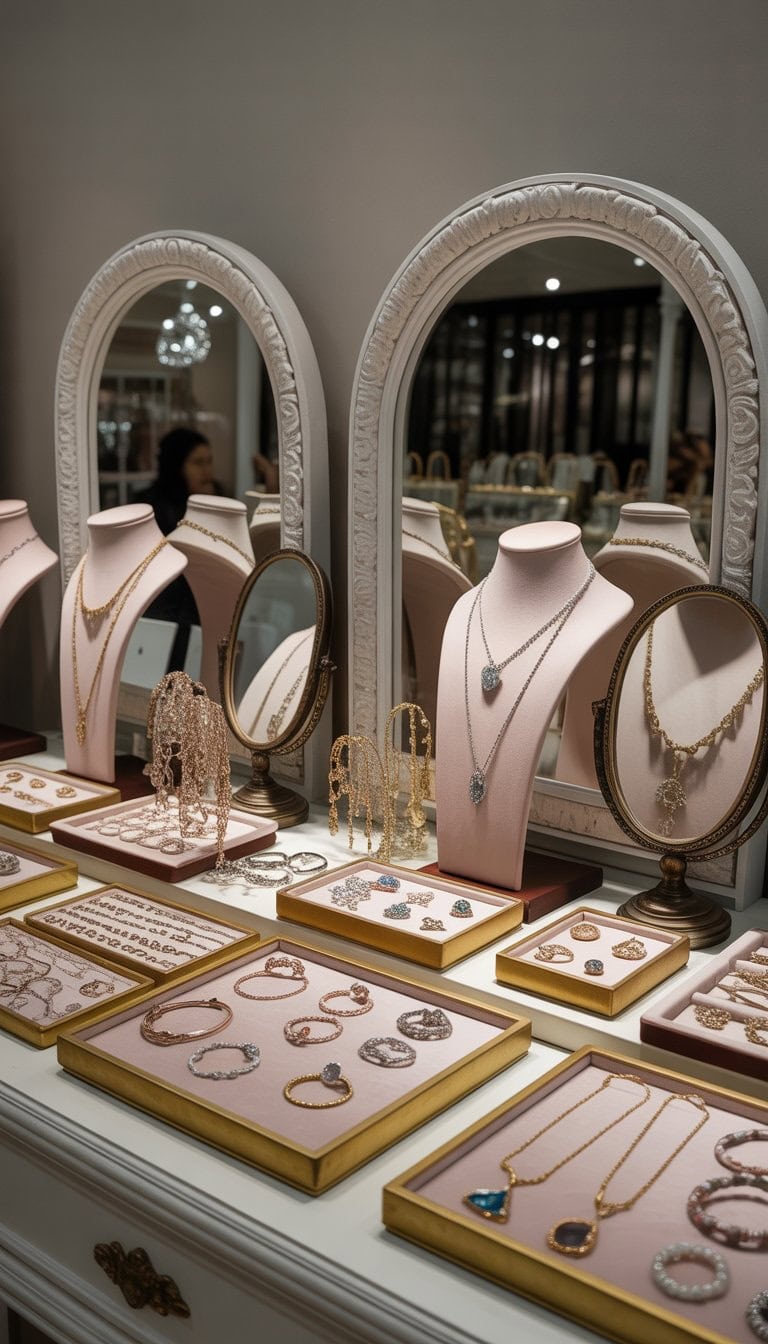
Incorporate mirrors with ornate frames for elegance
I love using mirrors with ornate frames to make my jewelry displays look more elegant. These mirrors do more than reflect; they draw attention to the jewelry and add a special touch to my setup.
When I mix vintage-style frames or gold-trimmed ones, they really stand out and feel inviting. It feels like each piece of jewelry gets its own spotlight in front of a beautiful backdrop.
Sometimes, I layer multiple mirrors together for extra depth and charm. Using ornate mirrors can help my booth feel more stylish and unique, just like in some decorated mirror displays.
Use adjustable clamp lamps to spotlight key pieces
I love using adjustable clamp lamps at my booth. These lamps are easy to attach to tables or shelves and can be pointed exactly where I need more light.
When I want to highlight my best rings or necklaces, I just tilt a clamp lamp toward those pieces. The focused light makes them stand out so much more.
Clip-on styles are a favorite of mine because they’re simple to set up and move. I’ve found that even a few clip-on lamps can make my displays look brighter and more inviting.
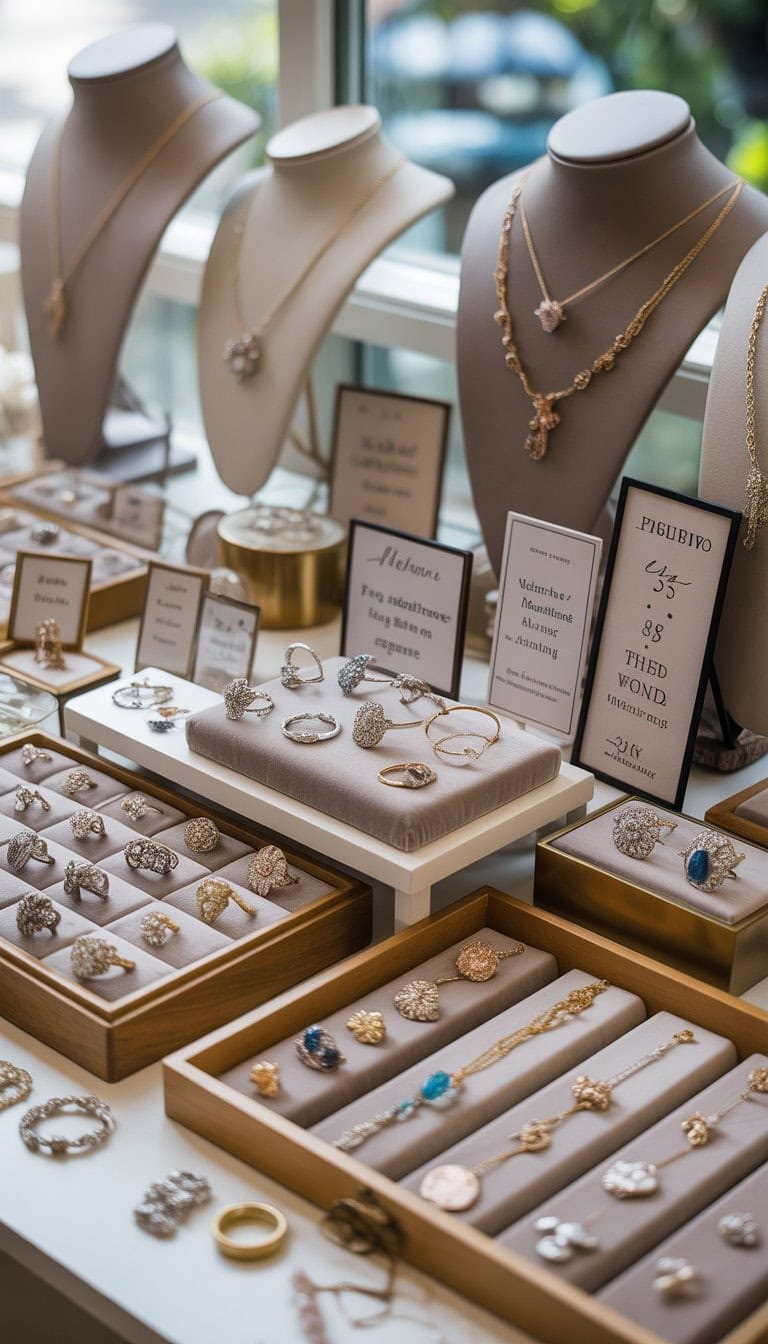
Place statement signboards with brand story
I always make sure to add a statement signboard that shares my brand story at my jewelry booth. It helps people get to know me and my work in just a few seconds.
Short and clear messages work best. My favorite signs highlight how I started making jewelry and what inspires my designs.
A signboard with my logo and story helps my booth feel friendlier and more personal. Visitors often stop and read it, and sometimes it starts conversations. For layout inspiration, I like to check out craft booth display ideas online.
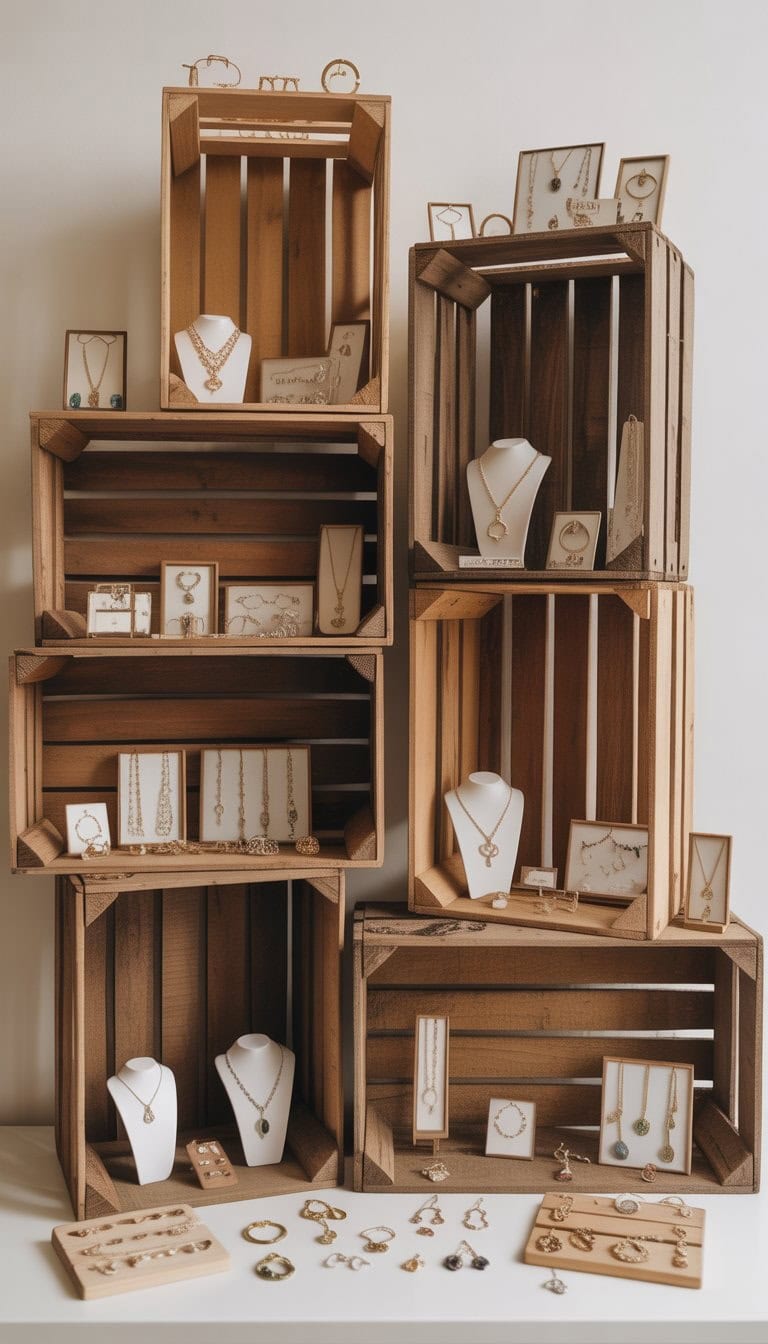
Use wooden crates stacked for multi-level displays
I love using wooden crates to make my jewelry display more interesting. By stacking crates, I can create different levels that catch people’s attention. This makes it easier for shoppers to see all of my pieces at a glance.
Sometimes I place the crates on their sides to make quick, open shelving. I also like how I can move the crates around to fit any space. There are so many creative ways to use crates for displays, so I always find a setup that works for me.
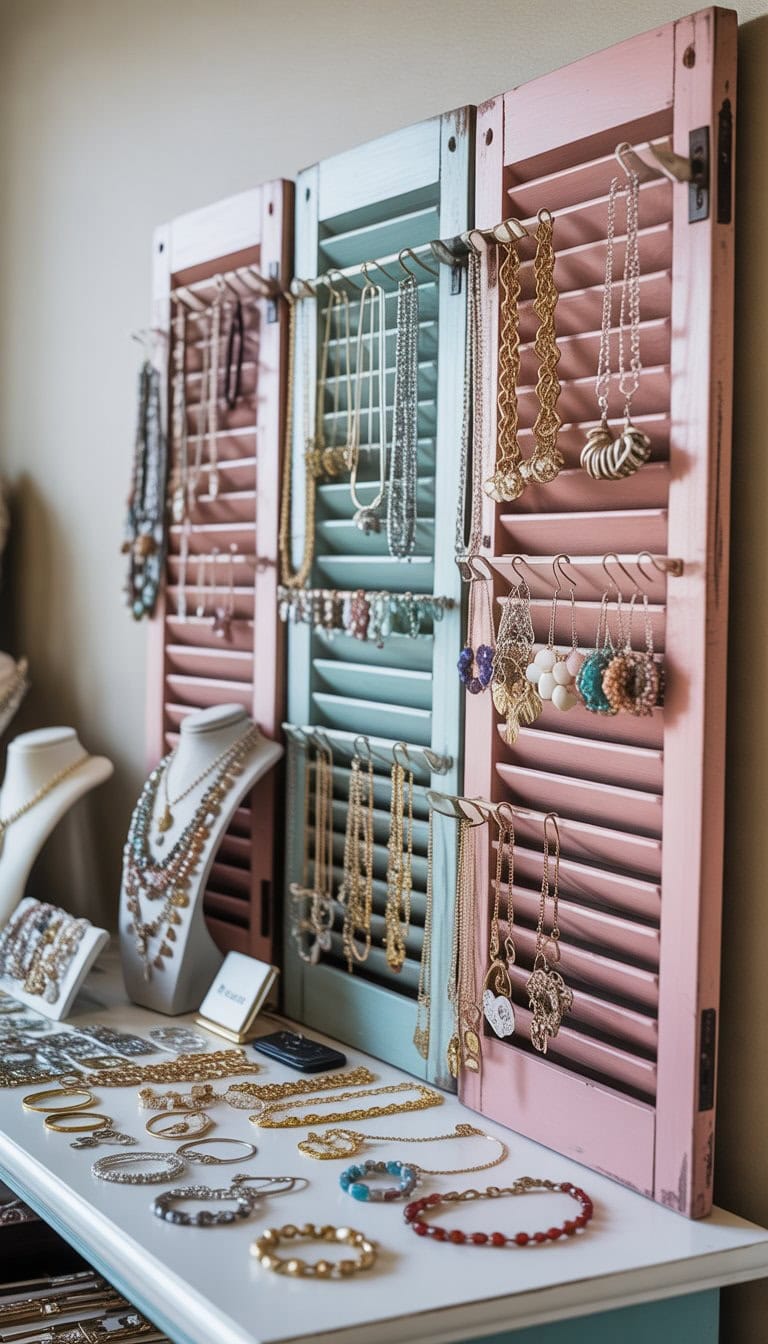
Hang jewelry on repurposed window shutters
I love using old window shutters as a creative way to display jewelry. The slats are perfect spots to hang earrings, necklaces, or bracelets, keeping them organized and easy to see.
I sometimes add hooks or small S-hooks to hold pieces that don’t fit between the slats. Painting the shutters in a fun color helps them stand out at my booth.
Repurposed shutters give my display a vintage, handmade vibe that draws people in. If you want more tips, you can see how others use shutters for jewelry displays.
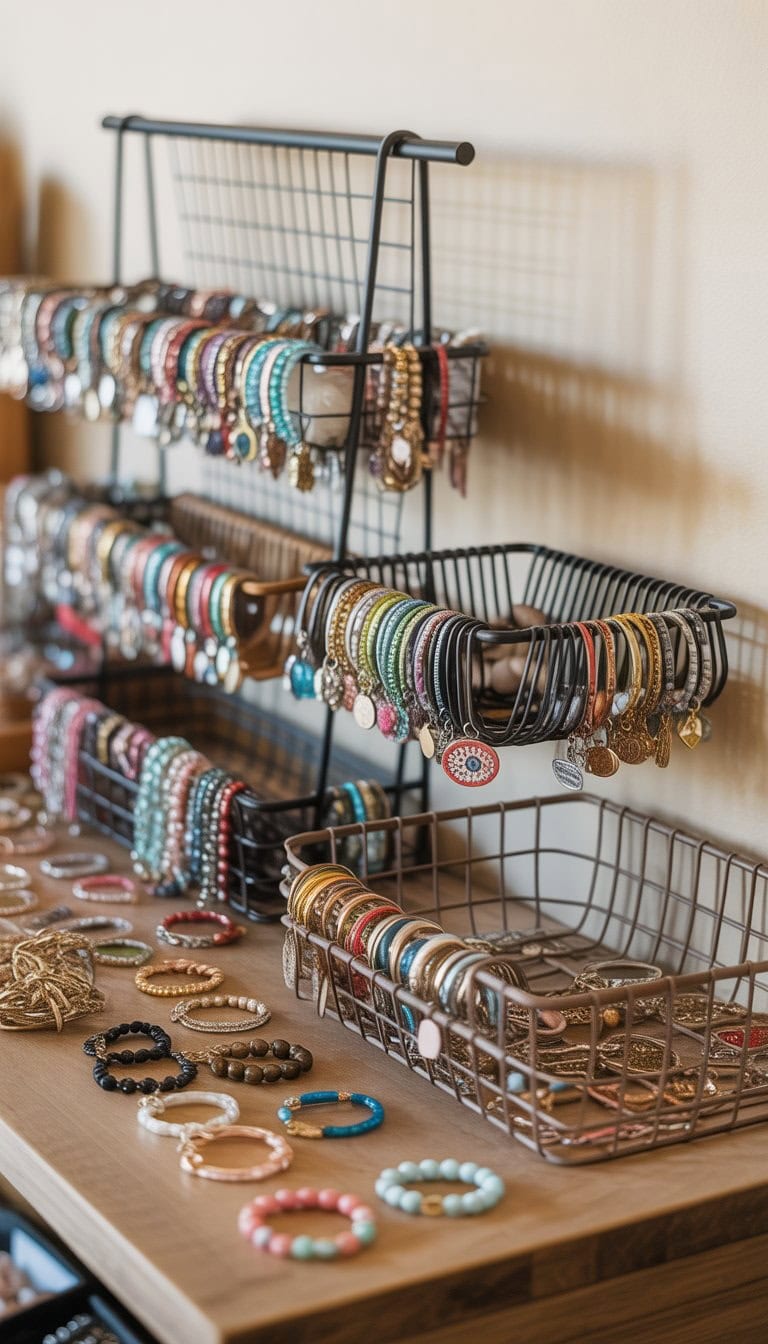
Use wire baskets to hold loose charm bracelets
I love using wire baskets for displaying loose charm bracelets at my booth. They create a relaxed and open feel, allowing shoppers to see all the bracelets at a glance. It’s easy for people to pick out their favorites and try them on.
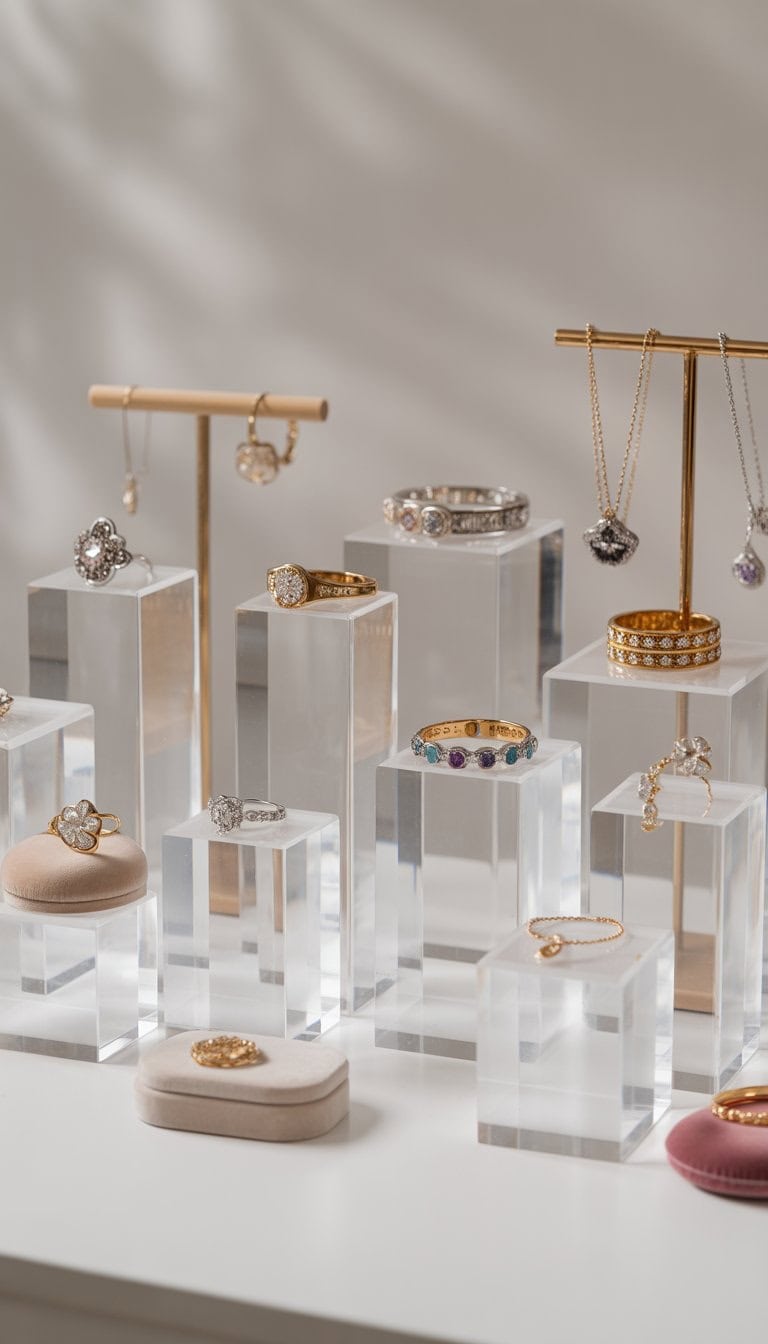
Employ short acrylic risers for layered presentation
I love using short acrylic risers at my table because they create height and help my jewelry pop. Instead of everything sitting flat, I can make layers that catch people’s eyes. Simple setups feel more professional right away.
Short acrylic risers are very versatile. I use them to group bracelets, necklaces, earrings, or even display sets together. They also work well for adding focus on new or unique pieces.
I like how easy it is to clean them and move them around. There are many options available, from clear to custom-sized types, like these acrylic display risers.
Add small potted plants for natural vibes
I like to use small potted plants in my jewelry booth to bring in some life and color. It makes my table feel fresh and helps my displays look less cluttered.
I find that plants like succulents or little ferns work best because they’re easy to take care of.
Sitting a plant near my jewelry stands gives my space a calm, welcoming touch. If you want even more ideas, check out these plant vendor booth display ideas.
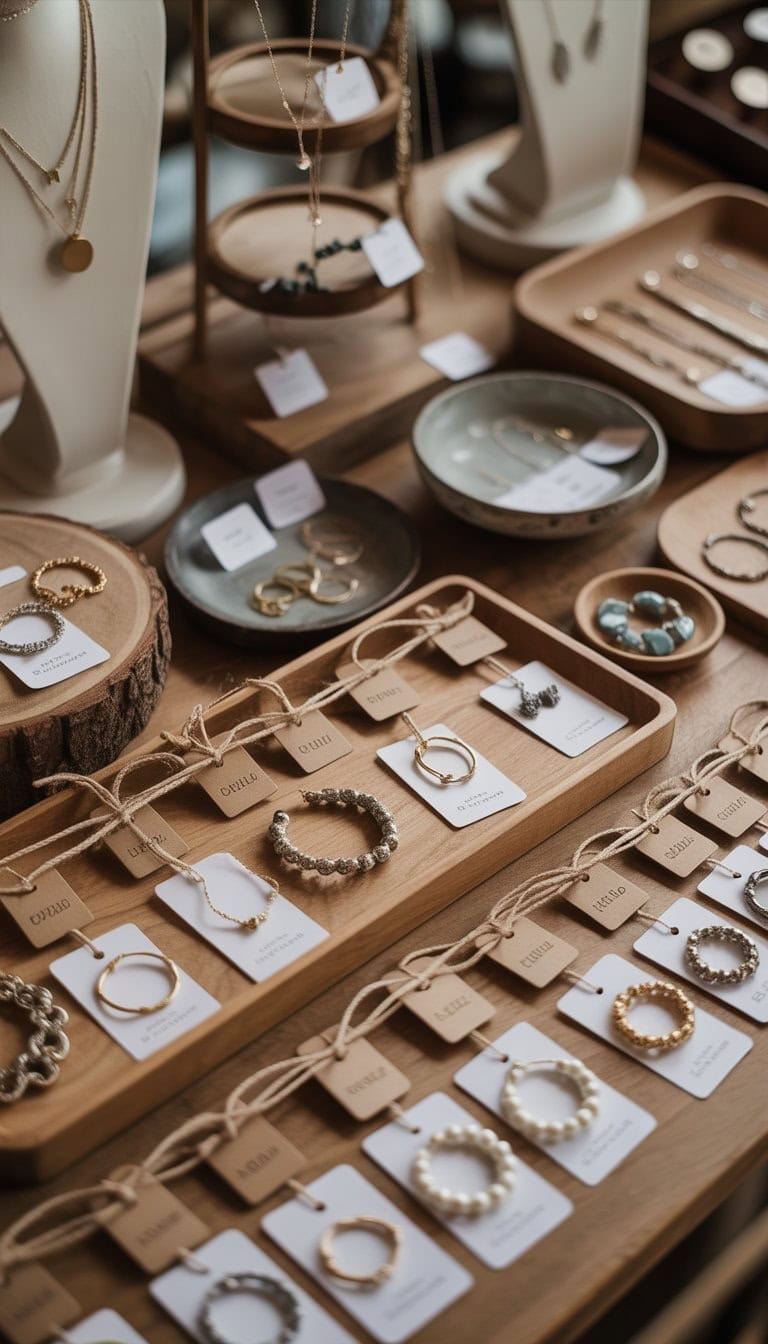
I love using kraft paper tags and twine to label my jewelry at shows. They look simple and rustic, which fits my style. The tags are easy to write on with a pen or marker.
Twine is sturdy and adds a touch of charm to every display. I can tie the tags onto bracelets, necklaces, or even earring cards. You can find packs of kraft tags and string online, like these kraft paper gift tags with twine.
This method makes my prices clear and keeps everything looking neat. It’s a small detail that helps my table stand out.
Use jewelry stands with multiple tiers for necklaces
I love using jewelry stands with multiple tiers for necklaces because they save space and keep things neat. With several levels, I can show off many styles at once without tangling. It’s easy for people to see every piece.
When I set up, I pick sturdy stands that fit my table. Simple designs make my necklaces stand out. You can find some great options for necklace display stands for vendors that work well for craft shows and markets. This setup always makes my booth look more professional and organized.
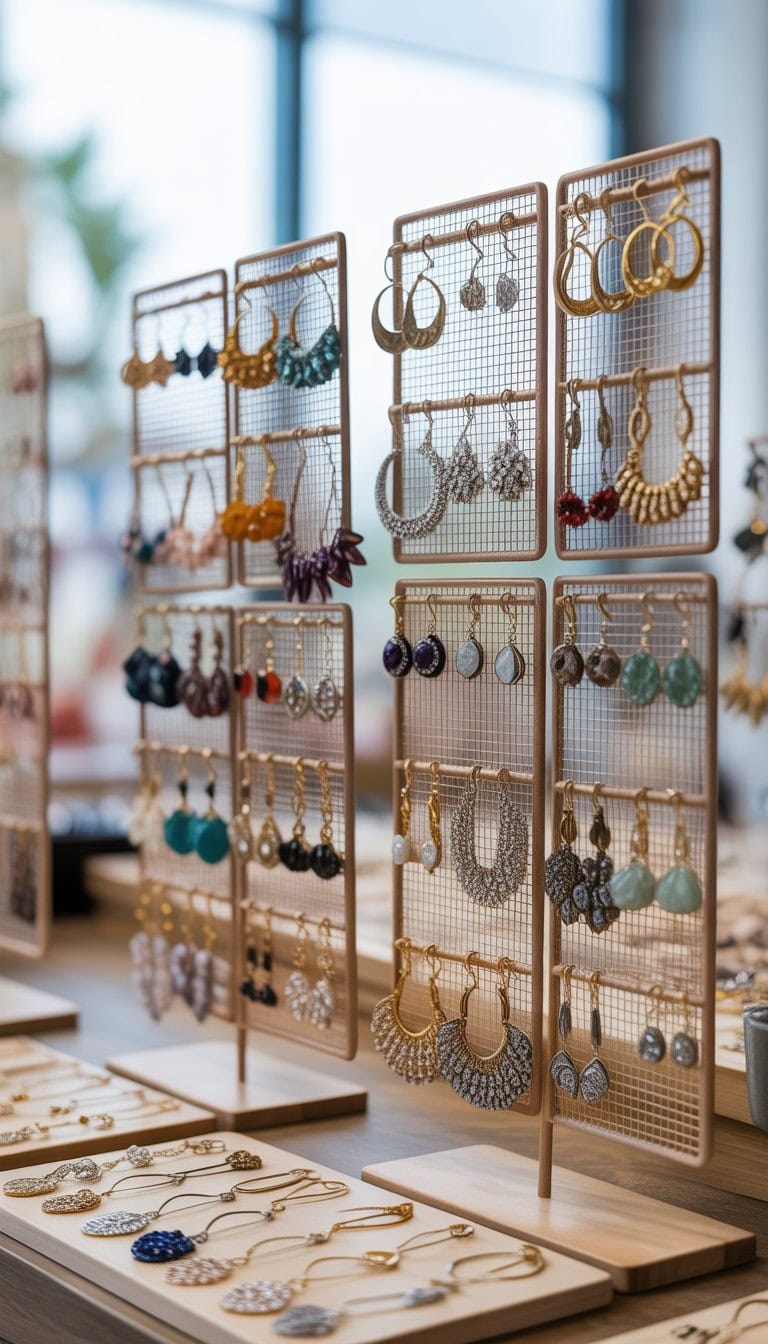
Hang earrings on decorative mesh panels
I like to use decorative mesh panels to show off my earring collection at events. The panels make it easy for shoppers to see each pair up close. It looks neat and draws attention to my table.
I hang earrings straight onto the mesh using simple hooks. This keeps everything organized and lets me mix and match designs. For more ideas on mesh and display setups, I often look at earring display inspiration.
Mesh panels are light and easy to move. They help me set up quickly and change my layout when needed.
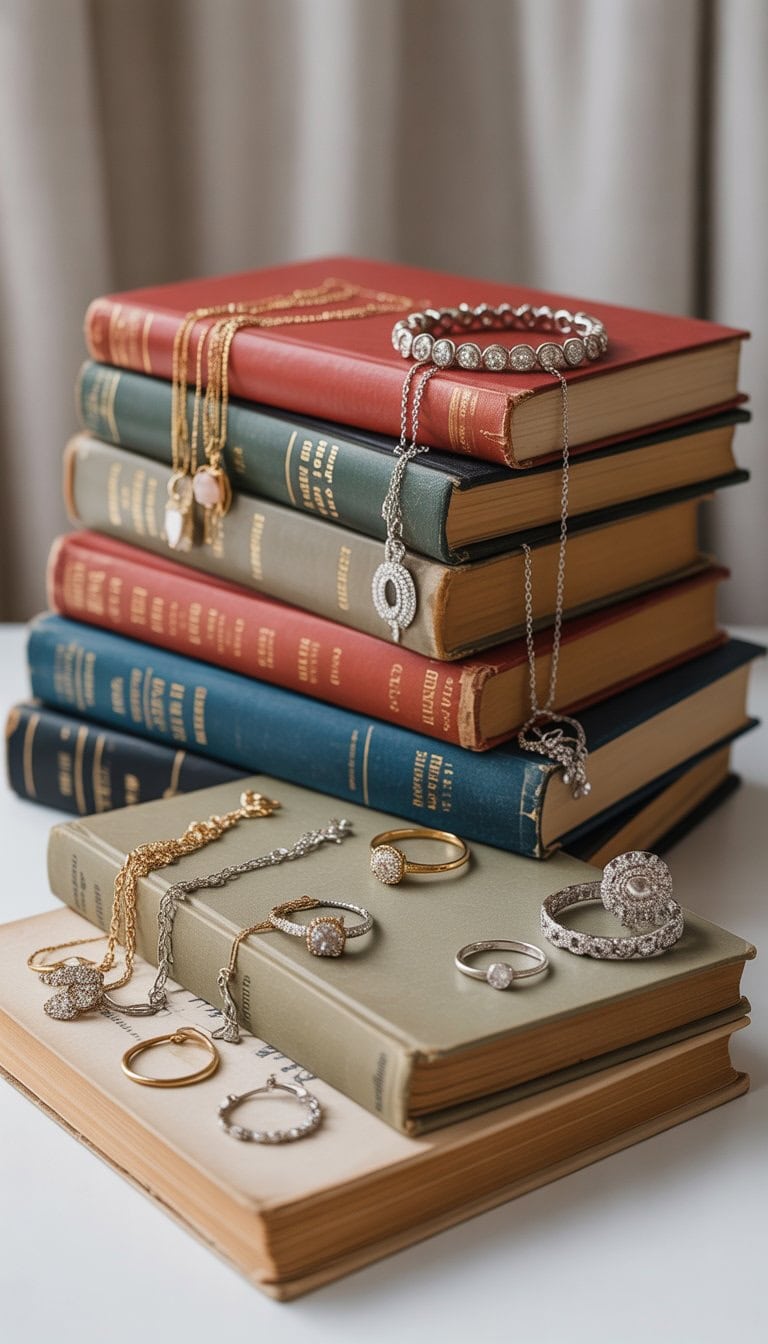
Display items on vintage books stacked creatively
I love using vintage books to show off jewelry in my booth. Stacking old books at different heights lets me create a layered look that draws the eye. It gives everything more character and charm.
I usually place rings or brooches right on top of a small stack. For necklaces, I drape them around the spines or fan them across the open pages.
It’s an easy way to add texture and warmth to my display. Plus, books are lightweight and simple to move around whenever I want to try a different setup.
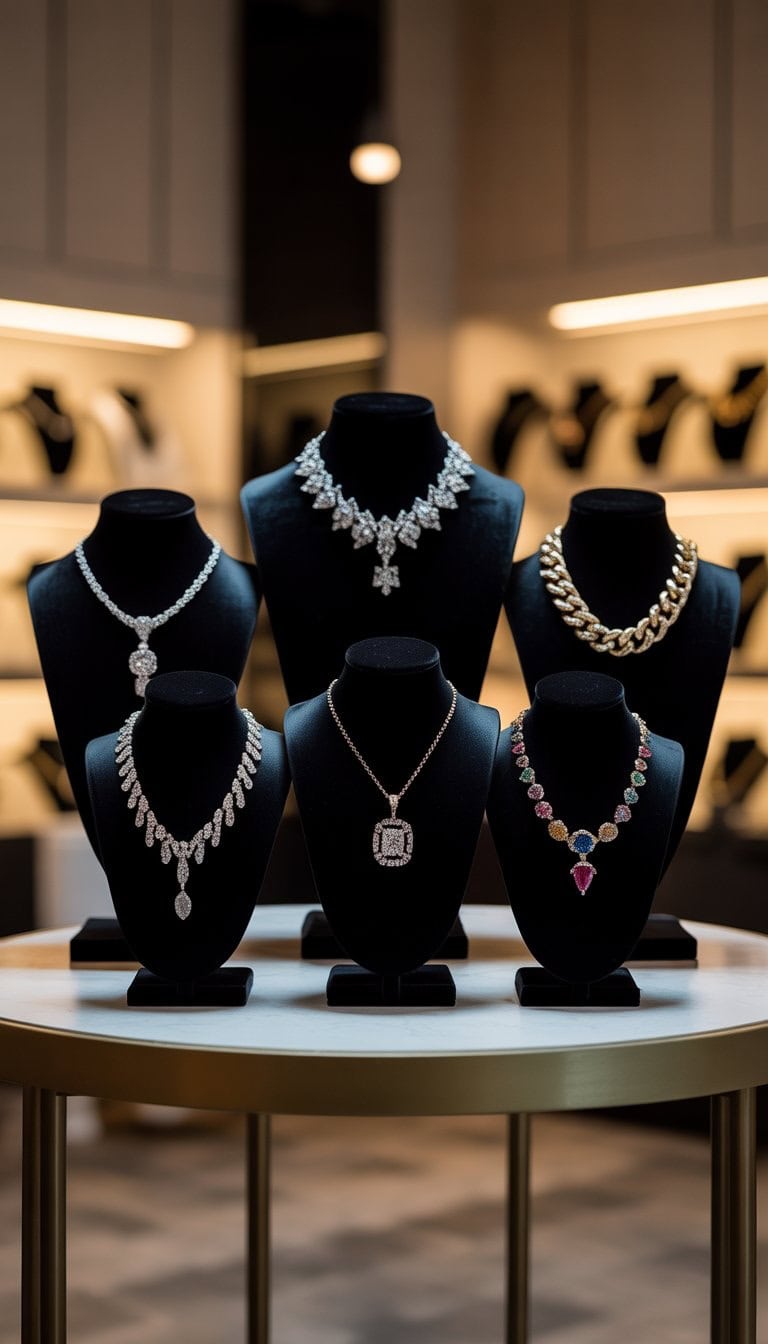
Use black velvet busts for luxurious necklace presentation
I love using black velvet busts to show off my necklaces. The soft velvet makes the jewelry look more elegant and keeps each piece safe from scratches.
When I set up displays, the deep black color of the bust really helps the metal and gemstones stand out. It draws people’s eyes right to the necklaces.
These busts work great for most styles, whether I’m selling classic pearls or a bold pendant. I’ve found them useful both at markets and in my shop. If you want your necklaces to look classy and inviting, velvet necklace display busts are a reliable choice.
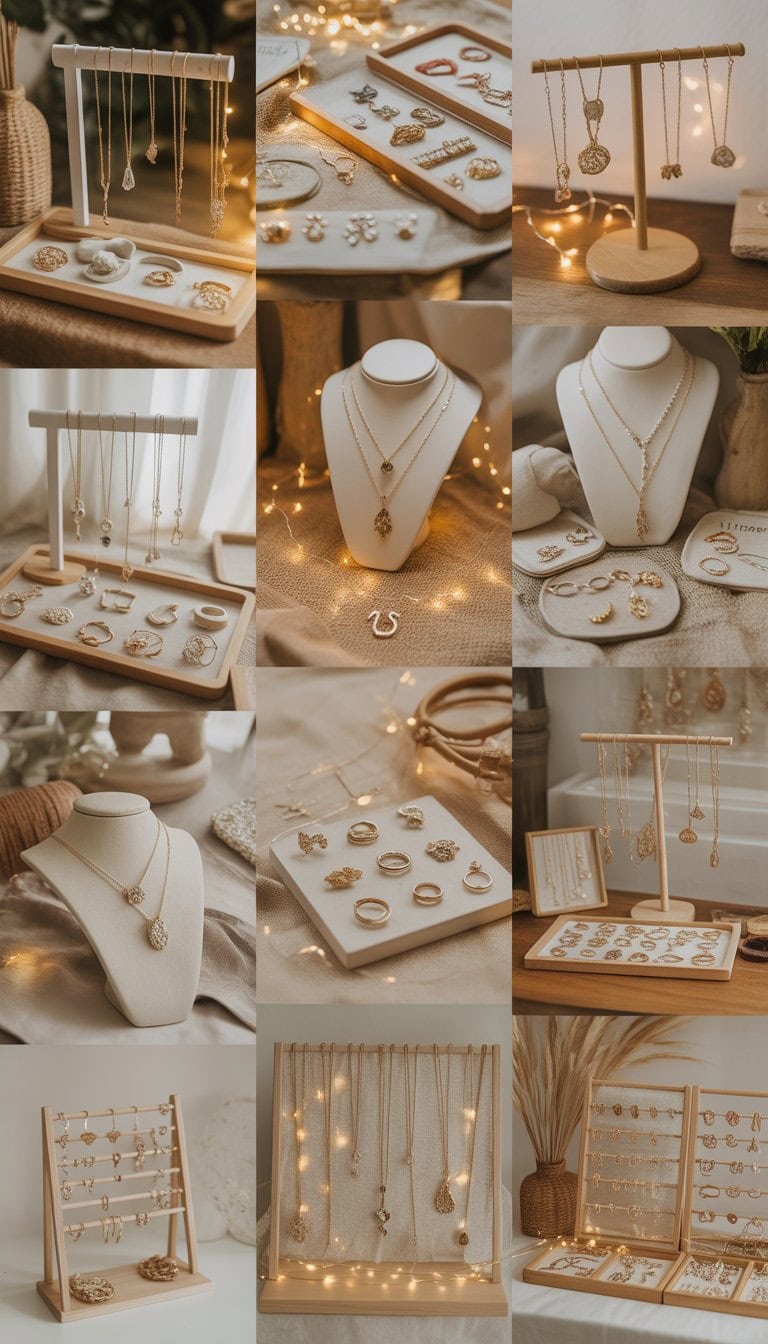
Add fairy lights to create a warm, inviting glow
When I set up my booth, I always add fairy lights. They make my display feel cozy and draw people in. Fairy lights give off a gentle, welcoming glow that helps my jewelry sparkle.
I like to hang them around the edges of my table or wrap them around stands. It’s a simple way to add charm without taking up much space.
Fairy lights are easy to install and move around. They make my booth look unique, and customers often comment on the warm look. For ideas on displaying fairy lights, check out these vendor booth lighting ideas.
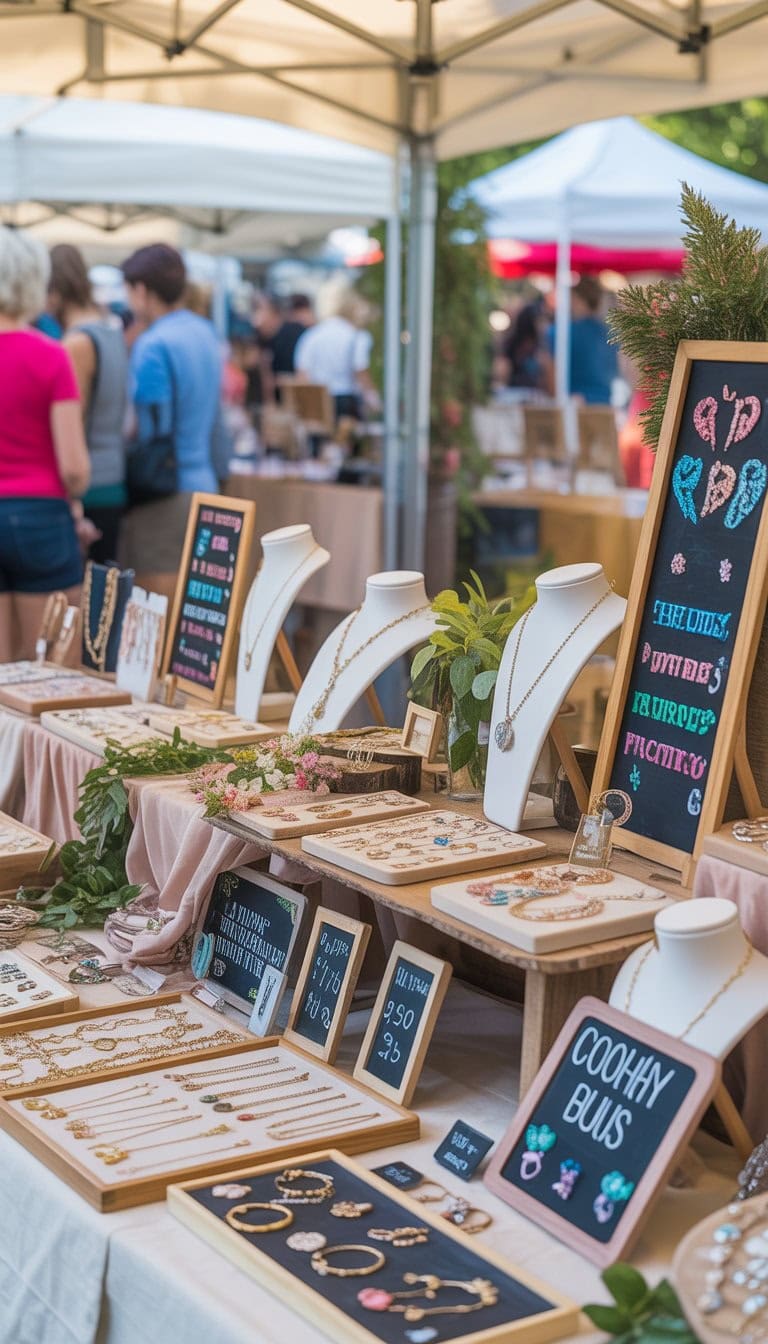
Use small chalkboards for pricing and fun quotes
I love using small chalkboards at my booth. They help me share prices in a way that looks neat and easy to change during the day.
Mini chalkboards are perfect for writing quick updates or adding a friendly message for shoppers. Sometimes I add fun quotes about jewelry or remind people to treat themselves.
If you want ideas for making your display stand out, check out these creative mini chalkboard stands and get inspired for your next event.
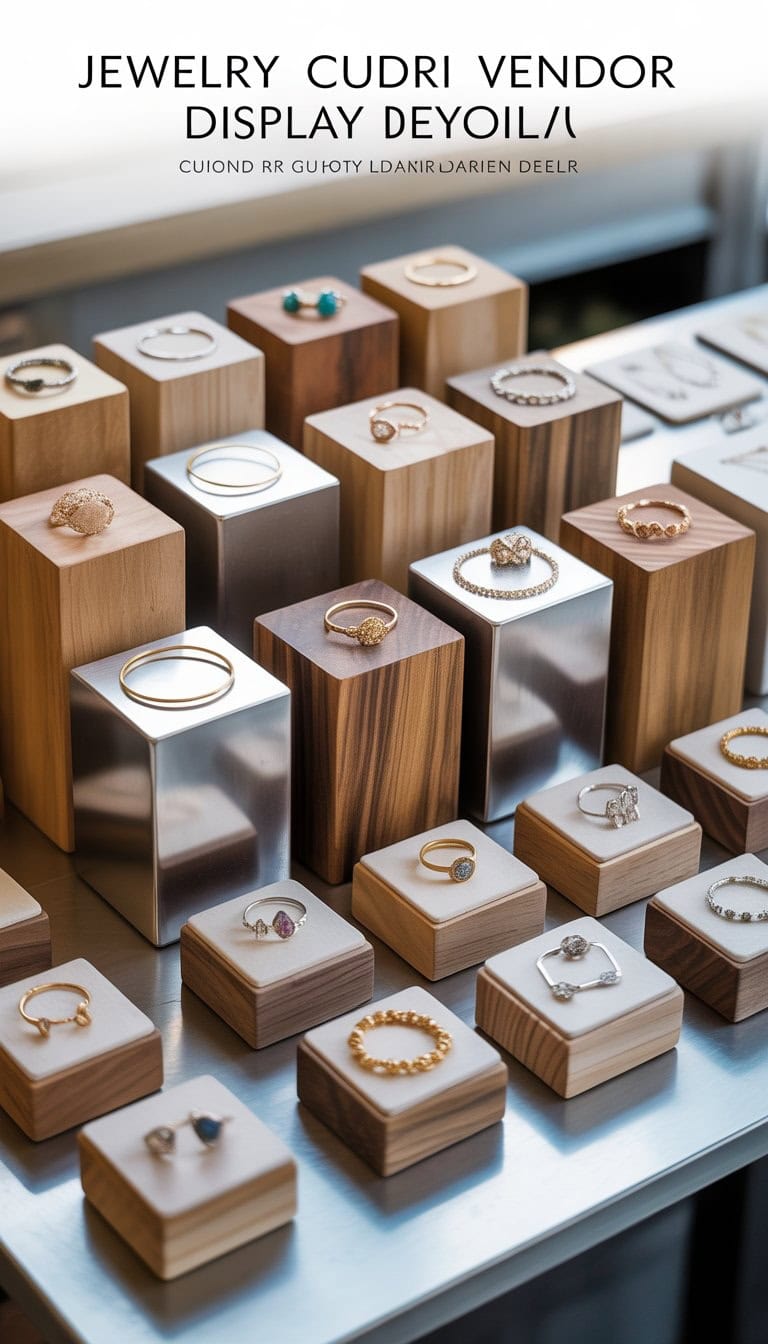
Incorporate geometric display cubes in wood or metal
I like using geometric display cubes to add different heights and layers to my jewelry booth. Wood or metal cubes can make my space look neat and organized. They help my displays stand out without being too busy.
Stacking the cubes lets me play with the layout and change it for every event. I also use them to create small groups of similar pieces. It draws the eye and makes things easy for shoppers.
I’ve seen cube displays at many craft shows. They seem to fit with almost any jewelry style. If you want more ideas, check out cube display inspiration.
Keep a clean and open table layout with minimal clutter
I always find that less is more when it comes to my jewelry table. A clean space invites people in and makes my display look professional.
I keep only my best pieces front and center. I use simple stands and trays, giving each item room to shine. This helps my jewelry stand out rather than getting lost in a busy setup.
Keeping the table open also makes it easy for customers to browse. I avoid piling on too many decorations or signs so nothing feels crowded. When the table feels open, people feel comfortable stopping by and taking a closer look.
I learned a few tricks from checking out inspiring table layouts and have noticed a real difference. Keeping things simple lets the jewelry do all the talking.
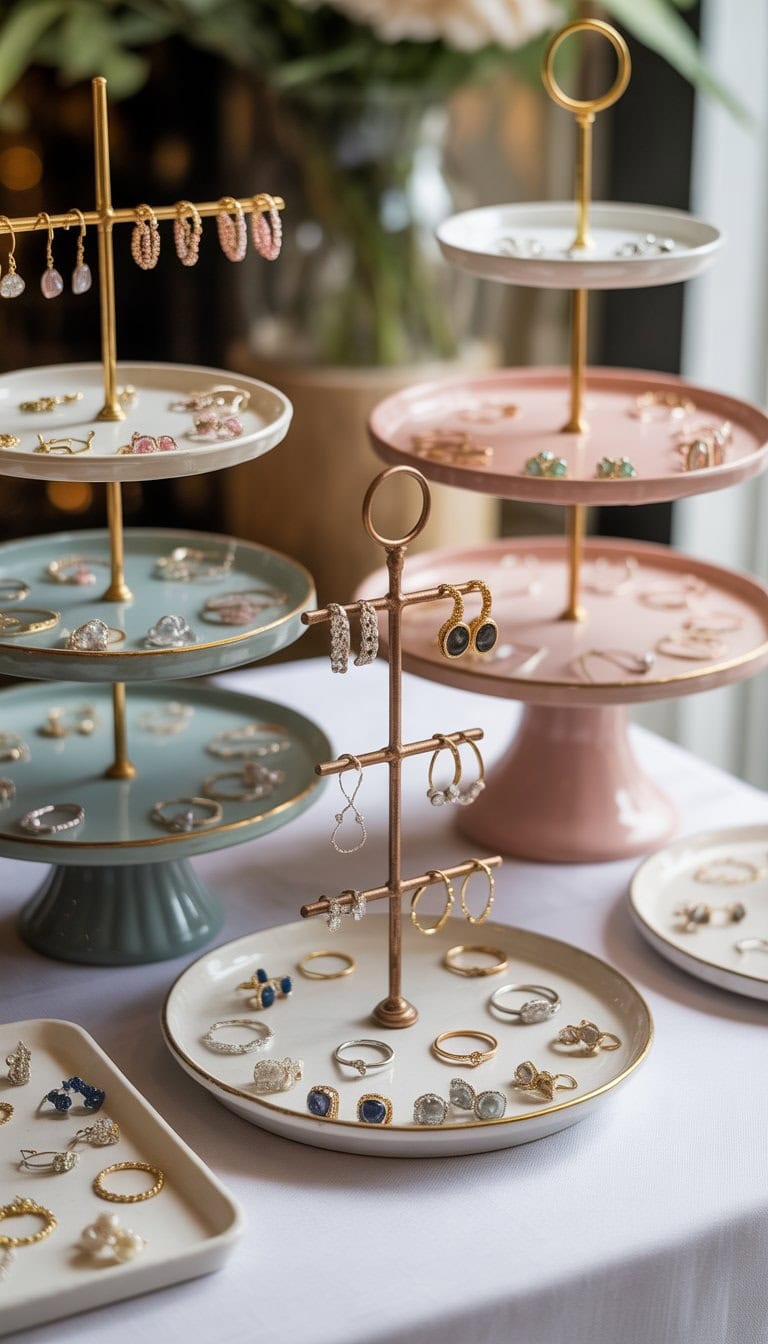
Use tiered cake stands as earring or ring holders
I love using tiered cake stands for my jewelry booth because they give a playful touch and save a lot of space on the table. The different levels make it easy for people to see more options without feeling crowded.
I arrange rings and earrings by type or color on each tier. Sometimes, I even dangle earrings off the edge to show them off better.
This idea is quick to set up, and you can switch up your display style often. A tiered stand makes my table look organized, and it’s easy for shoppers to browse. I’ve even used cute, simple cake stands I already had at home. For more ideas, you can check out this cake stand jewelry organizer or a simple DIY cake stand holder.
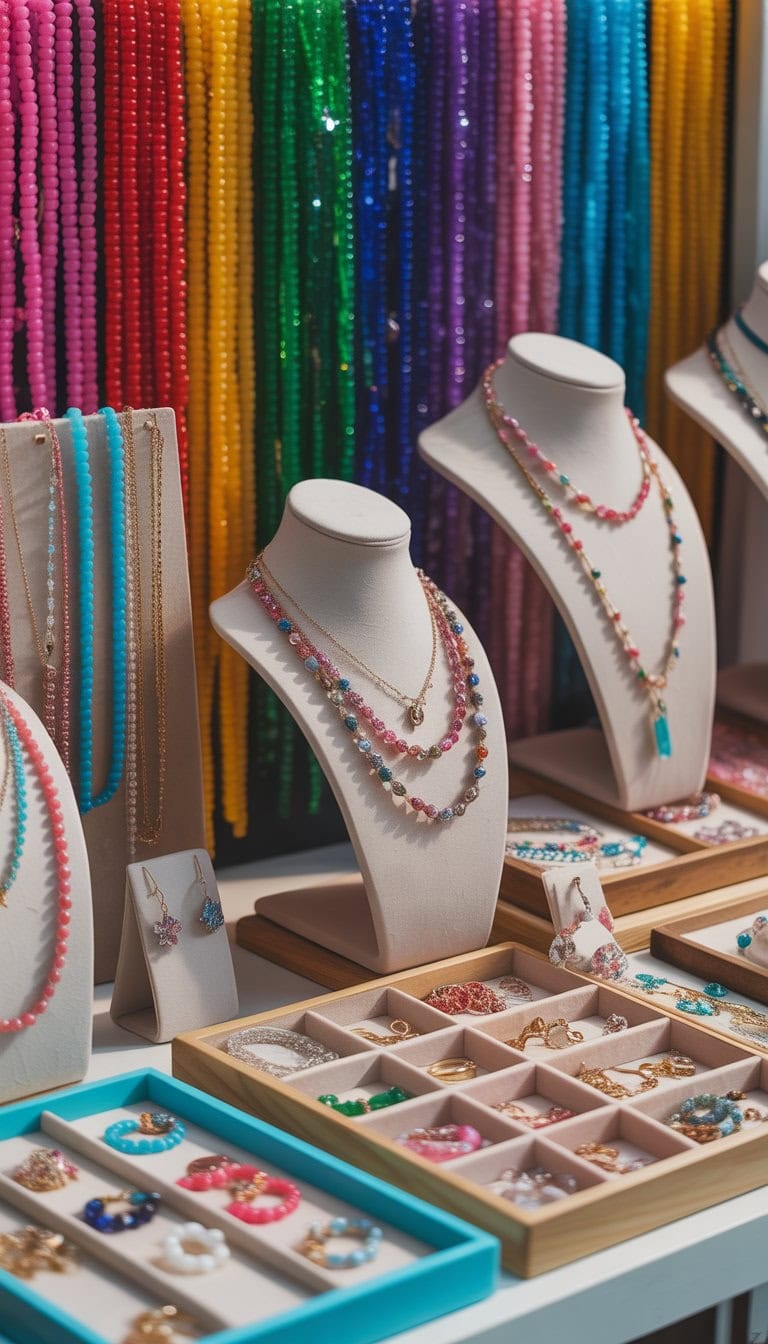
Add colorful beads as a backdrop element
I love using colorful beads as a simple yet eye-catching backdrop for my jewelry displays. Beads add a pop of color and can help set the mood of my booth. I like to string them on fishing line or clear thread and hang them behind my display table.
This gives a bright, creative look that draws people in. Whenever I switch up the bead colors, my booth feels fresh and new. If you’re looking for ideas on bead bar displays, I often get inspired by creative displays on Pinterest.
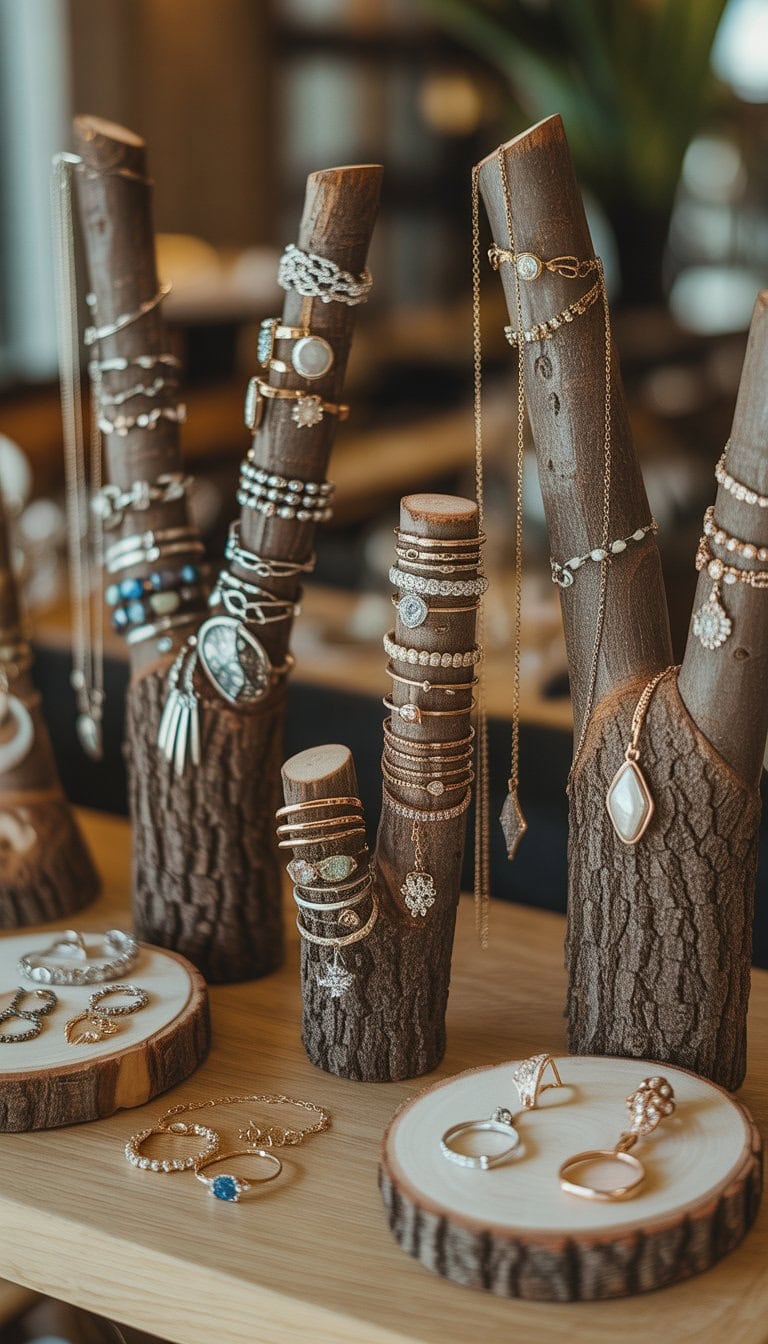
Display jewelry on tree branch stands for organic feel
I like to use tree branches as display stands because they make my booth feel natural and warm. Jewelry looks unique when it hangs on real wood. It makes the table stand out at any event.
I’ve found that bare branches work best for showing off necklaces and bracelets. For earrings, thinner twigs hold the hooks nicely. This method is not expensive and lets me get creative, especially if I paint or decorate the branches.
If you want inspiration, I look at these tree branch jewelry display ideas. There are lots of ways to use branches for a pretty and calm display.
Creating an Inviting Jewelry Display
When I want my booth to draw people in, it’s all about making the display easy to see, feel, and shop. The materials, colors, and lighting I choose can change how my jewelry looks and how customers feel.
Choosing the Right Display Fixtures
I know that display fixtures shape the first impression. For earrings, I might use simple racks or even wooden frames with mesh for a handmade feel. Necklaces look best draped over busts or laid neatly on velvet trays. I often use tiered stands for bracelets, since they save space and make browsing simple.
Here’s a quick list of fixtures I find useful:
Necklace busts in black or white
Velvet or linen display trays for rings
Wood crates for stacking and height
Earring racks or clip cards
Clear acrylic risers
Mixing a few types keeps my table interesting. I keep fragile jewelry in cases with lids. With each choice, I think about easy access for customers and keeping items secure. These ideas help my booth stand out at events with lots of vendors, as seen in some great craft booth display examples.
Using Color and Lighting for Impact
Color and lighting pull people’s attention. For my backgrounds, I stick with cream, gray, or black since they won’t compete with the jewelry’s sparkle. I add a pop of color through fabric linings, signs, or small props, but the main pieces always stand out. Sometimes I use a soft tablecloth in one color to tie everything together.
Lighting makes a huge difference, especially indoors. I use small LED spotlights or even battery-powered fairy lights to give my booth a warm glow. Good lighting helps gemstones shine and brings out metal details. When the weather is bad and light is low, I bring extra clip-on lights.
Testing setup before the show helps me see how everything will look. With the right color and lighting, I can create a booth that feels bright, cozy, and welcoming, as many successful jewelry vendor displays show.
Maximizing Sales at Vendor Events
Selling jewelry at vendor events takes planning, creativity, and attention to detail. I know from experience that getting both your display and your interactions right can make a huge difference in the number of sales you make. Little changes in layout and approach can turn browsers into buyers.
Tips for Effective Arrangement
When I set up my booth, I focus on making it easy for people to see everything at a glance. I use risers and display stands to create height and layers, so the pieces in the back aren’t hidden. Neck forms, trays, and small bowls help sort different styles and price ranges.
I always put bestsellers and eye-catching pieces at eye level. Signs with clear prices save time and help shy visitors shop comfortably. Using a neutral colored tablecloth keeps the focus on the jewelry and not the background.
Lighting is my secret weapon. Battery-powered lights make gemstones and metals sparkle, even in gloomy indoor spaces. I keep extra bulbs and batteries on hand just in case. For fresh arrangement ideas, I find inspiration from craft booth and jewelry displays on Pinterest.
Encouraging Customer Interaction
People buy more when they feel comfortable and involved. I greet everyone with a smile, keeping my body language open but never pushy. I invite guests to pick up pieces, try on bracelets, or see how earrings look in a mirror.
A fun tip is to set up a small “try-on” area with a mirror and hand wipes. If I notice someone admiring a piece, I’ll offer tips about care or share a quick story behind it. This makes a real connection.
Offering simple deals—like “buy two, get one 15% off”—gets customers thinking about buying more. Engaging displays also nudge people to interact, as shown by thousands of Paparazzi jewelry vending display ideas on TikTok. Seeing jewelry up close and in hand often leads to a sale.
Frequently Asked Questions
I love sharing ways to turn simple materials into striking displays. With a little creativity and smart organizing, even a small setup can draw in customers and make each piece shine.
How can you create a captivating jewelry display on a budget?
I’ve found that tiered earring stands and painted wooden frames can really elevate a table without costing much at all. Repurposing cork coasters as necklace racks is another budget-friendly trick that adds a handmade touch.
Using colorful lace or fabric scraps for backdrops helps catch people’s attention and still keeps expenses low.
What are some creative DIY setups for artisan jewelry exhibitors?
For a unique look, I like to play with different heights using stacked boxes or layered trays. Simple U-shaped booth layouts with three tables can create a natural flow and make the booth feel welcoming.
Spray-painting thrifted picture frames in bold colors always makes my space pop. Combining different DIY elements lets me show off my personal style.
What’s the secret to making jewelry sparkle in your display?
Good lighting is key. I use clip-on LED lights aimed straight at the jewelry to highlight the shine of metals and the color of stones.
Mirrors placed behind pieces add extra shimmer and draw eyes to the display. Clean surfaces help reflect light and prevent any dull spots.
Could you suggest eco-friendly materials for jewelry presentation?
I love using recycled wood for stands and upcycled jars or bowls to hold bracelets. Cork, linen, and untreated cotton fabrics offer a natural look and feel, making displays both attractive and earth-friendly.
Even cardboard can be cut and decorated to create sturdy, sustainable holders.
What lighting techniques work best for enhancing precious metals and stones?
I always position soft white LED spotlights just above or to the side of my displays. This setup avoids harsh shadows and makes the jewelry shine naturally.
Small portable lightbars or strip lights help when I’m indoors or under a tent. Diffused lighting keeps gemstones from looking too harsh while highlighting every detail.
How do you organize varying jewelry types to tell a story on your stand?
I like to group pieces by theme or color to guide visitors’ eyes and create a narrative. For example, pairing nature-inspired necklaces with leafy backdrops and arranging bold, brightly colored frames for statement earrings draws out different moods.
Building the story around a main centerpiece helps customers connect with the collection’s theme. I always tailor the story to what I want shoppers to feel or remember from my booth.