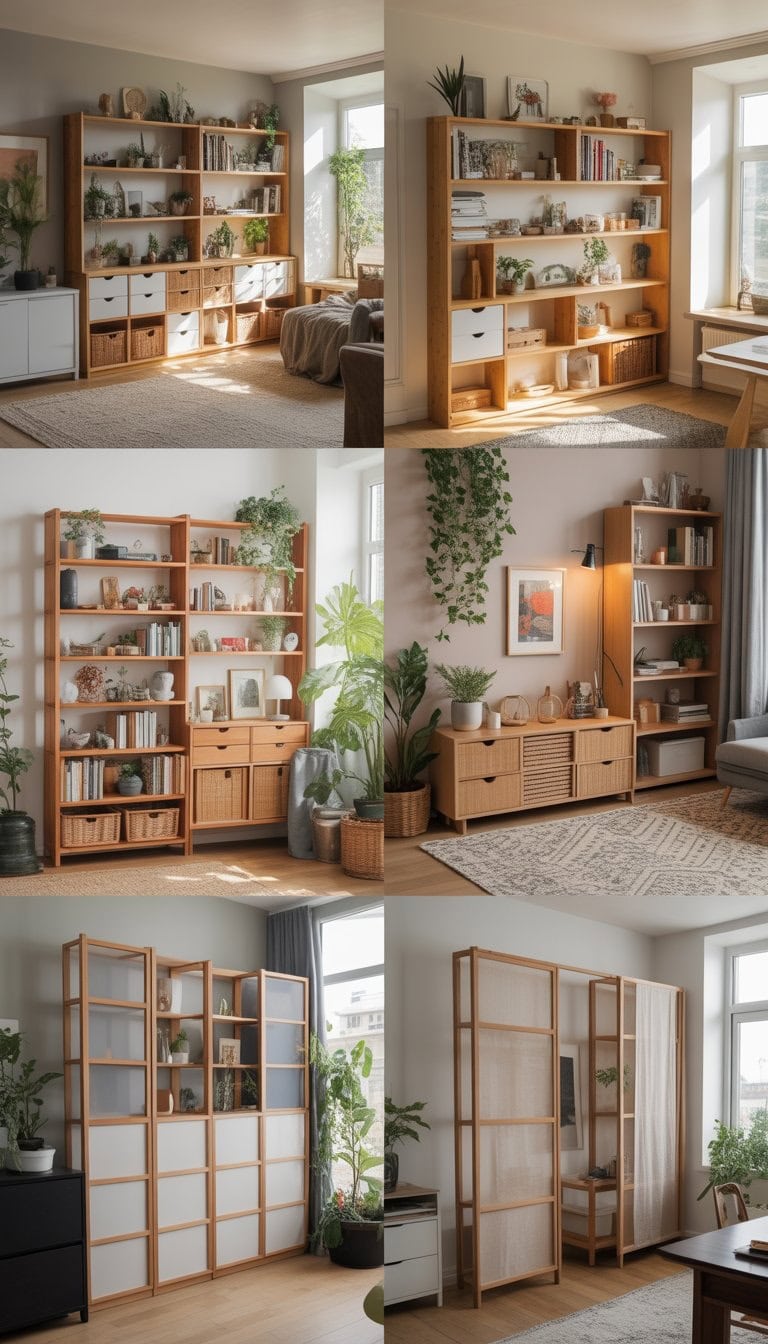
Every time I walk through my home, I love spotting the things that make it special and uniquely mine. IKEA’s Ivar shelves are more than just plain storage—they’re a fresh canvas waiting for your personal touch. I know how satisfying it feels to turn simple furniture into something both beautiful and useful.

That’s why I’m excited to share these inspiring Ivar shelf hacks that help transform any space, spark creativity, and make your organization dreams possible. With a little imagination, you can turn standard shelves into everything from striking statement pieces to clever storage for any room. I’ve discovered that even small changes can turn ordinary furniture into something that feels custom-made just for me.
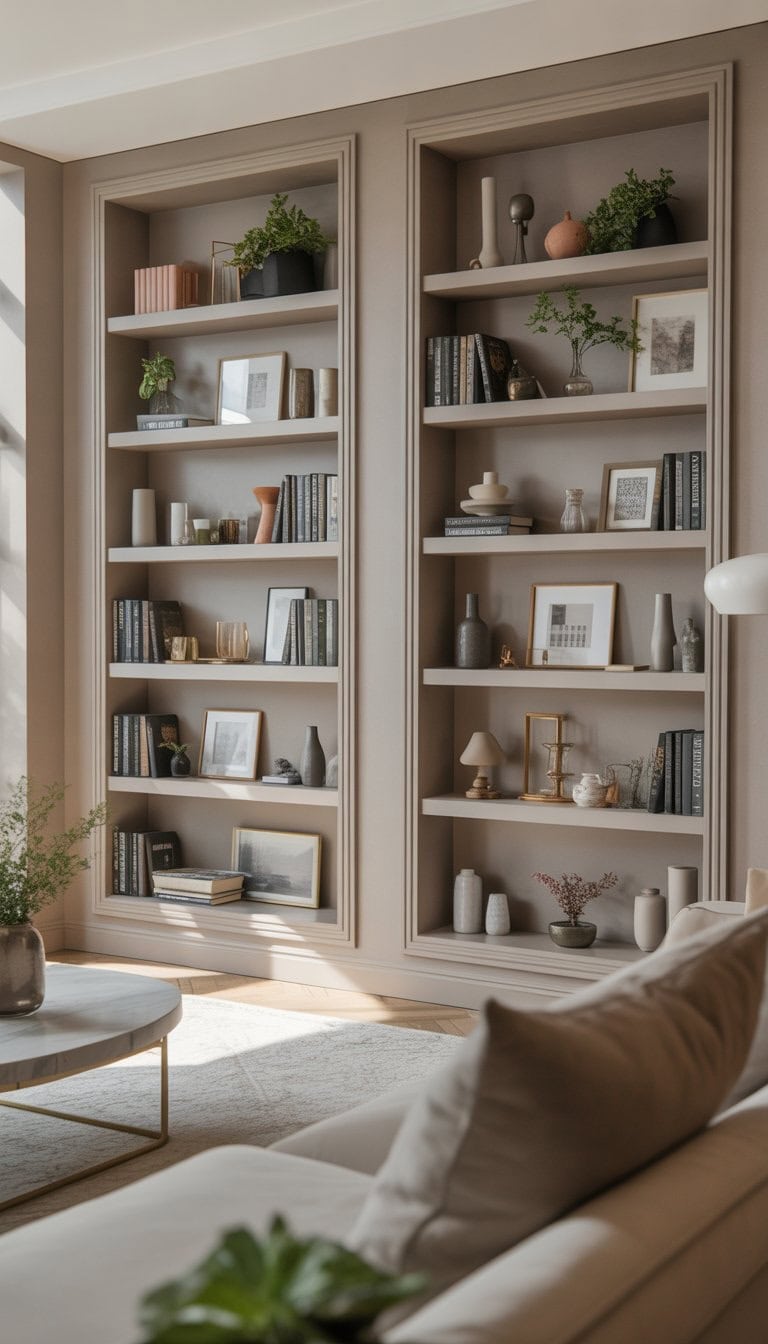
Stack multiple IVAR units for a built-in library wall

I’ve always wanted a wall of bookshelves that looked custom and high-end, but didn’t cost a fortune. With IKEA IVAR shelves, I found a practical way to make it happen. I just stacked several IVAR units on top of each other to reach the ceiling.
To keep everything safe and stable, I firmly attached each unit to the wall. Using extra brackets and heavy-duty fasteners made me feel confident nothing would budge. I saw others do the same thing with similar success online, and it worked well for my space too.
The shelves look clean and organized. Having everything in one tidy spot really changed how my room feels. If you want a library wall without a custom build, stacking these shelves is a simple, smart solution you can try, as seen in this IVAR bookshelf stack hack.
Add doors to create hidden storage cabinets

I love turning open shelves into secret storage. By adding doors to my IKEA IVAR shelves, I can hide away things that usually make a space feel cluttered.
For a simple upgrade, I used thin plywood doors with basic hinges. It was an easy fix and it makes a big difference. Now, all my mess is out of sight and the room feels calmer.
I’ve seen some creative ideas online too. Some people use cane webbing or even paint patterns on the doors. If you want more inspiration for IKEA IVAR door ideas, check out these Ikea Ivar door hack ideas.
Whether I keep it plain or get bold with color, the doors always add a clean look. It feels great knowing my stuff is tucked away.
Use hemp rope as a decorative side panel cover

I love finding ways to add a personal touch to my IVAR shelves. One idea that works well and looks great is using hemp rope as a side panel cover. It gives a natural, relaxed feeling to the shelving.
I simply thread the rope through the holes in the side panels, creating a pattern that matches my style. You can use straight lines, zigzags, or even a criss-cross design. The process is pretty easy, so anyone can do it.
This method doesn’t just add style. It also helps hide clutter and keeps things looking tidy. If you want more ideas, you can see extra creative examples from others who have tried hemp rope for IVAR shelf sides.
Convert IVAR shelves into a minimalist desk combo

I love how easy it is to turn IVAR shelves into a clean, functional desk. All I need is a sturdy plank, a set of IVAR side units, and some basic tools. I cut the shelves to size, attach them at my preferred height, and secure everything together.
Keeping the design simple helps the workspace feel open and calming. I sometimes paint the wood white or leave it natural for a cozy touch. It’s also easy to add extra shelves above for more storage without any clutter.
This setup gives me a spot for my laptop and books, plus space to keep things organized. I got inspired by projects I saw online, like a minimalist desk using IVAR shelving, and put my own spin on it to fit my needs.
Paint IVAR shelves in contrasting colors for a modern look

When I want my IKEA IVAR shelves to stand out, I paint them with two bold, contrasting colors. This gives the shelves a fresh and modern vibe without much effort.
I start by picking colors that pop, like navy blue and white or mustard yellow and gray. The trick is to choose shades that are different enough to really show off each section.
Before painting, I always add a coat of primer since the IVAR system is made from softwood, which soaks up paint fast. This step helps the colors come out even and bright. You can find more tips for painting IVAR shelves here.
Once they’re dry, the shelves bring a fun and modern touch to any room. I love how the colors make my storage look like a unique piece of art.
Attach bungee cords for flexible book storage

I love using bungee cords on my IVAR shelves for book storage. It’s simple—just stretch the cords between the side panels or across the front of the shelf.
The cords hold books upright but still let me grab one easily. If my book collection changes, I can move or adjust the cords without any tools.
Bungee cords also add a pop of color or a cool pattern. For a natural feel, I sometimes swap in hemp rope or something organic looking. I found this idea while exploring creative IVAR shelving hacks that use bungee cord.
This setup isn’t just practical—it keeps my shelves looking neat without much effort. I like that it’s easy to update, so my IVAR always fits my space and style.
Use IVAR shelves as a plant display with integrated planters

I love using my IVAR shelves to show off my favorite plants. The open design lets me play around with heights and sizes, making it easy to find spots for leafy greens and trailing vines.
I found that adding a few built-in or hanging planters gives the shelf a real indoor garden feel. I use plastic trays or lined baskets on some shelves to help catch water and keep things tidy.
It’s fun to mix regular plant pots with the integrated planters. This way, I can switch plants out or move them as they grow. Some people share their IVAR plant display ideas online, which helped me get started.
Putting together my plant shelf was easy and made my space more inviting.
Customize with leather handles for a rustic touch

When I wanted to give my IKEA Ivar shelves a cozy feel, I picked out some simple leather handles. Swapping out the basic knobs for leather handles was quick and made the whole piece look warmer. It’s a small change, but it really makes the storage stand out.
I chose a brown leather to give my shelves a natural, rustic vibe. The soft leather stands up to daily use and feels nice to the touch. Installing them was easy—just a screwdriver and a few minutes.
Leather handles don’t just look good; they also go well with other materials like wood or metal. You can find great examples of this simple upgrade in Ivar shelf hacks that blend style and function. This little touch made my shelves feel both unique and inviting.
Build a media console by modifying shelf height

I love turning IKEA Ivar shelves into a media console because it’s flexible and easy to change for your space. By adjusting the shelf height, I can fit everything from gaming consoles to books and speakers. If you want, it’s simple to move or remove shelves to get the perfect fit.
Sometimes I even add legs to the bottom for a little height boost. This makes it look more like a real piece of furniture and less like a shelving unit. I’ve found inspiration from others who stained or painted the wood for a custom look, too.
Even if the cabinets are not super heavy-duty, they hold up well for storing most electronics and daily stuff, as I saw in several projects. It’s all about making it work for what you need most.
Create a toy organizer with labeled baskets

I love turning my IKEA IVAR shelves into a neat toy organizer. It’s easy to add baskets that fit right onto the shelves. Each basket can get a simple label, so everyone in the family knows where things go.
Seeing all the little toys, cars, or blocks in their own bins makes cleanup simple. I find that labeled baskets help kids learn to put things away by themselves. It saves me time and keeps the space tidy.
I like to pick baskets that are sturdy and easy for small hands to pull out. If you want more ideas, there are great examples of IKEA IVAR shelf hacks for toy storage. Adding your own labels makes it feel personal and organized at the same time.
Turn IVAR into a shoe rack by adding angled shelves

I found that the IVAR shelves are perfect for making a shoe rack at home. By tilting the shelves, I can store shoes at an angle, which helps me see all of them at once. This makes it easier for me to pick a pair quickly when I’m in a hurry.
I used simple brackets to angle each shelf slightly upward. This keeps my shoes from sliding off but still lets me grab them without trouble. The layout is flexible, so I added extra shelves for small shoes and spaced them out for boots.
When I saw others using similar ideas, like in this custom IVAR shoerack project, I realized I could make my closet more organized. With a bit of time, I turned a basic IVAR into a neat, functional shoe rack.
Install under-shelf lighting for ambiance

I love how simple lighting changes the whole feel of my IKEA IVAR shelves. Adding LED strips under the shelves really brings everything to life.
I use peel-and-stick LED light strips because they’re easy to install and don’t need fancy tools. There are different colors and styles, but even a basic white light can make the shelves look clean and modern.
All I had to do was measure, cut the strips to the right length, and stick them under each shelf. If you want extra help, there are plenty of guides online, like this guide on easy under shelf lighting.
It’s an easy way to turn plain shelves into a cozy display. I can adjust the brightness for either a warm glow or bright task lighting, depending on what I need.
Mount IVAR horizontally for a floating shelf aesthetic

I love the clean, open look floating shelves bring to any space. Mounting the IVAR shelf horizontally lets me add stylish storage without bulky brackets showing underneath. The boards have a slim profile, so they look light and modern on my walls.
I make sure to install sturdy wall anchors so each shelf feels secure and safe. It’s simple to line up two or three IVAR shelves in a row for longer display space.
When I style the shelves, I use them for books, plants, and small decor. This setup works great in living rooms, bedrooms, or a home office. For extra ideas, I’ve seen creative shelf setups shared on sites like Pinterest.
Use wood stains to enhance the natural pine finish

I love working with the IVAR shelves because the raw pine is a great blank canvas. Using wood stains is one of my favorite ways to turn a basic shelf into something special.
First, I always start by lightly sanding the surface. This helps the stain go on smoothly and makes the grain look even better.
I choose a stain color that fits my space, whether it’s a rich dark shade or something lighter for a soft, natural feel. Pine can soak up stain differently, so I sometimes use a wood conditioner before staining to avoid patchy spots.
After applying the stain, I let it dry well. Sometimes I add a protective finish like a water-based polyurethane to keep it looking fresh. If you want tips on the process, this guide on how to stain IVAR cabinets breaks it down step by step.
Combine open shelves and closed cabinets for mixed storage

I love mixing open shelves with closed cabinets on my IKEA Ivar setup. The open shelves let me show off my favorite books, plants, or special collectibles. It makes the space feel personal and bright.
At the same time, closed cabinets hide any clutter I don’t want on display. I use them for things like cables, papers, or everyday items that aren’t as pretty. This combo keeps my room looking fresh but still organized.
It’s easy to mix and match shelf heights, too. Adding doors to just a part of the unit can completely change the look. I found some great ideas for this kind of mixed storage on MyDomaine’s roundup of Ivar hacks. The contrast between open and closed spaces really brings a custom feel to my storage.
Choosing the Right IVAR Components
Picking out IVAR pieces feels like a fun puzzle. I look at style, shelf sizes, and use so my shelves fit my needs and space. The materials and weight limits make a big difference in what I can store or display.
Selecting Shelving Units and Finishes
When I choose my IVAR shelves, I start with how much stuff I want to store. IVAR comes in a variety of heights and widths, so I always measure my wall first. Sometimes, I need tall shelves for books, but other times, I pick shorter ones for kids’ rooms or craft spaces.
For finishes, the classic IVAR pine looks clean and easy to customize. I can leave it natural for a warm look, paint it in bold colors, or stain it for a deeper shade. If I want a really unique result, I check out some creative IVAR hacks for ideas. Cabinets, drawers, and doors are add-ons that help with hiding clutter or adding a design touch.
Here’s a quick list I use to pick the right components:
- Measure your space
- Think about shelf depth and height
- Decide if you want open or closed storage
- Pick a finish—natural, painted, or stained
Understanding Weight Limits and Durability
It’s super important for me to think about what I’ll put on my IVAR shelves. These shelves can hold a lot, but if I overload them, they might start to sag. Most standard IVAR shelves can handle up to 77 pounds per section, but I always check the instructions for my exact model.
When I plan to store heavy items like books, tools, or electronics, I make sure to use wall brackets for extra support. Sometimes, I add more vertical posts for stability if my shelves are extra long. I never skip this step, since durability means my IVAR shelves will look good and last for years.
If I want to stack units or line them side by side, I double-check that the floor is even. This keeps the whole setup steady and safe. A strong, well-supported IVAR setup opens up new possibilities for any room!
Personalizing Your IVAR Shelves
I’ve found that personalizing my IKEA IVAR shelves is all about creativity and a few smart upgrades. Adding paint or stain can totally change their vibe, and swapping out basic knobs or handles makes each piece feel more like mine.
Creative Paint and Stain Ideas
I love that IVAR shelves are made from untreated pine, so I can do almost anything with them. I’ve tried everything from classic white paint to bold colors like navy blue and forest green. If I want something a bit more subtle, I’ll mix up a wood stain instead.
One cool idea is to do a color block look by painting just the doors or the shelves. This makes the shelf the main focus in a room without overdoing it. Sometimes, I use painter’s tape to make clean stripes or geometric shapes.
For a more natural look, I sometimes sand the wood lightly and use a clear or light stain. This brings out the grain and gives a smooth finish. I also suggest using a glossy finish if I want the shelves to look modern, or a matte seal for a softer touch.
Adding a pattern is also fun. I can use stencils to paint little dots, leaves, or even letters. If I mess up, it’s easy to sand down a bit and try again. The IKEA site has examples of painting shelves and attaching knobs.
Upgrading Hardware for a Custom Look
Changing the handles or knobs on my IVAR shelves makes a huge difference. I don’t have to settle for the standard IKEA pieces. I’ll pick out knobs that go with my style, whether it’s something modern in brass, classic in chrome, or playful with colored ceramic.
Sometimes, I find unique handles at flea markets or reuse old hardware. Mixing different shapes, like round knobs mixed with slim pulls, makes the shelves feel designed just for me. It’s easy to attach new hardware using a screwdriver, and sometimes I even add extra hooks on the sides for hanging bags or baskets.
If I want shelves to match the rest of my room, I’ll glue on wood trim or metal corners before screwing in the new hardware. I also like using larger knobs for a statement look, or smaller ones for a simple, clean vibe.
The IKEA Hackers blog and Pinterest are full of ideas if I need inspiration for customizing the hardware and making storage bins look built-in. Even small changes can make my IVAR shelves different from everyone else’s.
Frequently Asked Questions
I’ve experimented with all sorts of tweaks and setups for my IKEA IVAR shelves. These answers come from real-world experience and practical advice, focused on getting more out of your shelving and making them look great.
What are some creative ways to personalize IVAR shelving units?
I love painting my shelves in bold, contrasting colors to give them a modern vibe. Adding doors lets me stash away stuff while keeping things looking tidy. Sometimes, I use hemp rope on the sides for a touch of natural style, or swap out the hardware for something sleek and unique.
How can I add extra functionality to my IVAR shelves?
Sometimes I stack extra IVAR units to make a wall-to-wall library or add storage bins for games and office supplies. Turning a section into a minimalist desk combo has helped me save space and keep everything within arm’s reach. With a few simple add-ons, I keep my setup flexible for whatever I need.
What are the best methods for stabilizing IVAR shelving?
I always attach the frame securely to studs, especially for tall stacks. Using extra brackets or corner braces from any hardware store gives me even more stability. For heavy loads, I make sure weight is spread out evenly across all shelves.
Can IVAR shelves be used in a standalone setup without wall support?
I’ve set up IVAR shelves as freestanding units when space is tight or I don’t want to drill into the walls. For safety, I keep these units low and avoid stacking too many pieces high. Extra anchoring isn’t always required for smaller setups, but I don’t overload them.
What’s the ideal approach to finishing IVAR wood surfaces for a custom look?
Sanding the wood first helps smooth out any rough bits. I’ve tried clear varnish for a natural style, but painting in bold colors can give the shelves a complete transformation. I use a good primer before painting, which makes the finish last longer and look more even.
How do I maximize space with an IVAR shelving system in a small room?
To make the most of a tight space, I go vertical and stack shelves all the way up to the ceiling. Adding storage baskets and boxes lets me keep little things organized. Swapping regular shelves for doors creates hidden storage, instantly making the room feel less cluttered. For more tips, check out these clever IVAR shelf hacks.
