I love how a simple piece of furniture can be completely transformed with just a bit of creativity and inspiration. There’s something special about taking an ordinary IKEA Besta unit and turning it into a stunning, functional piece that fits perfectly in my home. Every time I see how a little DIY magic turns these basics into something unique, I feel more confident and proud of what I can create.

Whenever I want to refresh a room, I look for ideas that add both style and storage without costing a fortune. These hacks show that I don’t have to settle for a cookie-cutter look when I can add my own touch. The endless possibilities help me express my style and make my space feel like mine, all while keeping things organized and beautiful.
Spray paint cabinet doors for a vibrant color block effect

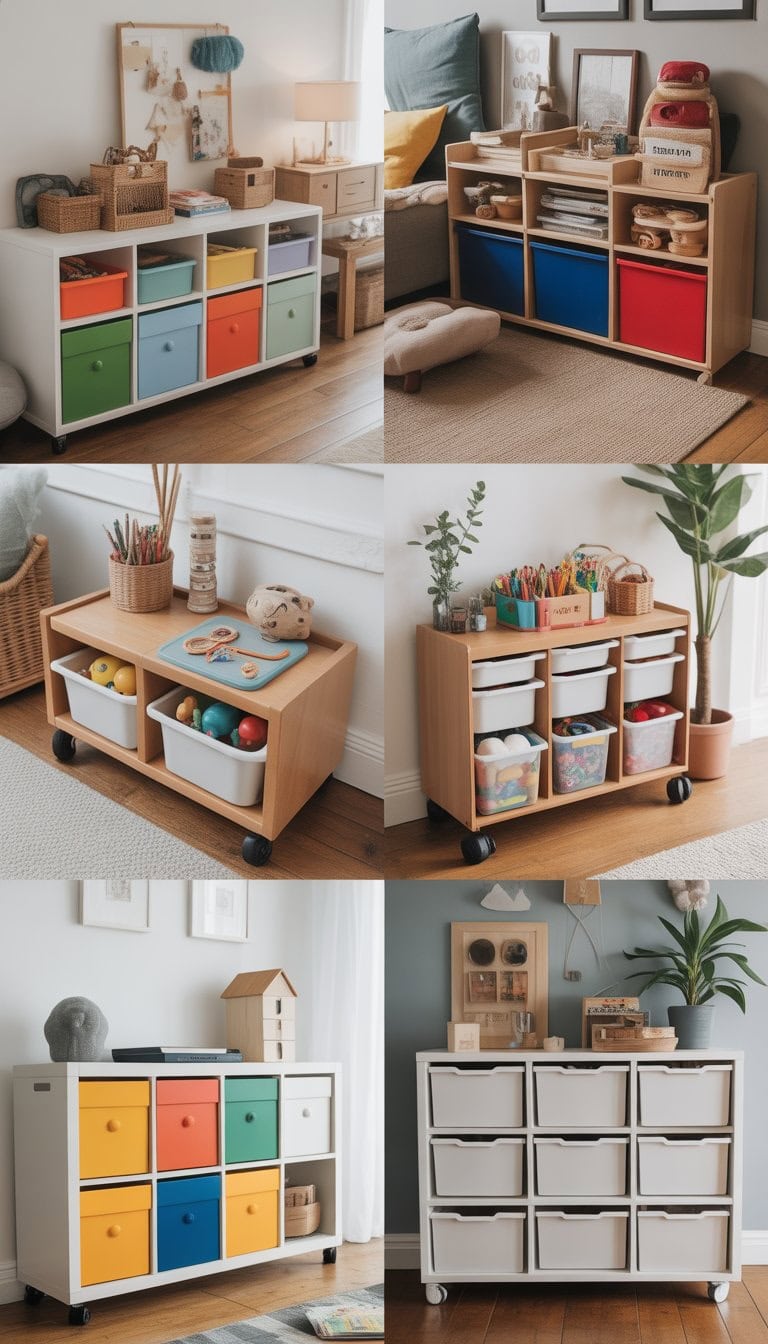
I love how easy it is to change the whole look of my Ikea Besta with spray paint. Picking bold colors and using tape, I can create color block designs that really stand out. It always surprises me how much brighter my space feels after adding a splash of color.
Before painting, I make sure to clean and lightly sand the doors. This helps the paint stick better and last longer. I usually use painter’s tape to get clean lines for each color block.
The best part is how flexible this hack is. I can go with soft pastels, bright shades, or even a two-tone look. Projects like my color block storage cabinet prove how simple paint can turn a plain unit into a custom statement piece. If you want a fresh and personal touch, give this idea a try for yourself for vivid cabinets.
Create a media wall with integrated hidden storage

I love using IKEA Besta units to make a sleek media wall that looks built-in. The cabinets fit together neatly, and you can mix closed and open storage. This lets me tuck away game consoles, cables, or movies out of sight but keep display shelves for my favorite decor or books.
To maximize storage, I like to add extra drawers or shelves around the TV. Sometimes I use push-to-open doors for a clean look with no visible handles. It feels organized, and my living room always looks tidy.
If you want ideas on layout and setup, I found great inspiration on how to create a media wall with Besta from others who’ve tried this project. Mixing storage types makes the wall both stylish and useful.
Add legs to raise the unit for a modern console look

I love how much style simple legs can give to an IKEA Besta unit. By lifting it off the ground, I instantly make the whole piece feel more open and modern.
I often pick metal or wooden legs depending on the room. Adding legs is simple. I just screw them into the bottom corners using the right brackets or metal plates.
Once the legs are on, my Besta starts looking like a custom console. This small change makes vacuuming or sweeping underneath easier, too. I’ve seen people try different styles, like mid-century or minimalist, just by switching the leg shape or color.
If you want tips and visuals, you can check out what other people have done with IKEA Besta unit legs.
Install glass doors for a chic display cabinet

I love turning a basic Ikea Besta unit into a display cabinet by installing glass doors. It makes my storage look more open and modern right away.
Adding glass doors helps me show off favorite items like books, vases, or art. The cabinet stays neat, but nothing feels hidden or boxed in.
When I fitted my unit with glass, I also swapped out the knobs for something in gold. It gave the piece extra style and helped tie everything together in my living room.
This hack doesn’t take much work. With just a few changes, my Besta looks custom-made. For more ideas, I found inspiration in projects like the one featured on TikTok with glass doors and gold accents.
Use cabinet screws to join multiple Besta units securely

When I want my Besta units to line up perfectly, I always use cabinet screws. These screws give the units a stronger hold and keep them steady. It’s an easy way to make two (or more) cabinets feel like one solid piece.
I find it simple to connect the units by lining up the frames and using the longer screws that Ikea provides. This keeps them from shifting when I open or close the doors. If you need a step-by-step guide, you can follow the instructions shown by Norse Interiors.
For extra support, I sometimes attach the whole thing to the wall. It’s a small detail that really makes my storage look neat and polished.
Transform into a stylish storage bench with cushions

I love how an ordinary IKEA Besta becomes so much more with a few tweaks. Turning it into a bench is my favorite way to add extra seating and hidden storage at the same time. It fits well in entryways, mudrooms, or even at the foot of my bed.
All it takes is building the cabinets, then placing them side by side. I picked some simple legs to lift it off the ground, which makes it look more finished. Adding a soft cushion on top makes it comfortable and gives it that cozy, custom feel.
For extra style, I sometimes use custom door fronts or paint the cabinets a new color. I’ve seen some amazing ideas online, like these bench hacks with cushions that really transform the whole space.
Attach LED strips inside for ambient lighting

I love adding LED strips inside my Besta units to create a cozy glow. It really changes the feel of my space and makes everything look a bit more stylish. Installing LEDs is simple—just stick the strip where you want it and plug it in.
Sometimes I run LED strips along the top or behind the shelves. I’ve learned that hiding the lights behind a bar or toward the back helps the light spread softly. It doesn’t take much work, but the effect is impressive.
If you want more ideas, you can check out this guide for setting up LEDs in a Besta. It’s easy to adjust the lighting with smart bulbs or remotes, too. I like to play with the colors based on my mood.
Incorporate floating shelves above for extra space

I like to add floating shelves above my IKEA Besta units whenever I need more room. These shelves keep things off the counter and give me a spot to display my favorite books, plants, or little decorations.
It’s easy to match the floating shelves to the look of the Besta so everything feels like it belongs together. Sometimes, I use the shelves for extra storage baskets or boxes to help keep clutter away.
Floating shelves work well in living rooms, bedrooms, and even entryways. I’ve also seen creative ideas for floating Besta designs, which look neat and modern. It’s a simple way to upgrade storage without taking up more floor space.
Add brass or matte black handles for a luxe touch

When I want to upgrade my IKEA Besta, I go for new handles first. Swapping out the standard knobs with brass or matte black hardware makes a big difference.
I’ve found that brass adds a warm shine, which feels stylish but still timeless. Matte black handles give a modern and clean look.
It’s easy to switch them, and I don’t need special tools. Many people like this hack because it fits almost any decor. If you want ideas or examples, there are lots of creative ways to add handles, like the ones on Pinterest and TikTok.
Even a simple hardware change makes the Besta look more expensive, and I love seeing the personal touch it adds.
Convert into a bar cabinet with wine racks inside

I always wanted a spot to keep my favorite drinks and glasses organized. So, I used an IKEA Besta unit and turned it into a bar cabinet. Adding wine racks inside gave me a simple place to store bottles and keep everything neat.
It only took a few tools and some time. I found inserts that fit the shelves and made sections for the wine. This let me customize the look and fit more bottles where I wanted.
There are so many creative IKEA Besta wine bar hacks out there. It’s fun to see how changing one furniture piece can add a touch of style and function to my home. Guests always notice it and ask how I made it.
Use wallpaper or contact paper on doors for patterns

I love using contact paper or peel-and-stick wallpaper to refresh my IKEA Besta doors. It’s a simple way to add color, patterns, or textures without much hassle. Just measure, cut, and smooth it onto the door.
There are so many designs to choose from—marble, wood grain, or bold prints all work well. I’ve seen beautiful results using grasscloth wallpaper for a more textured look, too. It gives the piece a custom, high-end feel.
When I want to switch things up later, contact paper peels off easily. There are great examples of these Besta makeovers with contact paper, and they show how creative you can get with just a few rolls and a little patience.
Build an open shelving unit by removing doors

One of my favorite ways to change up a IKEA Besta cabinet is to take off the doors. This simple switch turns it into an open shelving unit that’s great for display and easy access.
When I took the doors off my Besta, it felt like I instantly got more space for books, baskets, and a few decorative pieces. It looks lighter and works really well in my living room.
If I want to be more creative, I’ll add storage boxes or baskets in some of the cubbies. This keeps things looking tidy while still having that open feel.
I also like the option to spray paint or decorate the cabinet frame for a fresh look, as recommended in some Besta hacks. Removing the doors is quick, easy, and makes the unit feel completely different.
Add caster wheels for easy mobility

I love making my IKEA Besta even more practical by adding wheels. With casters, I can move my storage unit anywhere in the room without heavy lifting. All I need is a set of sturdy wheels that can handle the weight.
When I worked on my Besta hack, I found that using casters with an M8 threaded bolt works well. That’s the size that fits into the standard fittings of many IKEA Besta units. If IKEA updates their design, I check to make sure the bolts still match.
Putting on wheels is a quick upgrade that makes a big difference. Now it’s much easier to clean under and around my storage. I found more great ideas on adding casters to Besta from other IKEA fans.
Combine with wooden crates for rustic charm

I love adding a touch of rustic charm to my home. Pairing my IKEA Besta unit with wooden crates helps me get that cozy look without much effort.
I like to stack simple crates on top or beside the Besta. They create extra storage for things like blankets, books, or shoes.
Painting or staining the crates to match my style is easy. For a unique look, I sometimes mix in crates of different sizes and wood tones.
If I want an even cleaner finish, I add small handles to the crates. It makes pulling them out much easier, especially for kids.
This style mix feels both modern and warm. For more ideas, check out how others have upgraded their storage by combining these looks with Besta units at CabinetNow’s guide to turning IKEA storage rustic chic.
Mount a countertop on top for a workspace station

I love using IKEA Besta cabinets as a base for a custom workspace. By adding a countertop, I can turn the storage unit into a functional desk or craft area. It’s a smart way to get extra workspace right where I need it.
Attaching the countertop is pretty simple. I make sure the Besta units are level and secure before placing the countertop on top. For heavy countertops, I use brackets or build a support frame to keep everything stable, just like people have done in this Besta and kitchen countertop project.
This setup works well in my home office or even in the dining room. I get storage for all my supplies and a big surface to spread out and work.
Install mirrored doors for depth and light

I love adding mirrored doors to my IKEA Besta units. Mirrors make a room feel bigger and instantly add more light. They’re a simple way to brighten up spaces that feel dark or cramped.
When I installed mirrored doors, it created a modern look that felt both stylish and practical. I noticed reflections boosted the amount of natural light in the room. Plus, mirrored surfaces are easy to wipe clean.
You can find mirrored doors made for IKEA pieces, or you can attach a mirror yourself. I followed an easy video tutorial when I did mine. For a little more help, there’s a step-by-step guide for safely attaching mirrors to Besta doors.
Paint the back panel a contrasting tone inside

One of my favorite ways to upgrade a Besta cabinet is by painting the inside back panel a bold, contrasting color. This simple change brings depth and excitement—especially when you open the doors or use it as open storage.
I like to use a paint color that stands out from the outside finish. Sometimes I choose deep blue, forest green, or even a bright pastel for a fun surprise.
Before painting, I remove the panel for a smooth, even finish. Adding primer first helps the color stick and stay vibrant.
Once everything is dry, putting the unit back together is quick. Every time I see that pop of color inside, it makes the cabinet feel a lot more custom. For more inspiration, you can check out these IKEA Besta makeover ideas.
Add dividers for customized drawer organization

I love keeping my drawers neat, and adding dividers to my IKEA Besta units is one of my favorite hacks. Dividers help me separate items like remote controls, chargers, and small gadgets so nothing gets lost or messy.
Sometimes, I use adjustable dividers so I can change the layout when my needs change. There are lots of budget-friendly options online and at IKEA stores.
When I want to get creative, I mix different shapes and colors for each drawer. Even simple pieces of cardboard or plastic trays work well. For more inspiration and ideas, I like browsing Ikea drawer divider tips and hacks on Pinterest.
This small change makes a huge difference in my daily routine. It’s amazing how something simple can make my storage feel more personal and organized.
Create a pet feeding station with built-in bowls

I love how easy it is to turn a basic IKEA BESTA shelf into a pet feeding station. All I needed was a jigsaw and a couple of food bowls that fit the openings. After tracing the bowls, I carefully cut out the spaces and dropped the bowls in.
It looks stylish and keeps pet food tidy in my kitchen. The surface is easy to wipe clean, making life simpler when my dog is messy. I added some peel-and-stick contact paper for a custom look.
If you want extra tips, I found a helpful step-by-step guide for this project on House Digest. This is a fun weekend DIY that your pets will thank you for!
Hang plants or decor from the top edge

I like to add a personal touch by hanging small plants or decorative items from the top edge of my IKEA Besta unit. It instantly makes the space feel lively and brings some color to the room.
I use lightweight planters, simple hooks, or string to hang them up. Sometimes I use a trailing pothos or a string of fairy lights for a cozy touch.
It’s easy to switch out the decor for different seasons. I’ve tried small art pieces and even cute ornaments during the holidays. This hack doesn’t take much time, but it always makes my Besta unit stand out.
If you’re looking for inspiration and more ideas, you can find creative Besta makeovers in collections like the 21 Gorgeous IKEA Besta Hacks.
Attach a pegboard on one side for tools or accessories

One way I like to upgrade my IKEA Besta is by attaching a pegboard to one side. It gives me extra space to hang tools, scissors, or craft supplies without cluttering the top or inside drawers.
I use a pegboard like the IKEA SKÅDIS because it’s lightweight and easy to hang. This also lets me change the layout as my needs change. If you’re renting, you can use command strips instead of drilling for a no-damage setup.
With hooks and small shelves, I can keep everything handy. It’s perfect for art, sewing, or even office supplies. You can find even more ideas for customizing with pegboards to make your Besta as functional as you need.
Choosing the Right Materials for IKEA Besta Hacks
When I start a Besta hack, I look at how the right materials make a difference. The quality of the finish and the hardware can turn a basic unit into a stunning piece.
Paints, Finishes, and Adhesives
Picking paint is one of my favorite steps. For that polished look, I choose a high-quality primer and furniture paint. Spray paints work well for smooth, even coverage, while chalk paint makes distressing easier. If I want a bold color block, I tape off sections and use contrasting shades—this style is shown in many creative color block Besta projects.
Finishes matter, too. I seal painted surfaces with a clear, non-yellowing topcoat for protection and easy cleaning. For a more natural style, I sometimes use wood veneer or contact paper in patterns like marble or oak.
When I attach new materials—like overlays or trim—I use strong adhesives. Double-sided foam tape or wood glue offers a lasting grip without damage. I avoid super glue since it can leave marks or make removal hard.
Selecting Hardware and Accessories
The right hardware instantly makes a Besta hack feel custom. I often swap out the standard IKEA handles for metal, wood, or leather pulls. These change the mood of the piece, adding either a modern or classic touch.
Legs and feet are easy upgrades. Mid-century tapered legs raise the unit off the ground and make the whole look more like real furniture. Hairpin or gold-finished legs create a trendy vibe. Adding these details is as easy as screwing them into the base.
For extra function, I put in organizers, cable outlets, or soft-close hinges. Door fronts, knobs, and other accessories can be found at hardware stores or online, so it’s simple to match any style. If I’m doing a bigger change, like replacing panels, I make sure to measure twice so everything lines up perfectly.
Here’s a quick table of my top accessory choices:
| Accessory | Effect |
|---|---|
| Brass Handles | Elegant, shiny |
| Leather Pulls | Warm, casual |
| Tapered Legs | Mid-century |
| Metal Feet | Modern vibe |
| Cable Holes | Tidy, practical |
A few small changes go a long way to making an IKEA Besta unit feel unique and personal.
Maintaining Your Customized Besta Units
I’ve learned that keeping my IKEA Besta hacks looking sharp isn’t hard, but it does require regular attention. With the right care and a little effort, I make sure my setups stay stylish and functional for years.
Cleaning and Care Tips
I always dust my Besta furniture weekly using a soft microfiber cloth to prevent scratches. For sticky spots or fingerprints, I use a mixture of warm water and mild dish soap. It’s important for me not to soak the surfaces since too much moisture can damage the boards.
Here’s how I handle different finishes:
- Painted fronts: I avoid harsh scrubbing and use gentle circular motions.
- Laminate or glass doors: I stick to glass cleaner or diluted vinegar for a streak-free shine.
I also add felt pads to doors and drawers to reduce wear from opening and closing. If I use baskets or organizers inside, I pull them out now and then to wipe down the shelves underneath.
Repair and Refresh Strategies
When I spot small chips or scratches, I quickly fix them with furniture touch-up markers that match my unit’s color. For deeper damage, I use wood filler and then repaint or cover with matching contact paper.
If the hinges or doors get loose, I tighten the screws with a simple screwdriver. Sometimes, I switch out handles or legs for a fresh look without buying a whole new unit.
For units in sunlight, I rotate items decorating the surface so fading doesn’t happen in just one spot. If any parts do get damaged, I can usually find new doors, shelves, or inserts at IKEA, which makes long-term updating easy.
Frequently Asked Questions
I love how flexible the IKEA BESTÅ line can be—from colorful doors to custom legs, it’s easy to get creative. With the right details, these cabinets can look high-end and unique in any room.
How can I give my BESTÅ unit a unique high-end look?
I get the best look by adding custom doors, designer handles, or stylish legs. Using bold spray paint for a color block effect or installing glass doors creates a standout feature. Adding trim, like molding or overlays, can make my BESTÅ look like a built-in, not flat-pack furniture. Find more inspiration with these makeover ideas.
What are some creative uses for BESTÅ in the kitchen space?
I use BESTÅ units as extra pantry shelves, a coffee bar setup, or for hidden recycling bins. With integrated hidden storage, it’s easy to keep the kitchen organized and clutter-free. Adding a marble or butcher block top can tie the cabinets into the kitchen style.
What are the best materials to use for a BESTÅ top panel transformation?
Wood (like ash or oak), quartz, and marble-look laminate all work well for topping a BESTÅ. I often choose wood for warmth or a stone-look panel for a luxury vibe. The trick is to use materials that are both durable and easy to clean.
In what ways can I customize the doors of my BESTÅ to make it standout?
I like to spray paint the doors in bold or neutral colors. Swapping in glass doors or adding trim pieces helps create a chic display cabinet. Using stylish hardware like agate pulls or brass knobs makes a big difference, as shown in these designer hacks.
Any tips for adding depth to my IKEA BESTÅ setup?
Combining two or more units with cabinet screws to create a media wall adds instant depth. Layering with décor or books, or mixing open and closed storage, keeps my setup looking interesting. Adding floating shelves above or around my BESTÅ works, too.
What are the perfect accessories to top off my BESTÅ unit for that touch of elegance?
Decorative vases, table lamps, and framed art are my go-to pieces. Plants add life, while a stylish tray or a few coffee table books complete the look. Metallic accents or marble trays add that extra touch of elegance I love.

